
>>

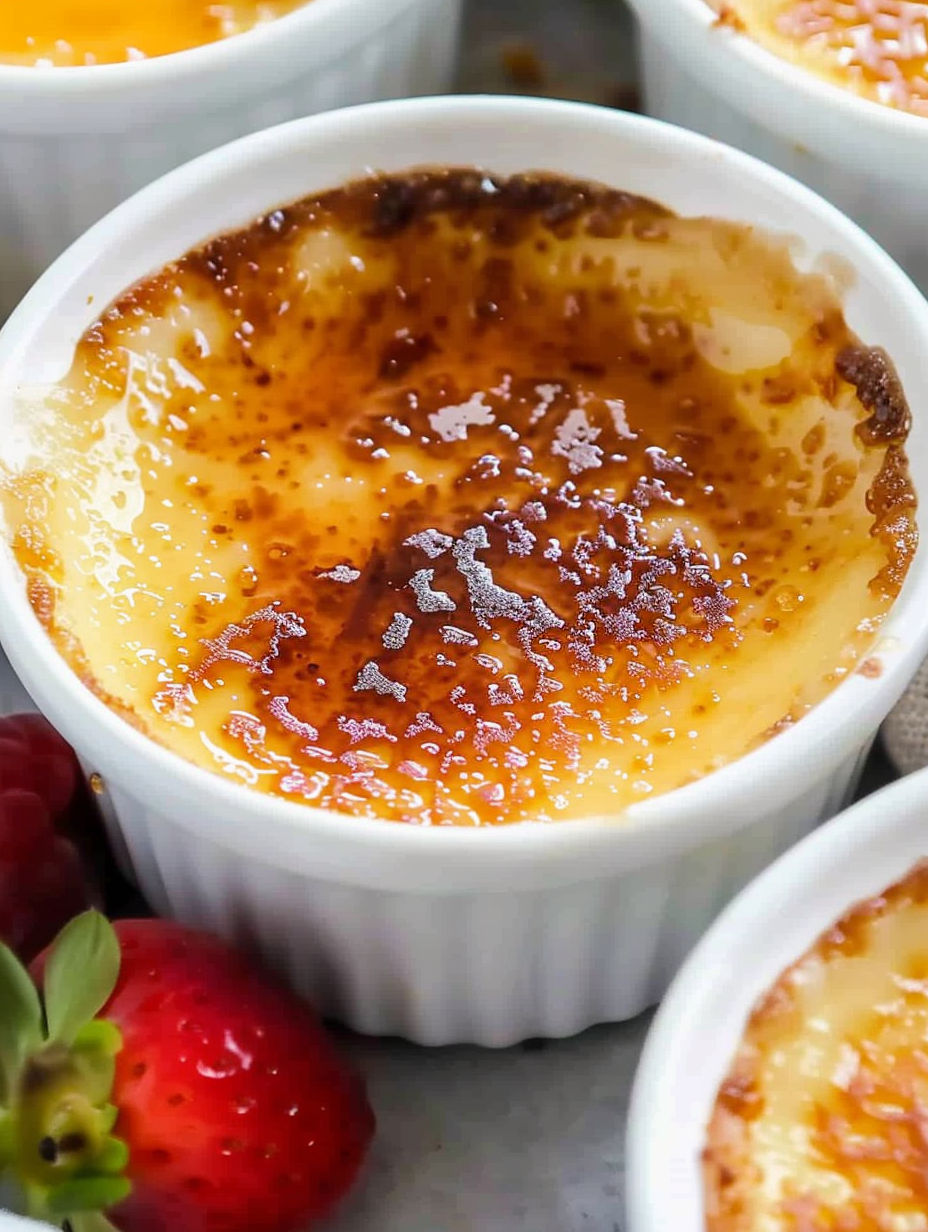
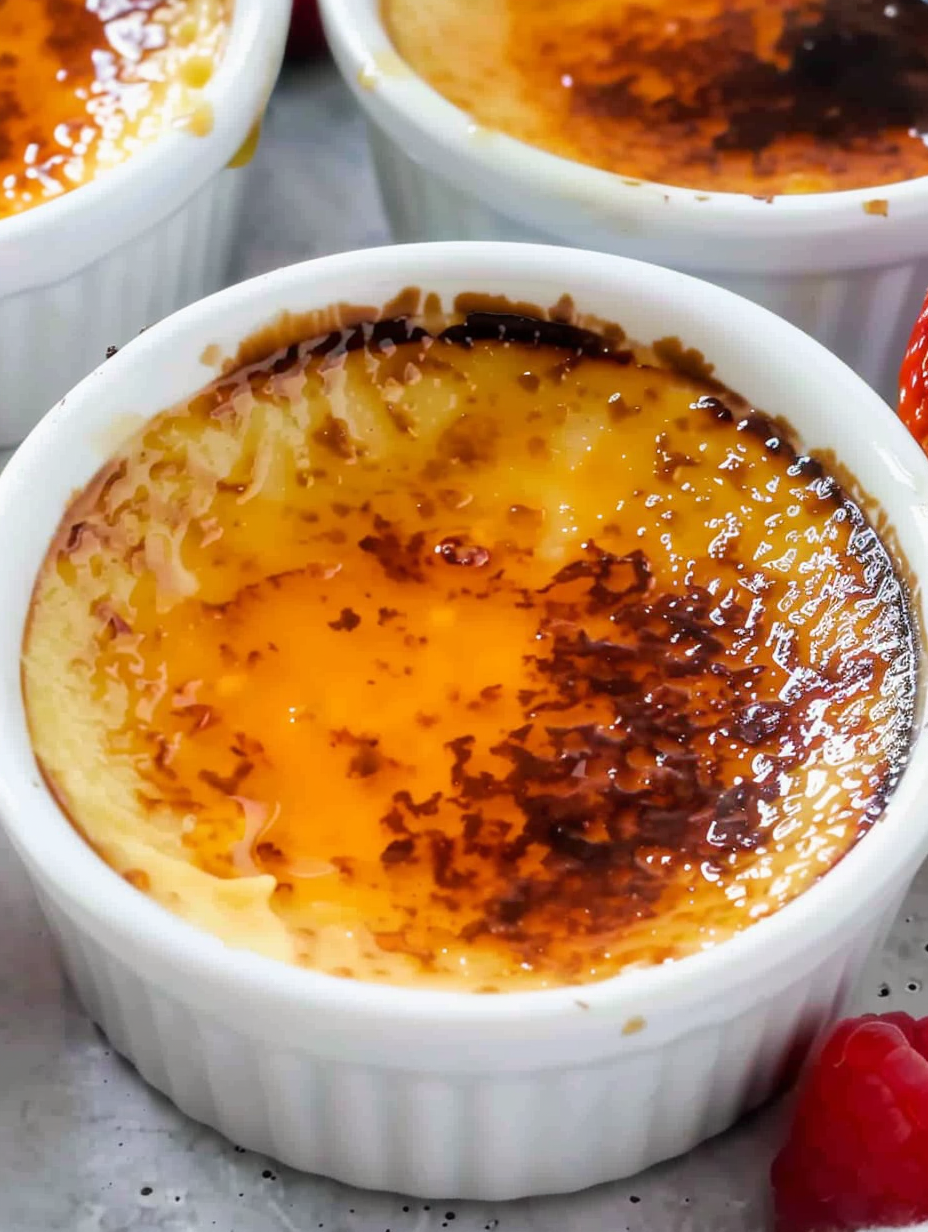
A silky white chocolate custard with a crisp caramelized sugar crust. Elegant, creamy, and perfect with tart berries for contrast.

This white chocolate crème brûlée is my favorite way to elevate a familiar classic. I first made this version on a quiet winter evening when I wanted to treat my family to something decadent but approachable. The addition of high quality white chocolate transforms the custard into something silkier and a touch sweeter, creating a luxurious mouthfeel that contrasts beautifully with a thin, crackly caramelized sugar top. It quickly became a special occasion staple and a dessert guests request whenever company is coming.
I discovered that the secret to success is gentle heat, patient chilling, and careful attention to the final torching step. The custard must be cooked until it holds but still has a slight jiggle at the center. Cooling completes the texture and chilling overnight improves the depth of flavor. Serving chilled with bright berries cuts the sweetness and adds a fresh note that keeps the dessert balanced. Every time I tap the sugar crust and hear the satisfying crack, I remember why this is worth the effort.
In my experience guests always comment on the texture and the contrast between the cold custard and hot crackled sugar. Family members tend to reach for seconds and I often find that the tartness of raspberries or blackberries is the perfect foil to the creamy white chocolate. Making it has taught me the value of patience at the chilling stage and the joy of a perfectly torched top.
My favorite part of this recipe is the contrast between the cold, creamy custard and the hot crisp sugar shell. Family gatherings often end with the theatrical torching and the sound of the sugar cracking, which always draws smiles. I have learned to time the chilling so the dessert can be finished quickly just before guests arrive, making it feel both special and manageable.
Store the custards covered with plastic wrap in the refrigerator for up to 3 days before caramelizing. Do not caramelize and then refrigerate as the sugar crust will soften. For travel place the ramekins into a flat container to keep them steady and refrigerate until 30 minutes before serving. To reheat a chilled custard without melting the shell, allow it to sit at room temperature for 30 minutes and then torch the sugar just before serving so the custard stays cool inside while the top is warm and crisp.
For a different flavor profile swap half the white chocolate for milk chocolate to add cocoa balance. If you prefer less sweetness reduce the white chocolate to 6 ounces and increase the cream to 2 1/4 cups while adding 1 teaspoon lemon zest for brightness. For vanilla lovers use 1 vanilla bean split and scraped into the cream while heating. Note that lower fat milks will affect the set and mouthfeel, so stick with heavy cream for reliable results.
Serve with a scattering of fresh raspberries or blackberries to cut the sweetness and add acidity. A small sprig of mint makes a pretty garnish and a spoonful of citrus compote adds complexity. Present the ramekins on a chilled plate so the custard stays cold while the sugar remains warm. For a dinner party consider plating with a small cookie or tuile for textural contrast.
Crème brûlée traces its roots to French and English custard traditions, with modern versions celebrated in both cuisines. The technique of torching sugar to create a crisp top was refined in French kitchens and the dessert became synonymous with elegant dining. Adding white chocolate is a contemporary twist that highlights the custards adaptability. It celebrates the classic formula while introducing a modern flavor that complements seasonal fruit pairings.
In summer pair the custard with fresh stone fruit or mixed berries. In winter add a cinnamon or orange infusion for warmth. For holidays consider topping with a thin layer of spiced sugar by mixing a dash of cinnamon or a touch of cardamom into the topping sugar before torching. These small changes make the dessert feel seasonal while preserving the essential texture and technique.
Make the custards one day ahead and refrigerate covered. Caramelize the sugar shortly before serving for the best contrast. If preparing for a large party bake in batches and keep finished ramekins chilled. Use an insulated cooler with ice packs to transport the ramekins if serving off site and caramelize upon arrival. Label each ramekin with baking time or warm spots if you made more than one batch so you can monitor doneness more easily.
Crème brûlée is a celebration of simple chemistry and careful timing. The gentle heating and elegant torching reward patience with a truly memorable dessert. I encourage you to try the white chocolate version the next time you want something both classic and a little special.
Author Catalina Castravet
Bring egg yolks to room temperature so they blend smoothly into the warm cream and avoid cooking.
Strain the custard before pouring to remove any cooked bits for an extra silky texture.
Use a light, even layer of fine sugar for the topping to form a thin crisp shell rather than a thick hard layer.
Let ramekins chill at least 2 hours and ideally overnight to finish the set and deepen flavor.
Choose a high quality white chocolate made with cocoa butter for the best flavor and melt characteristics.
This nourishing white chocolate crème brûlée recipe is sure to be a staple in your kitchen. Enjoy every moist, high protein slice — it is perfect for breakfast or as a wholesome snack any time.
If the center ripples widely then it needs more time. If it does not move and shows cracks it is overbaked. The ideal set is flat with a slight jiggle only in the center.
Yes, use a broiler if you do not have a torch. Place the ramekins on the top rack and watch carefully, rotating to prevent burning.
This White Chocolate Crème Brûlée recipe makes perfectly juicy, tender, and flavorful steak every time! Serve with potatoes and a side salad for an unforgettable dinner in under 30 minutes.
Preheat oven to 325 degrees Fahrenheit and place six 7 to 8 ounce ramekins into a large roasting pan so you can pour the custard and add a water bath easily.
In a large bowl whisk 6 egg yolks with 1 2/3 tablespoons granulated sugar and 1 1/4 teaspoons salt until well mixed and slightly paler, scraping the sides and bottom to ensure even mixing.
Heat 2 cups heavy cream over medium heat until hot and just simmering, remove from heat and pour over 8 ounces chopped white chocolate. Let sit one minute then stir until smooth and add 1 teaspoon vanilla extract.
With mixer on low speed slowly add a small amount of the warm chocolate cream into the yolks while mixing continuously, then continue to add the rest slowly to avoid cooking the eggs.
Strain the custard through a fine mesh sieve into a pouring vessel and divide evenly among the ramekins, leaving a small margin at the top to prevent spills.
Pour hot water into the roasting pan until it reaches halfway up the sides of the ramekins and bake for 45 to 50 minutes until the edges are set and the center has a slight jiggle.
Remove from oven and allow to cool in the pan to room temperature. Cover each ramekin and refrigerate for at least 2 hours and up to 3 days to finish setting.
Remove custards from the fridge 30 minutes before torching. Sprinkle about 1 tablespoon fine sugar on each and use a kitchen torch to melt and brown the sugar into a crisp shell. Alternatively broil carefully under a high broiler.
Allow the caramelized sugar to harden for 10 minutes before serving to achieve the crisp crack and serve with tart berries if desired.
Last Step: Please leave a rating and comment letting us know how you liked this recipe! This helps our business to thrive and continue providing free, high-quality recipes for you.
Leave a comment & rating below or tag
@yummique on social media!

Tender grilled zucchini wraps basil ricotta, bathed in marinara and mozzarella, baking into a bubbly, lighter Italian comfort dinner ready in 30 minutes.

Crisp-edged, tender-in-the-middle zucchini and yellow squash made in 15 minutes with pantry spices. A vibrant, veggie-forward side everyone devours.

Tender chicken meatballs simmered in rich marinara and blanketed with melty mozzarella, bringing all the flavors of chicken parm in cozy, bite-sized form.
Leave a comment & rating below or tag @yummique on social media!
Enjoyed this recipe? Share it with friends and family, and don't forget to leave a review!
This recipe looks amazing! Can't wait to try it.
Comments are stored locally in your browser. Server comments are displayed alongside your local comments.

Join to receive our email series which contains a round-up of some of our quick and easy family favorite recipes.
