
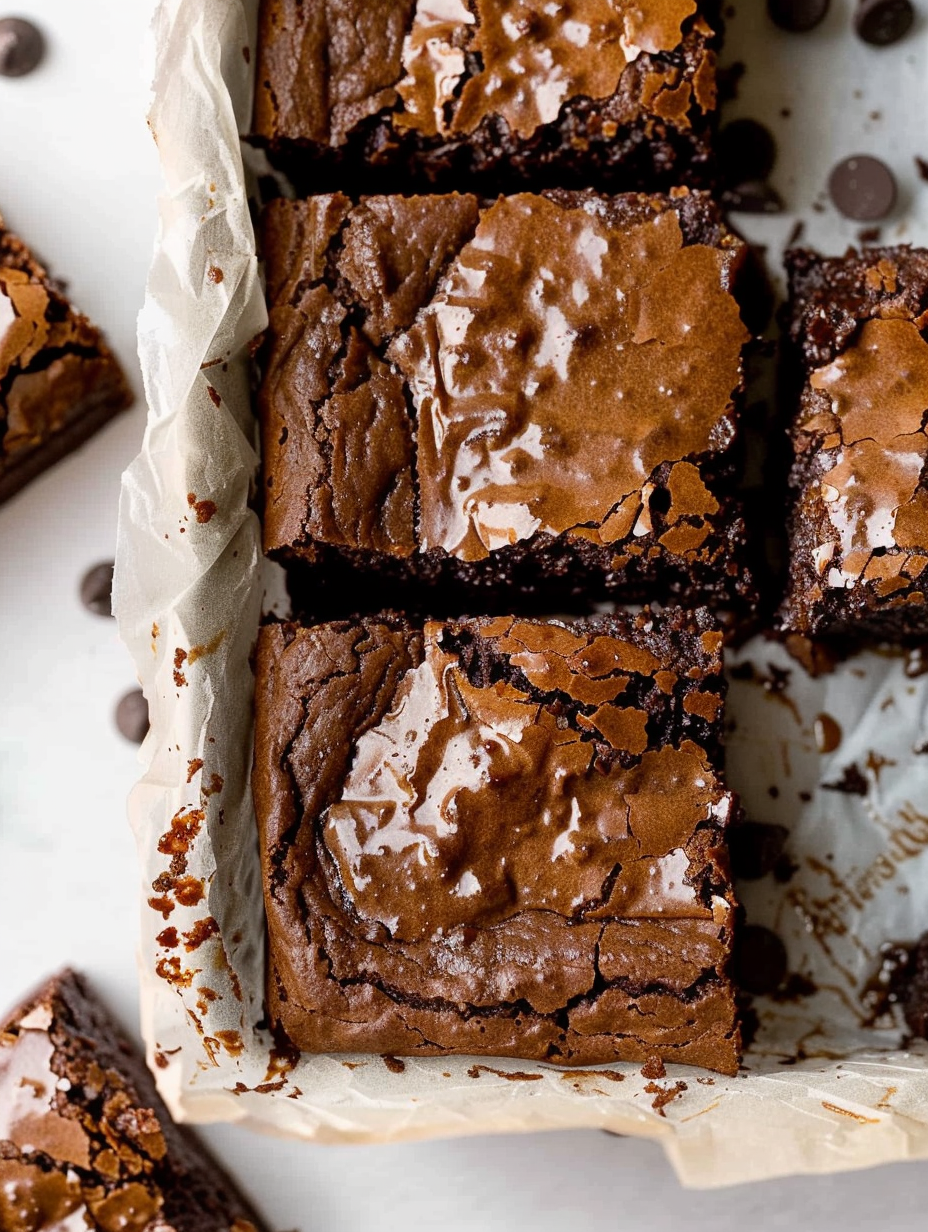
The Best Cocoa Fudge Brownies

Skip the boxed mix and make thick, chewy, fudge-packed brownies with a glossy cracked top — simple technique, pantry ingredients, and reliably irresistible.
Why You'll Love This Recipe
- Made from simple pantry items: all-purpose flour, cocoa, butter, sugar, eggs, and chocolate chips — no boxed mix required and no obscure ingredients.
- Fast active time: about 10 minutes to prepare and roughly 28 minutes to bake, with an optional 2-hour rest for best slicing results.
- Fudge-forward texture: warm butter combined gradually into eggs gives a glossy, dense crumb rather than a cake-like structure.
- Scalable and forgiving: the technique translates to larger pans or half-batches; adjust bake time to hit your preferred gooeyness.
- Make-ahead friendly: these keep well and freeze beautifully, which makes them perfect for parties, packed lunches, or last-minute desserts.
- Customizable: add espresso powder for depth, swap chips for chunks, or finish with flaky salt for contrast.
I remember bringing a pan of these to a neighborhood potluck and watching them disappear within minutes; someone asked if I used a mix and was surprised when I said no. My family prefers them slightly warm so the centers stay soft, while friends who like structure bake a little longer. Both camps are happy — that versatility is what keeps this recipe in my regular rotation.
Ingredients
- All-purpose flour (1 cup): Use a standard bleached or unbleached all-purpose flour measured by spooning into the cup and leveling. This provides the light framework; too much flour or overmixing will produce cakey results.
- Baking powder (1/2 teaspoon): A small lift agent ensures the edges set without the interior becoming cake-like. Fresh baking powder gives a predictable rise.
- Salt (1/2 teaspoon): Balances sweetness and enhances chocolate flavor. If using salted butter, reduce added salt slightly.
- Unsweetened cocoa powder (1/2 cup): Dutch-process or natural cocoa both work; Dutch gives a deeper color and rounder flavor, while natural has brighter acidity. Sift to avoid lumps.
- Espresso powder (1 teaspoon, optional): Concentrates chocolate flavor without tasting like coffee. Omit if you dislike coffee notes.
- Unsalted butter (3/4 cup): Melted and warmed; butter gives richness and contributes to the glossy top when added slowly to eggs.
- Neutral oil (2 tablespoons): Canola, vegetable, or melted coconut oil keeps brownies tender and helps with fudginess.
- Granulated sugar (1 and 1/3 cups, divided): Part warmed with butter to dissolve slightly, part whisked with eggs for structure and shine. Using pure cane sugar yields the classic brownie texture.
- Large eggs (2) + 1 large egg yolk: Eggs provide binding, moisture, and contribute to the glossy top when combined correctly.
- Vanilla extract (2 teaspoons, optional): Small flavor enhancer that brightens chocolate notes.
- Chocolate chips (3/4 cup): Semi-sweet or bittersweet chips add pockets of melty chocolate; you can also chop a chocolate bar into chunks for variation.
Instructions
Preheat and prepare the pan: Preheat the oven to 350°F (175°C). Line a 9x9-inch pan with parchment paper, allowing a bit of overhang for easy removal, and lightly spray the parchment with nonstick spray. Proper pan preparation ensures clean edges and easier slicing after cooling. Combine dry ingredients: In a large bowl sift together 1 cup all-purpose flour, 1/2 teaspoon baking powder, 1/2 teaspoon salt, 1/2 cup unsweetened cocoa powder, and 1 teaspoon espresso powder if using. Sifting removes lumps and helps incorporate air without overworking later. Melt butter and oil with part of the sugar: In a medium saucepan over medium heat, combine 3/4 cup (1.5 sticks) unsalted butter, 2 tablespoons oil, and 1/3 cup of the granulated sugar. Stir frequently until the butter has fully melted and the sugar begins to dissolve slightly; remove from heat and let cool for a minute so the mixture is warm, not piping hot. Whisk eggs and remaining sugar: In a large mixing bowl whisk together 2 large eggs, 1 large egg yolk, 2 teaspoons vanilla (if using), and the remaining 1 cup of sugar for about 30 seconds until homogeneous. You’re not trying to aerate heavily — just combine. Temper the eggs: Very slowly pour the warm butter mixture into the egg mixture, a little at a time, whisking constantly. This gradual addition prevents the eggs from scrambling and encourages a shiny, fudgy crumb. Continue until fully incorporated and smooth. Fold in dry ingredients and chips: Add the dry mix and 3/4 cup chocolate chips to the wet ingredients. Using a rubber spatula, stir gently until just combined — stop when you see the last streaks of flour. Overmixing is the number one cause of cakey texture. Transfer and bake: Scrape the batter into the prepared pan and smooth the top evenly. Bake at 350°F for 28 to 30 minutes. For very gooey centers check around 27 minutes; for slightly more structured squares allow up to 32 minutes. Look for a shiny, slightly cracked top and set edges. Cool completely before slicing: Place the pan on a cooling rack and allow to cool fully — ideally 1 to 2 hours — before lifting from the pan and slicing. Cooling lets the crumb set so slices hold clean edges.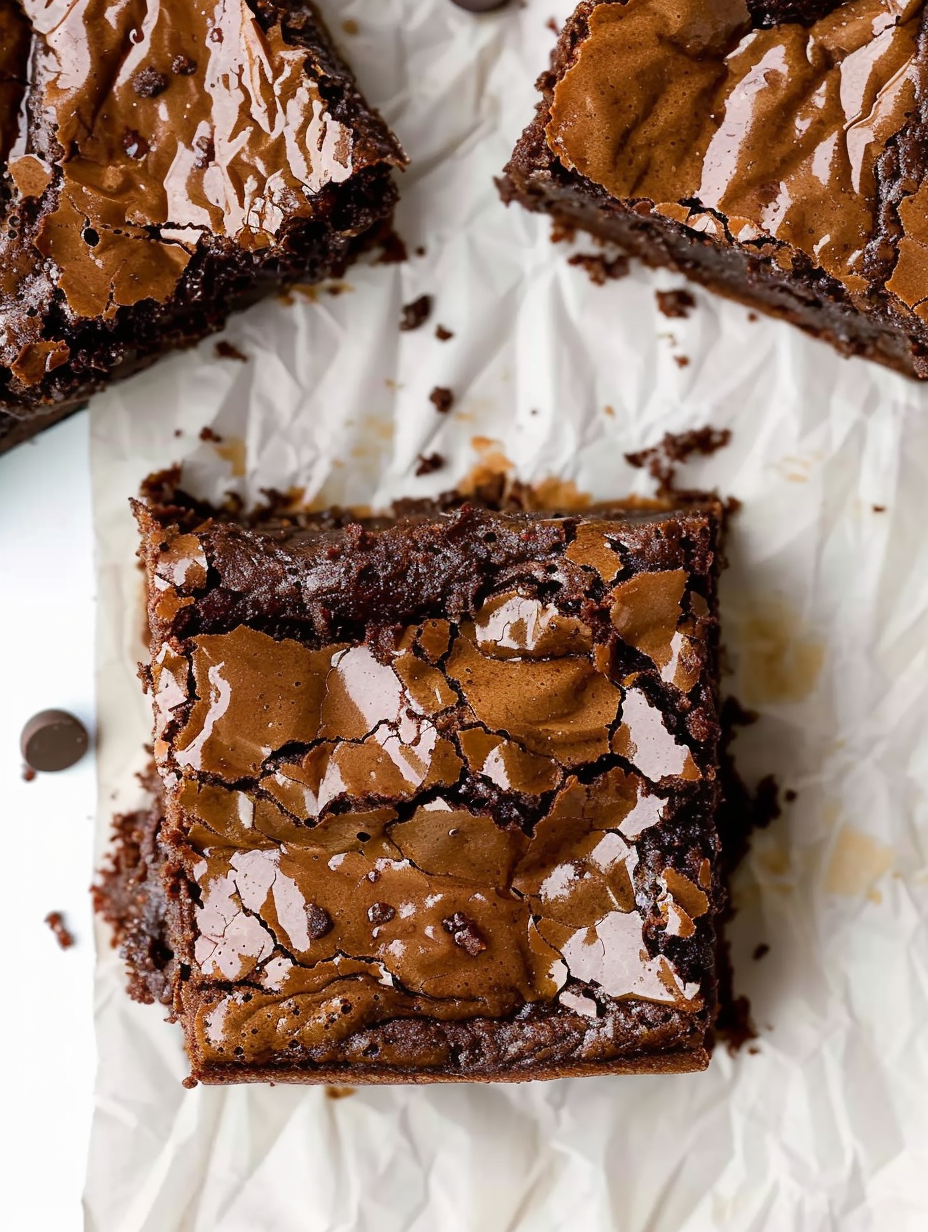
You Must Know
- These keep well at room temperature for 2 days in an airtight container and up to 5 days refrigerated; for longer storage freeze individual squares for up to 3 months.
- High in fat and sugar — a small square is satisfying. A 9x9 pan cut into 9 squares yields indulgent portions; cut smaller for lighter servings.
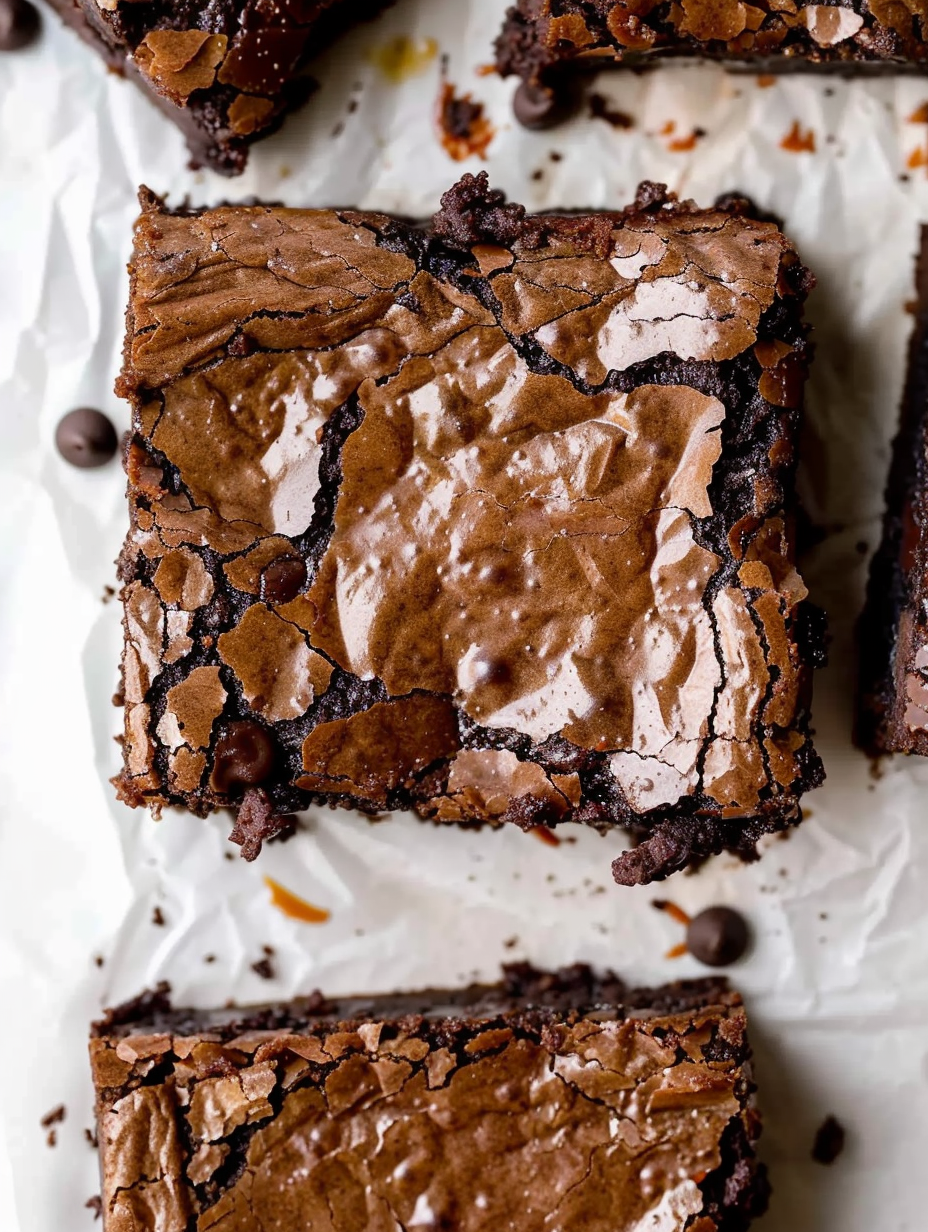
- To achieve the classic glossy top, be careful adding hot butter too quickly to eggs; tempering is essential.
- Brownies with a fudgy interior rely on minimal flour and minimal mixing; stop when the last trace of dry ingredients disappears.
My favorite part is the shiny top that cracks just enough to reveal fudgy pockets underneath. Over the years, neighbors and friends have told me this version is the best homemade brownie they’ve eaten, and they’re often surprised it’s made from scratch. That surprise and the shared laughter as people reach for seconds is what makes baking these so rewarding.
Storage Tips
Store cooled squares in an airtight container layered with parchment to prevent sticking. Leave at room temperature for up to two days; for longer life refrigerate up to five days. To freeze, wrap individual squares tightly in plastic wrap and place in a freezer-safe bag for up to three months. Thaw overnight in the refrigerator or at room temperature for a couple hours. Reheat gently in a low oven (300°F) for a few minutes or microwave briefly to revive the just-baked warmth without drying them out.
Ingredient Substitutions
If you prefer a dairy-free version, substitute vegan butter and use dairy-free chocolate chips — note the texture will be slightly different but still very satisfying. For gluten-free, swap in a 1-to-1 gluten-free flour blend and check binding: you may need an extra yolk for structure. Swap some sugar for brown sugar (up to half) for a moister, caramel-tinged crumb. If you love deeper chocolate notes, use bittersweet chocolate chips and a tablespoon less granulated sugar.
Serving Suggestions
Serve warm with a scoop of vanilla or salted caramel ice cream and a sprinkle of flaky sea salt for contrast. For a grown-up touch, pair with espresso or a fortified wine. Garnish with toasted nuts, a dusting of cocoa, or a drizzle of chocolate ganache for celebrations. These are excellent alongside whipped cream and berries when you want a slightly lighter accompaniment.
Cultural Background
Brownies are a classic American treat with roots traced back to late 19th-century cookery, born from improvisation when bakers sought a dessert smaller than a cake. Over time, regional variations emerged — nut-studded midwestern styles, ultra-fudge recipes popular in urban bakeries, and thin crackly-top versions favored in many home kitchens. This rendition leans into the dense, fudge-forward tradition that became popular in the 20th century when chocolate became more accessible and home baking culture flourished.
Seasonal Adaptations
For autumn, stir in a teaspoon of cinnamon and a pinch of nutmeg, or top with browned butter and chopped pecans. In winter, fold in orange zest for brightness or add peppermint extract and crushed candy for holiday flair. In spring and summer, lighten presentation with fresh berries and a dusting of powdered sugar. Adjust bake time slightly if you add many wet inclusions like fruit to avoid extra moisture in the batter.
Meal Prep Tips
To plan ahead, bake a double batch and freeze cut squares individually wrapped. Pack chilled squares in lunchboxes with an ice pack, or slice and plate for dessert trays when entertaining. If you prefer to serve warm, reheat individual squares briefly in the microwave or oven just before serving. Use parchment overhang to lift the pan out cleanly for quick slicing and minimal mess when plating multiple portions.
These brownies are the kind of dessert that becomes part of your household ritual — the pan that disappears quickly at gatherings and the recipe you instinctively reach for when you want to make someone’s day. Try them once and you’ll understand why they’ve become a favorite in my kitchen.
Pro Tips
Temper the warm butter into the eggs slowly to prevent scrambling and achieve a glossy top.
Stop mixing as soon as the last streak of dry ingredients disappears to avoid a cakey texture.
For extra fudgy centers, remove from the oven around 27 minutes; for more structure, bake 30 to 32 minutes.
Use parchment paper with an overhang to remove the pan easily and slice clean squares.
This nourishing the best cocoa fudge brownies recipe is sure to be a staple in your kitchen. Enjoy every moist, high protein slice — it is perfect for breakfast or as a wholesome snack any time.
Tags
The Best Cocoa Fudge Brownies
This The Best Cocoa Fudge Brownies recipe makes perfectly juicy, tender, and flavorful steak every time! Serve with potatoes and a side salad for an unforgettable dinner in under 30 minutes.
Instructions
Preheat and prepare pan
Preheat oven to 350°F (175°C). Line a 9x9-inch pan with parchment and lightly spray; set aside.
Sift dry ingredients
Sift together flour, baking powder, salt, cocoa powder, and espresso powder into a large bowl; set aside.
Melt butter and combine with sugar
In a saucepan over medium heat combine melted butter, oil, and 1/3 cup sugar. Heat until butter is melted and sugar begins to dissolve then remove from heat and cool slightly.
Whisk eggs and remaining sugar
In a large bowl whisk 2 eggs, 1 egg yolk, vanilla (if using), and remaining 1 cup sugar until combined, about 30 seconds.
Temper eggs with warm butter mixture
Slowly pour the warm butter mixture into the egg mixture in a thin stream while whisking constantly to prevent cooking the eggs. Continue until fully incorporated.
Fold dry ingredients and chips
Add the dry mix and chocolate chips, folding gently with a rubber spatula until just combined. Do not overmix; stop when the last streaks of dry ingredients disappear.
Bake and cool
Scrape batter into prepared pan, smooth the top, and bake 28 to 30 minutes or until edges are set and top is shiny and slightly cracked. Cool completely on a rack before slicing.
Last Step: Please leave a rating and comment letting us know how you liked this recipe! This helps our business to thrive and continue providing free, high-quality recipes for you.
Nutrition
Did You Make This?
Leave a comment & rating below or tag
@yummique on social media!
Categories:
You might also like...

Cheesy Zucchini Rollatini Bake
Tender grilled zucchini wraps basil ricotta, bathed in marinara and mozzarella, baking into a bubbly, lighter Italian comfort dinner ready in 30 minutes.

Air Fryer Zucchini and Squash
Crisp-edged, tender-in-the-middle zucchini and yellow squash made in 15 minutes with pantry spices. A vibrant, veggie-forward side everyone devours.

Chicken Meatball Parmesan
Tender chicken meatballs simmered in rich marinara and blanketed with melty mozzarella, bringing all the flavors of chicken parm in cozy, bite-sized form.
Did You Make This?
Leave a comment & rating below or tag @yummique on social media!
Rate This Recipe
Share This Recipe
Enjoyed this recipe? Share it with friends and family, and don't forget to leave a review!
Comments (1)
This recipe looks amazing! Can't wait to try it.
Comments are stored locally in your browser. Server comments are displayed alongside your local comments.

Hi, I'm Amira!
What's Popular

30-Minute Meals!
Join to receive our email series which contains a round-up of some of our quick and easy family favorite recipes.