
>>

Soft, buttery stuffed cheese bread brushed with garlic butter—mindlessly easy, ready in 15 minutes, and a guaranteed crowd-pleaser.
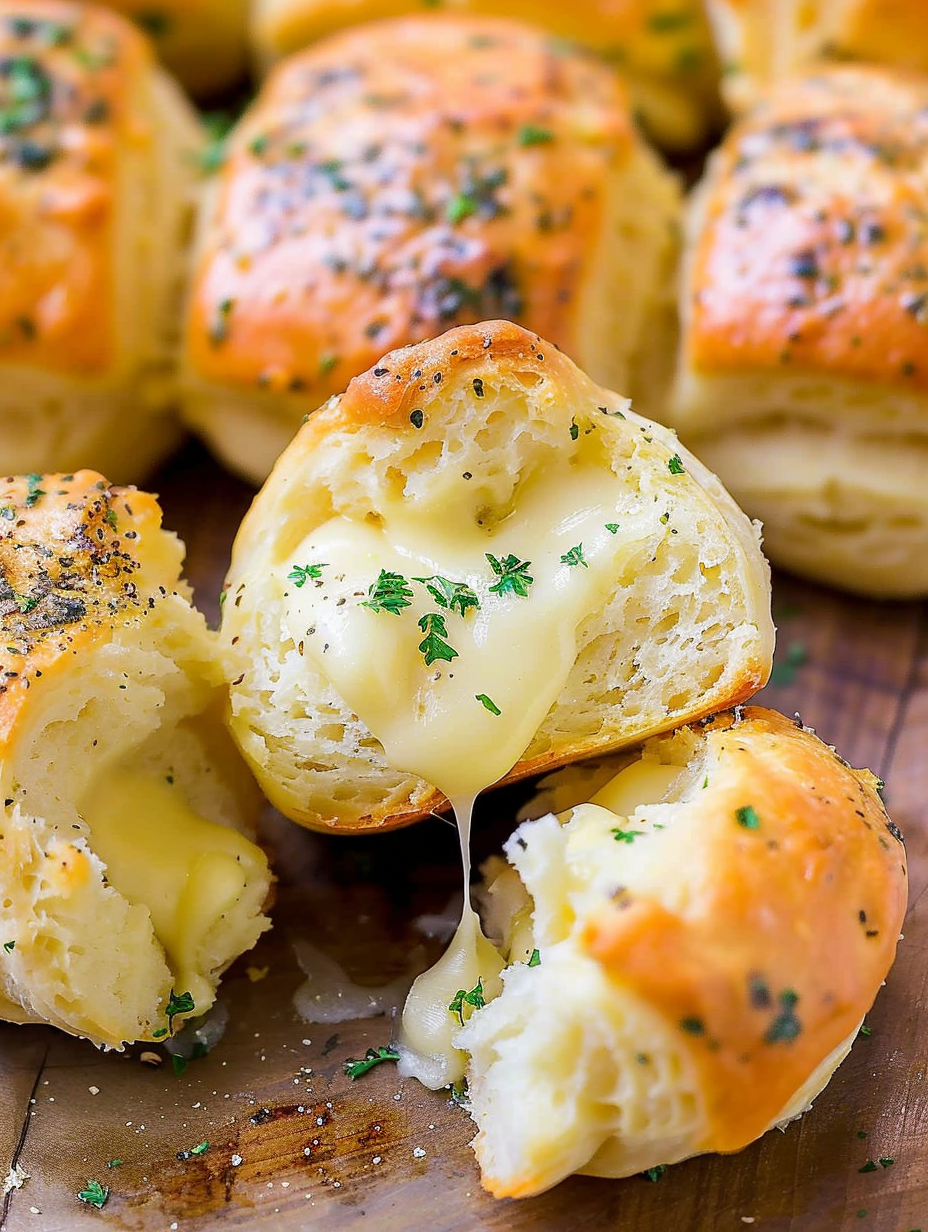
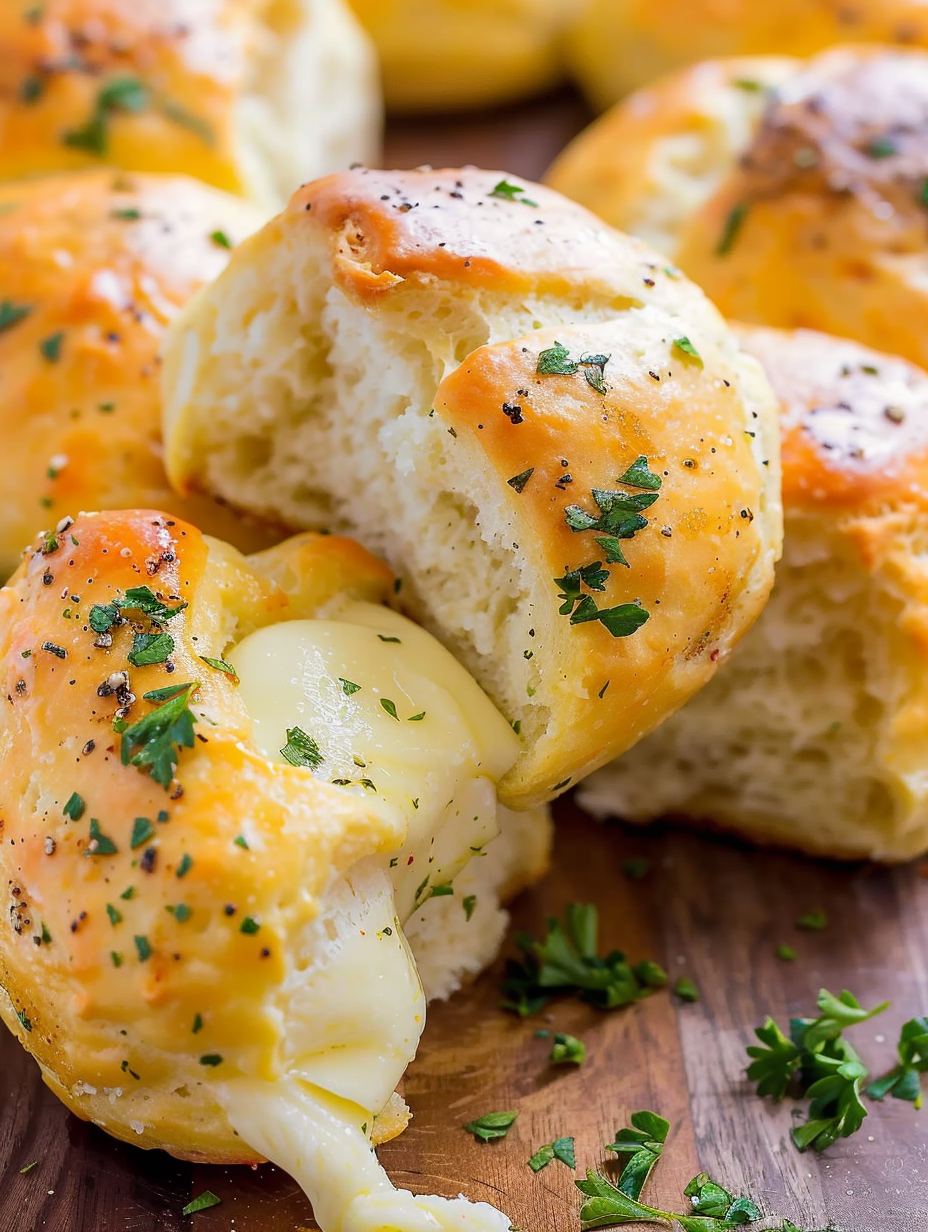
This stuffed cheese bread is my go-to appetizer when I want something that feels indulgent but comes together in a heartbeat. I first stumbled upon this combination during a busy holiday gathering when I needed something quick, and the canned biscuits + melted cheese trick saved the day. The result is a tender, pillowy bite of dough that yields to a molten center of cheese, finished with a glossy brush of garlic-butter that elevates every layer of flavor. It's simple, comforting, and somehow feels more special than the sum of its parts.
I remember nervously handing these out to a table full of skeptical teens and grown-ups; within minutes the tray was empty and everyone wanted the recipe. What makes this version stand out is the attention to small details: the quality of the cheese cubes, the gentle seal so the cheese stays tucked inside, and the quick garlic-butter brush right out of the oven. These touches give a homemade finish to a seriously easy snack—perfect for weeknights, parties, or when you want to impress with minimum effort.
In my kitchen these disappear faster than I can bake them. My kids request them for birthday parties and I often hide extra cubes of sharp cheddar for a bolder flavor. The garlic-butter glaze is the secret that turns a simple snack into something irresistible—salty, buttery, and a touch herbal from Italian seasoning.
My favorite moment is brushing the warm garlic-butter—the aroma instantly makes the house feel cozy and invites everyone to the table. Over the years I've learned to vary the cheese for different occasions: mild mozzarella for kids, sharp cheddar for stronger flavor, or smoked gouda for a more sophisticated bite.
Store leftovers in an airtight container in the refrigerator for up to 3 days. To maintain the best texture, reheat in a 350°F oven on a baking sheet for 6–8 minutes rather than the microwave—this refreshes the exterior while re-melting the interior. For longer storage, assemble but do not brush with garlic-butter; freeze the assembled sealed balls on a parchment-lined tray until solid, then transfer to a labeled freezer bag for up to 3 months. Bake from frozen and brush with butter right after baking.
If you need to alter the recipe, there are easy swaps: use sharp cheddar for a tangier interior (cut slightly smaller cubes as it melts differently), pepper jack for heat, or provolone for a milder, stretchy center. For a dairy-free option, use plant-based cheese that melts well and dairy-free buttery spread for the glaze—note texture and flavor will differ. To make gluten-free versions, buy a gluten-free biscuits brand and check the melting behavior; baking times may vary slightly.
Serve these on a warm platter garnished with extra chopped parsley and a small bowl of marinara or ranch for dipping. They pair beautifully with a crisp green salad or a charcuterie board for variety. For a brunch twist, place alongside scrambled eggs and roasted tomatoes. For parties, place toothpicks in each so guests can grab-and-go.
This recipe is a modern American comfort-food riff that leverages refrigerated dough—a convenience introduced mid-20th century that revolutionized quick home baking. Stuffed bread concepts are universal, echoing calzones, panzerotti, and stuffed rolls in many cuisines. The idea of hiding molten cheese inside dough is timeless; here it's simplified for busy home cooks using pantry staples.
In winter, boost the richness with smoked cheeses and a sprinkle of chopped rosemary. During summer, stir in finely chopped sun-dried tomatoes or basil into the butter for a fresher flavor. For holiday entertaining, add a pinch of red pepper flakes to the butter and swap mozzarella for a festive smoked gouda.
Assemble the balls the day before and keep them tightly wrapped in the fridge; bake and finish with butter the next day for freshly hot bites with minimal morning prep. For larger gatherings, freeze half of the assembled pieces and bake from frozen to deliver steady trays of warm appetizers throughout the event.
These bites are proof that a few smart shortcuts and attention to simple finishing touches can produce truly memorable results. Give them a try, and adapt fillings to suit your crowd—once you have this technique down, the possibilities are endless.
Keep the biscuit dough cold until you are ready to fill—warmer dough is stickier and harder to seal.
Brush the garlic-butter immediately after baking so the butter soaks into the hot surface for maximum flavor.
Watch the last 2 minutes of baking closely; these can over-brown quickly if left unattended.
This nourishing stuffed cheese bread recipe is sure to be a staple in your kitchen. Enjoy every moist, high protein slice — it is perfect for breakfast or as a wholesome snack any time.
This Stuffed Cheese Bread recipe makes perfectly juicy, tender, and flavorful steak every time! Serve with potatoes and a side salad for an unforgettable dinner in under 30 minutes.
Preheat oven to 400°F. Line a baking sheet with a Silpat or aluminum foil and spray with cooking spray. Position the rack in the center of the oven.
Separate biscuits and flatten slightly. Place one 1-inch cube of cheese in the center of each biscuit, gather edges and pinch tightly to seal. Place seam-side down on the prepared sheet.
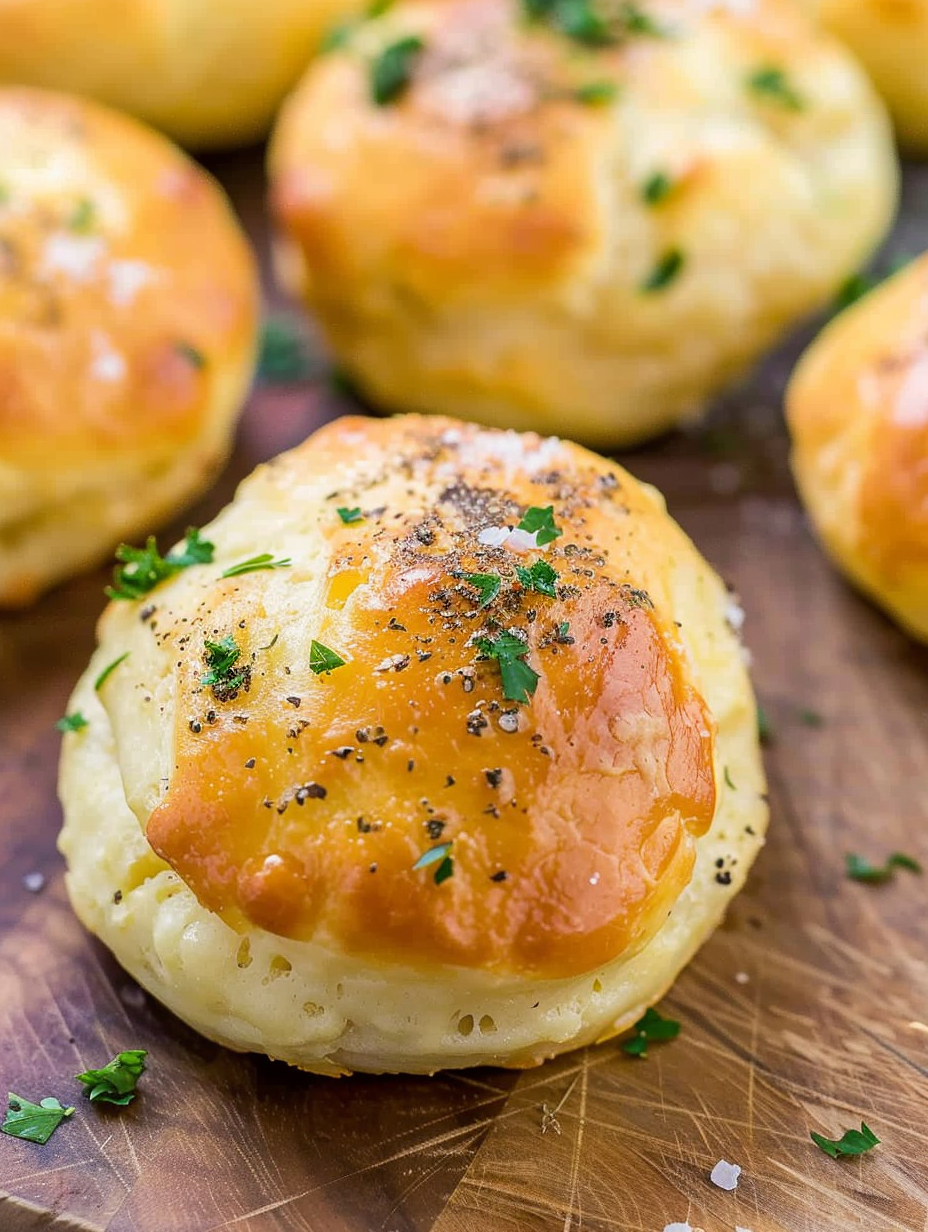
Bake about 10 minutes until the tops are very lightly golden—watch closely from minute 8 to avoid over-browning.
Melt butter in a microwave-safe bowl for 30–60 seconds. Stir in Italian seasoning, garlic powder, and salt until combined.
Brush each hot baked piece generously with the garlic-butter, garnish with parsley if desired, and serve immediately while warm and melty.
Last Step: Please leave a rating and comment letting us know how you liked this recipe! This helps our business to thrive and continue providing free, high-quality recipes for you.
Leave a comment & rating below or tag
@yummique on social media!

Tender grilled zucchini wraps basil ricotta, bathed in marinara and mozzarella, baking into a bubbly, lighter Italian comfort dinner ready in 30 minutes.

Crisp-edged, tender-in-the-middle zucchini and yellow squash made in 15 minutes with pantry spices. A vibrant, veggie-forward side everyone devours.

Tender chicken meatballs simmered in rich marinara and blanketed with melty mozzarella, bringing all the flavors of chicken parm in cozy, bite-sized form.
Leave a comment & rating below or tag @yummique on social media!
Enjoyed this recipe? Share it with friends and family, and don't forget to leave a review!
This recipe looks amazing! Can't wait to try it.
Comments are stored locally in your browser. Server comments are displayed alongside your local comments.

Join to receive our email series which contains a round-up of some of our quick and easy family favorite recipes.
