
>>

Crispy, caramelized chicken thighs glazed in a sticky sweet chili sauce—ready in 25 minutes and perfect for busy weeknights. Air-fryer friendly and family-approved.
In our house this dish became the go-to for casual gatherings because it looks impressive on the plate without the fuss. I often toss a few extra thighs on for tomorrow’s lunch and heat gently for a meal that still tastes fresh. Friends have taken this to potlucks and come back asking for the recipe, which always makes me smile.
My favorite part is how reliably this method produces both crisp skin and juicy meat. The glaze becomes almost lacquer-like on the surface, which makes each bite satisfying. When I first served this to a mixed crowd of picky eaters and adventurous eaters, everyone found common ground on the sticky-sweet flavor—rare for a single dish. It’s also forgiving: if you slightly overcook, the glaze masks small dryness and the meat is still enjoyable.
Store cooled leftovers in an airtight container in the refrigerator for up to 3 days. To freeze, wrap each thigh individually in plastic wrap then place in a freezer-safe bag for up to 3 months. When reheating, thaw overnight in the fridge if frozen, then reheat at 325°F (160°C) in the oven for 10–12 minutes or in the air fryer at 350°F (175°C) for 6–8 minutes to avoid burning the glaze. Microwave reheating will work in a pinch but will soften the skin; re-crisp under a broiler for 1–2 minutes if desired.
If you need a gluten-free version, replace regular soy sauce with tamari and check the oyster sauce label or use a mushroom-based oyster sauce alternative. For a vegetarian take, swap thighs for large king oyster mushroom caps or firm tofu slabs and skip oyster sauce or use a vegetarian umami sauce. If sesame oil is unavailable, a teaspoon of toasted sesame seeds added at the end gives a similar flavor lift. Adjust the sweet chili to taste—use sriracha and honey in a pinch, but the texture will be less syrupy.
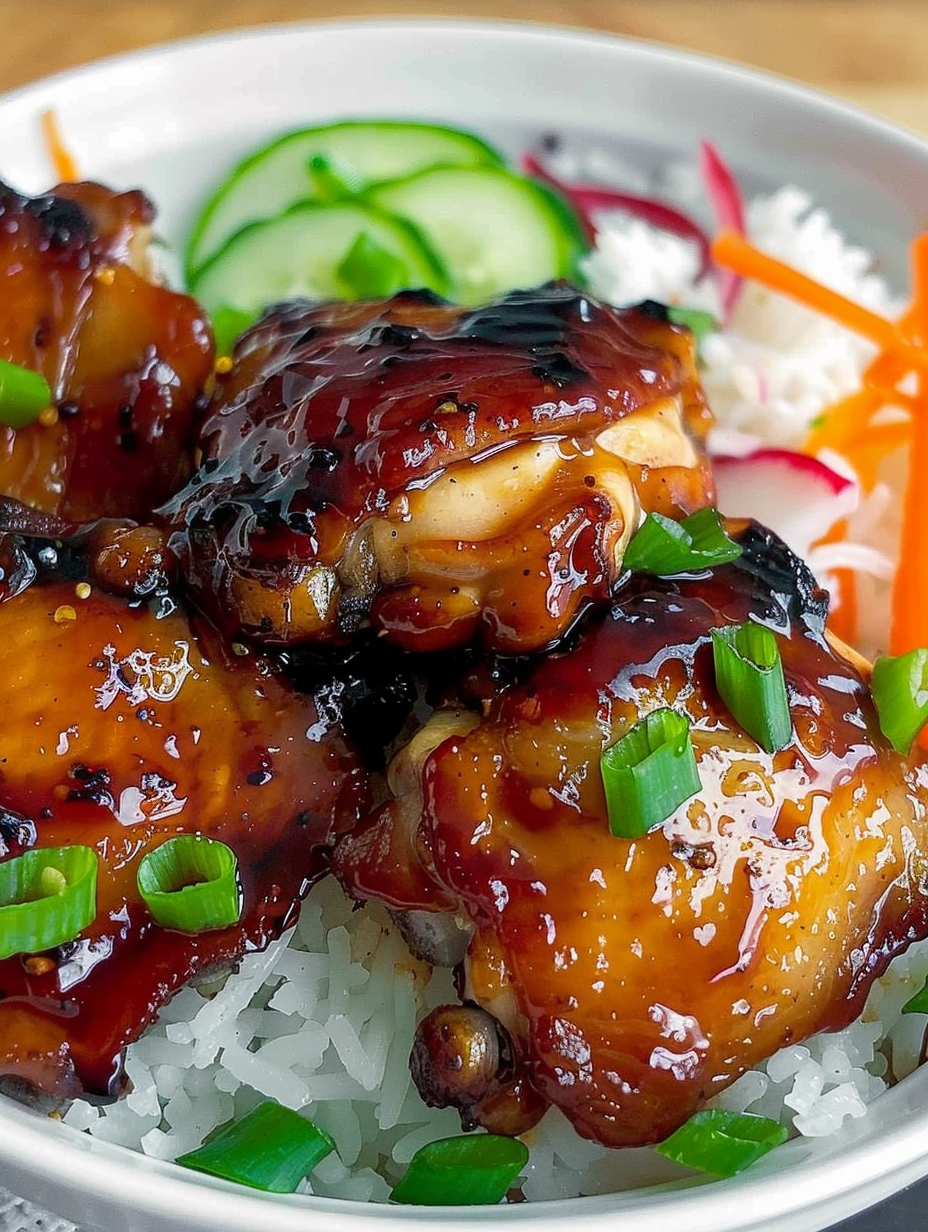
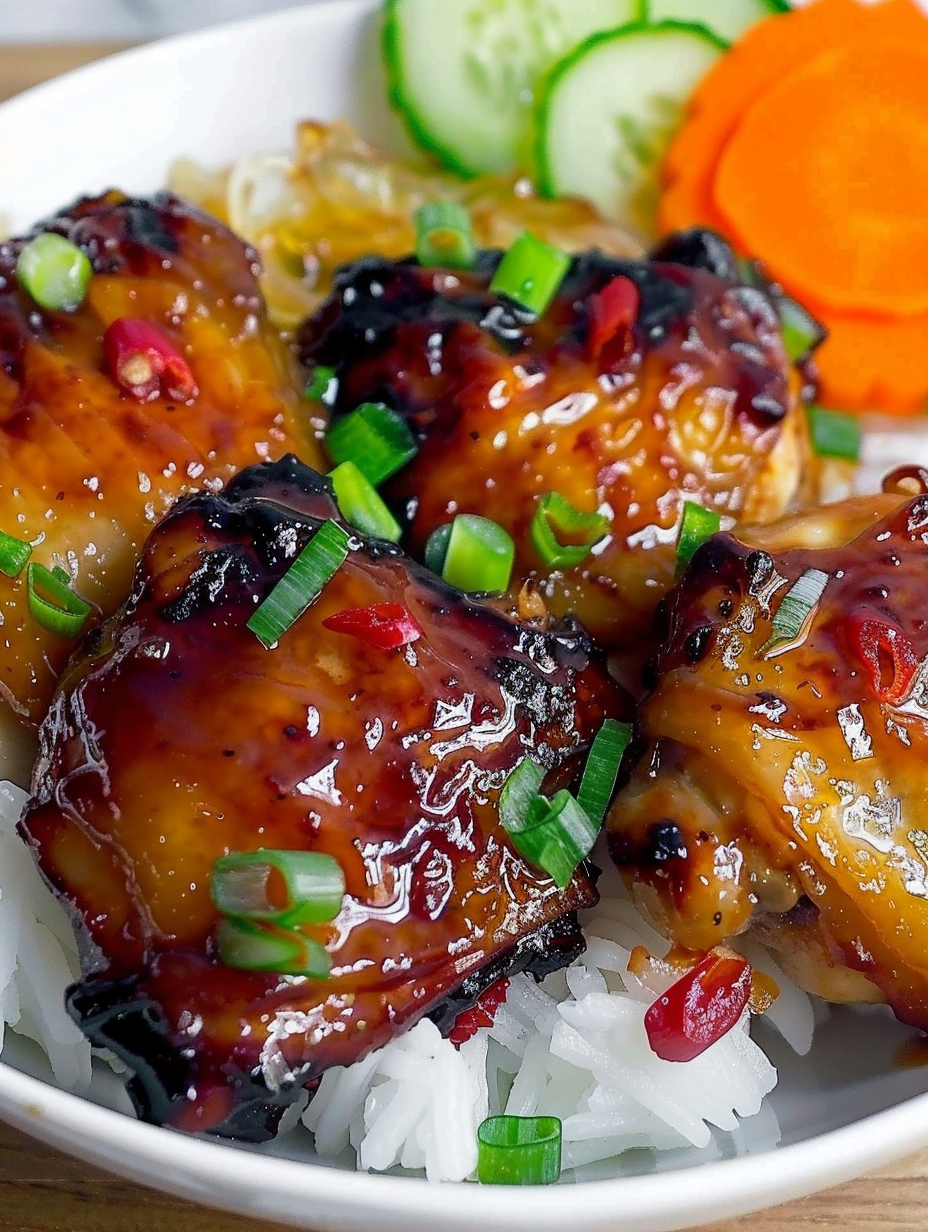
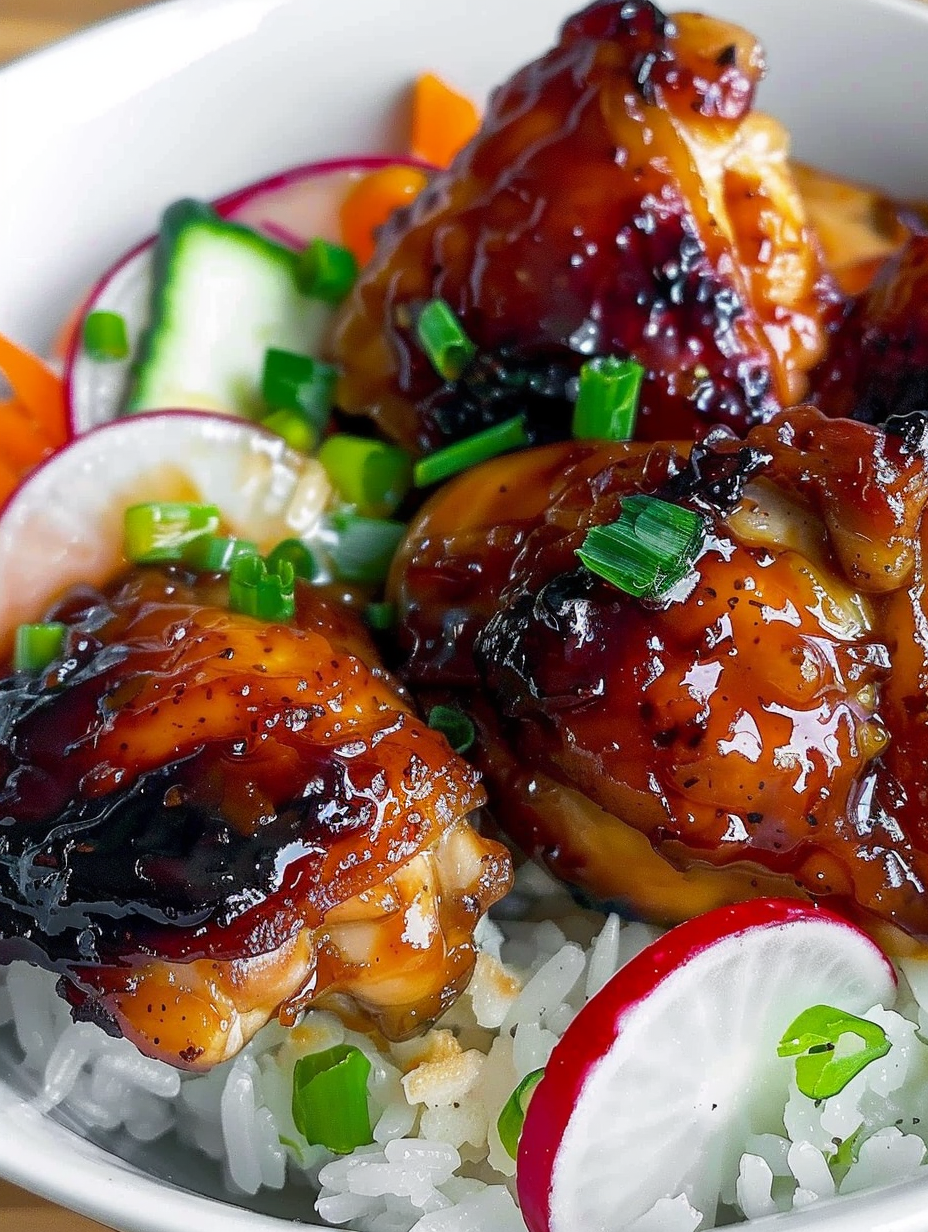
Serve the thighs over jasmine rice or coconut rice to balance the sweet glaze. For lighter meals, pair with steamed bok choy, blanched broccoli, or a crisp cucumber salad dressed with rice vinegar, a pinch of sugar, and sesame oil. Garnish with sliced scallions and toasted sesame seeds for color and texture. For a party, place on a platter with lime wedges and let guests help themselves—this dish travels well to buffets and potlucks.
Sticky sweet chili flavors are inspired by Southeast Asian condiments—particularly those used in Thai and Vietnamese kitchens. The sweet chili sauce common in supermarkets blends chilies, sugar, and vinegar into a glossy condiment that pairs beautifully with fried proteins. Adding soy and oyster sauce brings in Chinese-style umami, creating a fusion that borrows heritage flavors while lending itself to Western cooking methods like the air fryer. This hybrid approach produces a familiar yet vibrant profile that appeals broadly.
In summer, serve with a mango slaw or grilled pineapple to highlight the sweet notes in the glaze. During colder months, swap jasmine rice for coconut-lentil pilaf and add roasted root vegetables to the tray for a heartier plate. For holiday gatherings, double the glaze and brush generously for a glossy finish—pair with citrusy sides to cut through the richness. Small tweaks to produce and sides keep this dish feeling seasonal year-round.
Make the glaze up to 24 hours ahead and refrigerate in a sealed container. When prepping multiple nights, season the thighs and store them uncovered on a rack in the fridge for an hour to dry the skin—which enhances crisping. For batch cooking, cook in two air fryer batches and cool completely before refrigerating for lunches; reheat at moderate heat to avoid burning the sugars in the glaze. Label containers with dates to keep track of freshness.
This sticky sweet chili version of roasted thighs is proof that quick dinners can still feel thoughtful. It’s a dependable, delicious meal that brings family and friends to the table with minimal fuss—give it a try and make it yours by adjusting heat and sweetness to taste.
Pat chicken skin very dry before seasoning; moisture prevents crisping.
Use a probe thermometer to confirm an internal temperature of 165°F (74°C) at the thickest part of the thigh.
Baste 2–3 times with glaze during the last 10 minutes to build layers and a glossy finish.
If you broil to caramelize, watch carefully—sugars burn quickly under high heat.
This nourishing sticky sweet chili chicken thighs in the air fryer recipe is sure to be a staple in your kitchen. Enjoy every moist, high protein slice — it is perfect for breakfast or as a wholesome snack any time.
Yes. If you prefer a gluten-free version, use tamari or a certified gluten-free soy sauce and substitute oyster sauce with a mushroom-based vegetarian oyster sauce.
Store cooled leftovers in an airtight container for up to 3 days in the refrigerator or freeze for up to 3 months. Reheat gently in the air fryer or oven.
This Sticky Sweet Chili Chicken Thighs in the Air Fryer recipe makes perfectly juicy, tender, and flavorful steak every time! Serve with potatoes and a side salad for an unforgettable dinner in under 30 minutes.
Preheat to 375°F (190°C) so the basket is hot when you add the chicken—this jump-starts crisping and helps render skin fat.
Pat thighs dry. Toss with 1 tablespoon avocado oil, 1 teaspoon garlic powder, 1/2 teaspoon salt, and 1/2 teaspoon pepper until evenly coated.
Arrange in a single layer skin-side down and cook at 375°F (190°C) for 15 minutes to render fat and start browning.
Whisk together 1/2 cup sweet chili sauce, 3 tablespoons soy sauce, 1 tablespoon oyster sauce, and 1 tablespoon sesame oil. Adjust balance to taste.
Flip thighs skin-side up, baste with glaze, and cook an additional 10 minutes, basting 2 more times. Cook until internal temperature reads 165°F (74°C).
For extra crisp and color, broil for 2–3 minutes, watching closely to prevent burning of the sugars in the glaze.
Let rest 5 minutes before serving on rice or with vegetables. Garnish with sliced scallions and toasted sesame seeds if desired.
Last Step: Please leave a rating and comment letting us know how you liked this recipe! This helps our business to thrive and continue providing free, high-quality recipes for you.
Leave a comment & rating below or tag
@yummique on social media!

Tender grilled zucchini wraps basil ricotta, bathed in marinara and mozzarella, baking into a bubbly, lighter Italian comfort dinner ready in 30 minutes.

Crisp-edged, tender-in-the-middle zucchini and yellow squash made in 15 minutes with pantry spices. A vibrant, veggie-forward side everyone devours.

Tender chicken meatballs simmered in rich marinara and blanketed with melty mozzarella, bringing all the flavors of chicken parm in cozy, bite-sized form.
Leave a comment & rating below or tag @yummique on social media!
Enjoyed this recipe? Share it with friends and family, and don't forget to leave a review!
This recipe looks amazing! Can't wait to try it.
Comments are stored locally in your browser. Server comments are displayed alongside your local comments.

Join to receive our email series which contains a round-up of some of our quick and easy family favorite recipes.
