
>>

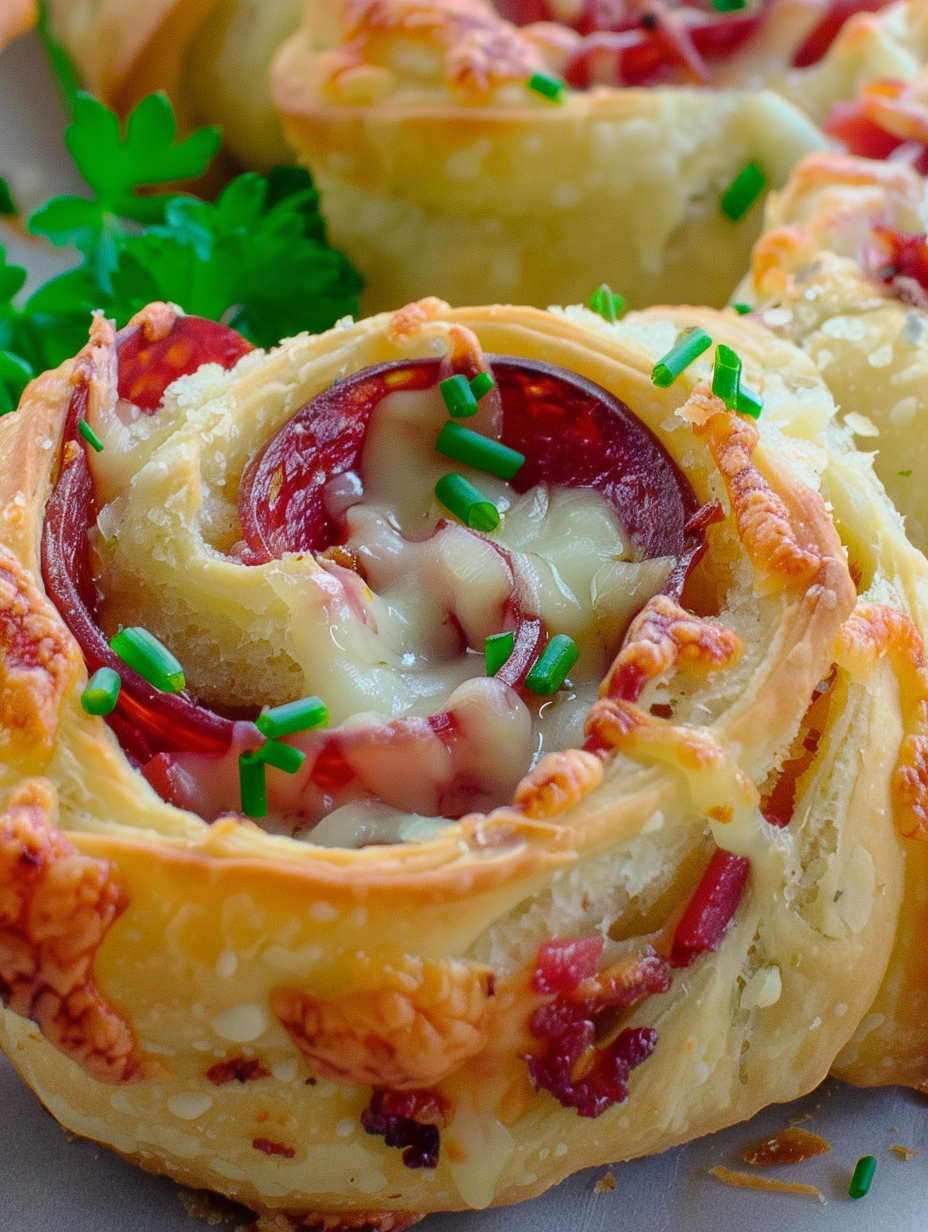
These Pizza Pinwheels are a winning dish—crispy, cheesy spirals filled with pepperoni and melty mozzarella. Perfect for parties, after-school snacks, or a quick appetizer.

This recipe for Pizza Pinwheels became a family favorite the first time I made it on a crowded game night when I needed something fast, portable, and wildly satisfying. I discovered this riff on pizza while rummaging through the pantry and fridge—two cans of crescent dough and a huge bag of shredded mozzarella. The combination of buttery dough, salty pepperoni, and golden melted cheese created a handheld bite that disappeared in minutes. What I love is how the texture contrasts: a slightly crisp outside, a tender, pillowy interior, and ribbons of gooey cheese threaded through pepperoni.
I first made these during a late afternoon craft party for my nephews; they were easy enough for small hands to assemble and sturdy enough to eat while juggling markers and glitter. The short bake time—around 8 minutes at 375°F—means you can serve them hot and bubbly in under 15 minutes from start to finish. These pinwheels travel well, reheat beautifully, and freeze with very little loss of quality. They’re a small, comforting version of classic pizza flavors, and they always draw a crowd.
Personally, the first batch I made vanished so fast I had to hide a few to photograph them. Family members texted me later asking for the “secret” to the crisp edge and molten center. Over time I learned a few small tricks—pinching seams carefully and chilling the log briefly before slicing—that keep the swirls tidy and prevent the filling from squeezing out while baking.

My favorite aspect of this preparation is how forgiving it is: a little extra cheese or a looser roll still produces a delicious result. I’ve brought these to potlucks, and they always vanish first. A small tweak—brushing the tops with a garlic-butter finish—elevates them to party-star status, and guests often ask for the recipe.
Store cooled pinwheels in an airtight container in the refrigerator for up to 3 days. For best texture, reheat on a wire rack set over a baking sheet at 350°F for 6–8 minutes to restore crisp edges. To freeze, flash-freeze slices on a parchment-lined tray until solid, then transfer to a labeled freezer bag for up to 3 months. Reheat from frozen at 375°F for 10–12 minutes, checking that the center is hot and cheese is bubbling.
If you need to adapt the filling, swap the pepperoni for thinly sliced cooked sausage, prosciutto, or sautéed mushrooms for a vegetarian option (use a plant-based pepperoni and vegan cheese to make it fully vegan). Replace mozzarella with a 50/50 blend of mozzarella and provolone for a deeper flavor; reduce higher-moisture cheeses slightly to avoid sogginess. Use low-fat cheese for a lighter version—note that melt and texture will change slightly.
Serve warm with small bowls of marinara or garlic butter for dipping. For parties, arrange on a platter with fresh basil leaves and a sprinkle of grated Parmesan. These pair well with a crisp green salad, roasted vegetables, or a simple antipasto plate. For kids’ lunches, pack a few pinwheels with carrot sticks and grapes for a balanced, hand-held meal.
Assemble the logs in advance and refrigerate up to 24 hours before slicing and baking—this makes last-minute entertaining effortless. Alternatively, pre-slice and freeze rounds on a tray, then bag them; bake from frozen straight onto a parchment-lined sheet. Use separate containers for cooled pinwheels to avoid sogginess when reheating multiple times—reheat only what you plan to serve.
These pinwheels are an Americanized, portable take on traditional pizza flavors, inspired by roll-and-fill techniques common in many cuisines. The spiral presentation echoes savory pastries found in Mediterranean and Central European baking, where fillings are rolled into dough and sliced into individual portions. Over time, home cooks in the U.S. have adapted the method to quick, convenience-friendly refrigerated doughs and familiar pizza toppings.
In summer, add roasted peppers, fresh basil, and sun-dried tomatoes for a bright twist. During winter, swap pepperoni for thinly sliced roasted chicken and caramelized onions with a sage-forward cheese blend. For holiday gatherings, use festive cookie-cutter shapes with the same filling rolled into thinner logs and baked until crisp for bite-sized canapés.
These pinwheels are proof that simple ingredients and a few careful techniques can deliver something comforting, shareable, and reliably delicious. Try them once and you’ll have a new go-to for quick entertaining and family dinners.
Pinch the crescent roll seams firmly to avoid separation while rolling.
Chill the rolled log for 10–15 minutes if the dough becomes soft—this gives cleaner slices.
Use a serrated knife and a gentle sawing motion to keep edges neat and prevent squashing.
This nourishing pizza pinwheels recipe is sure to be a staple in your kitchen. Enjoy every moist, high protein slice — it is perfect for breakfast or as a wholesome snack any time.
Yes—assemble the logs up to 24 hours ahead and keep them wrapped and refrigerated; slice and bake when ready.
Flash-freeze slices on a tray, then transfer to a freezer bag. Bake from frozen adding a few extra minutes to the bake time.
This Pizza Pinwheels recipe makes perfectly juicy, tender, and flavorful steak every time! Serve with potatoes and a side salad for an unforgettable dinner in under 30 minutes.
Preheat oven to 375°F. Line a baking sheet with parchment or a silicone mat and set out a large clean surface for assembly.
Roll out each can of crescent dough and pinch together the perforated seams to form two solid rectangles approximately 10x8 inches each.
In a large bowl stir together about 4 cups shredded mozzarella and 2 egg yolks until evenly combined; season lightly if desired.
Spread the cheese mixture over each dough rectangle, leaving a 1/2-inch border, then layer pepperoni slices evenly on top.
Roll each rectangle tightly from the short edge into a log, seal the seam, and chill 10–15 minutes if needed for cleaner slices.
Slice logs into 1/2–3/4-inch rounds, place on the prepared sheet, and bake at 375°F for 8 minutes until edges are golden and cheese is melted.
Last Step: Please leave a rating and comment letting us know how you liked this recipe! This helps our business to thrive and continue providing free, high-quality recipes for you.
Leave a comment & rating below or tag
@yummique on social media!

Tender grilled zucchini wraps basil ricotta, bathed in marinara and mozzarella, baking into a bubbly, lighter Italian comfort dinner ready in 30 minutes.

Crisp-edged, tender-in-the-middle zucchini and yellow squash made in 15 minutes with pantry spices. A vibrant, veggie-forward side everyone devours.

Tender chicken meatballs simmered in rich marinara and blanketed with melty mozzarella, bringing all the flavors of chicken parm in cozy, bite-sized form.
Leave a comment & rating below or tag @yummique on social media!
Enjoyed this recipe? Share it with friends and family, and don't forget to leave a review!
This recipe looks amazing! Can't wait to try it.
Comments are stored locally in your browser. Server comments are displayed alongside your local comments.

Join to receive our email series which contains a round-up of some of our quick and easy family favorite recipes.
