
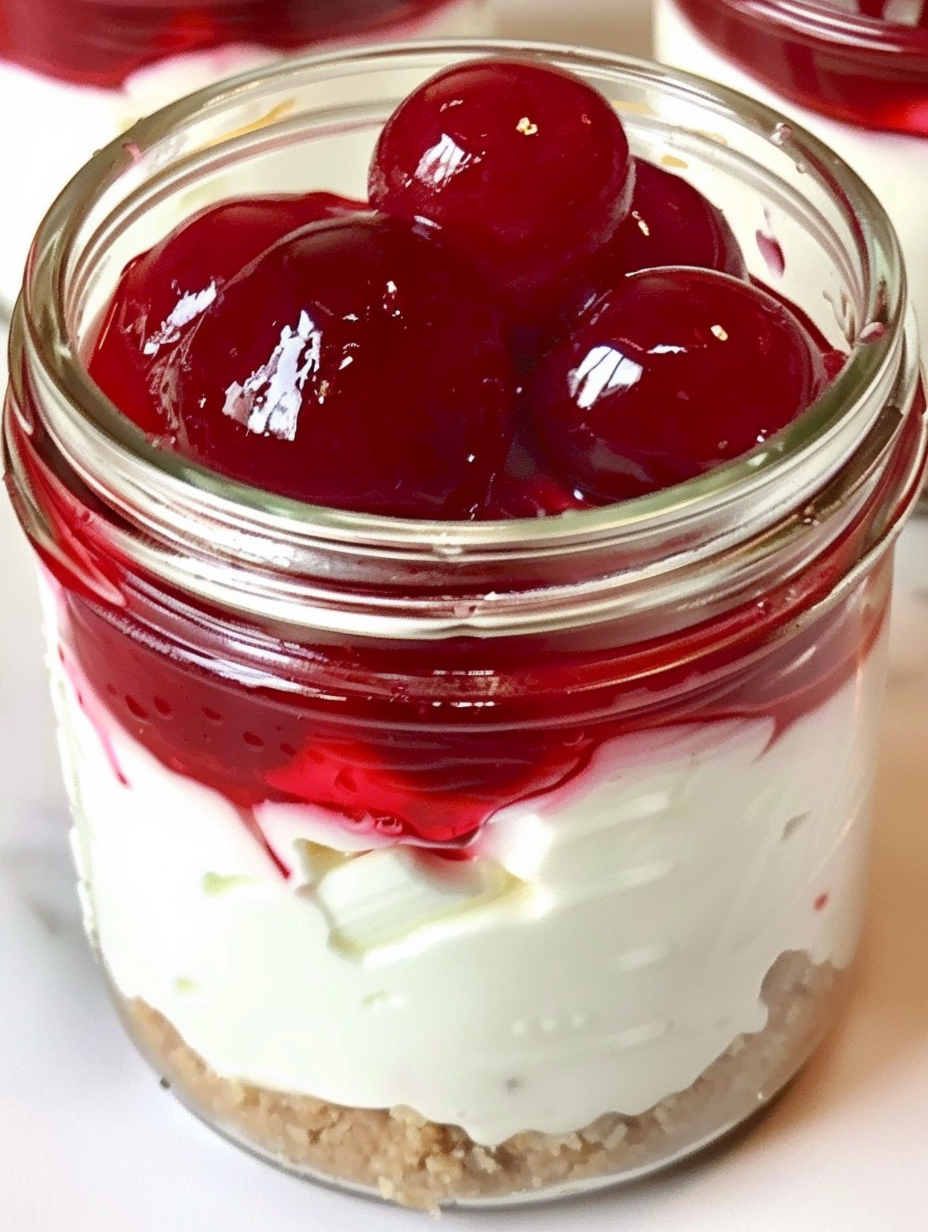
No-Bake Cherry Cheesecake

A creamy, effortless no-bake cherry cheesecake in jars—perfect for warm days, make-ahead desserts, and portable treats. Ready in minutes and chilling does the rest.
Why You'll Love This Recipe
- This dessert is ready to assemble in about 15 minutes and then simply chills for 2 to 3 hours, making it ideal for busy weeknights or last-minute guests.
- It uses pantry staples like graham cracker crumbs, butter, cream cheese, and canned cherry pie filling so you can make it without a special trip to the store.
- Single-serve jars improve presentation and portability and are excellent for picnics, potlucks, or packed lunches because each portion seals with a lid.
- The texture is reliably smooth and creamy thanks to room-temperature cream cheese and gentle mixing; the lemon juice brightens the sweetness without making it tart.
- Make-ahead friendly: prepare completely and store in the refrigerator for up to 3 days, or freeze for longer storage with simple thawing instructions below.
- Dietary flexibility: easily makes a vegetarian dessert, and swapping the crust can create a gluten-free version for guests with sensitivities.
In my family the reaction is always the same: silent mouths and second requests. I once brought a tray to a backyard barbecue and returned with empty jars and a new batch request for the next weekend. It’s simple but feels celebratory — a dependable dessert when you want to impress without stress.
Ingredients
- Graham cracker crumbs: 1 to 1 1/2 cups finely ground crumbs. Use a standard graham cracker brand or pre-bought crumbs. For best texture process whole crackers in a food processor until fine. The crumbs form a crunchy base and should be dry to absorb the butter and bind properly.
- White sugar: 1/3 cup. This helps set the crust and balances the butter. If using very sweet premade crumbs, reduce to 1/4 cup.
- Unsalted butter: 6 tablespoons melted. I use a high-quality butter like Challenge or Plugra for a clean, buttery flavor. Melt and cool slightly before mixing so it doesn’t melt the crumbs into sogginess.
- Cream cheese: 8 ounces (one standard package) Philadelphia cream cheese, softened to room temperature. Softening is critical; cold cream cheese creates lumps and requires more beating, which can incorporate air and change texture.
- Sweetened condensed milk: 1 (14 ounce) can. This provides sweetness and a silky set without gelatin. I use Eagle Brand with reliable consistency.
- Lemon juice: 1/3 cup freshly squeezed. Fresh lemon brightens the filling and helps the mixture set slightly because of its acidity. Bottled lemon juice will work in a pinch but fresh yields the best flavor.
- Vanilla extract: 1 teaspoon. Use pure vanilla for depth; imitation will work but loses subtle complexity.
- Cherry pie filling: 1 (21 ounce) can for topping. Choose a brand with whole cherries if you like texture; you can also use fresh cherries macerated with sugar in summer.
Instructions
Prepare the crust: In a medium bowl or in the bowl of a stand mixer, combine 1 to 1 1/2 cups finely ground graham cracker crumbs, 1/3 cup white sugar, and 6 tablespoons melted butter. Stir until the mixture resembles wet sand and holds together when pressed. If crumbs seem too dry add a teaspoon of extra melted butter; if too wet add a tablespoon of crumbs. The correct texture is the key to a crisp but scoopable base. Fill the jars with crust: Add about 2 to 3 heaping tablespoons of the graham mixture per jar or container and press firmly into the bottom to form an even layer about 1/4 to 1/2 inch thick. Use the bottom of a measuring cup for uniform compaction. Refrigerate the jars for at least one hour to allow the butter to solidify and set the crust. Beat the cream cheese: Place the softened 8 ounce package of cream cheese in a mixing bowl and beat with a hand mixer or stand mixer fitted with a paddle on medium speed until smooth and fluffy, about 2 to 3 minutes. Scrape down the sides to avoid lumps; achieving a silky base ensures the final texture is velvety. Add the sweetened condensed milk: Gradually pour in the 14 ounce can of sweetened condensed milk while mixing on low to medium speed. Blend until fully incorporated and smooth. Take care not to overbeat, which can incorporate air and produce a slightly grainy texture when chilled. Finish the filling: Add 1/3 cup fresh lemon juice and 1 teaspoon vanilla extract to the cream cheese mixture and beat until combined. The lemon helps firm the filling and adds a bright counterpoint to the condensed milk’s sweetness. Taste and adjust with a touch more lemon if you prefer extra brightness. Assemble and chill: Spoon the filling over the prepared crust in the jars, filling them almost to the top but leaving space for the cherry topping. Smooth the surface and cover. Refrigerate for about 2 to 3 hours or until set; chilling time depends on jar size and refrigerator temperature. Top and serve: Before serving, spoon cherry pie filling over each chilled portion. If transporting, add the topping and then secure with a lid or keep the topping separate and top just before serving to prevent moisture softening the crust. Enjoy: Serve chilled with a small spoon. These jars keep the presentation neat and allow guests to enjoy a clean, individual dessert that travels well.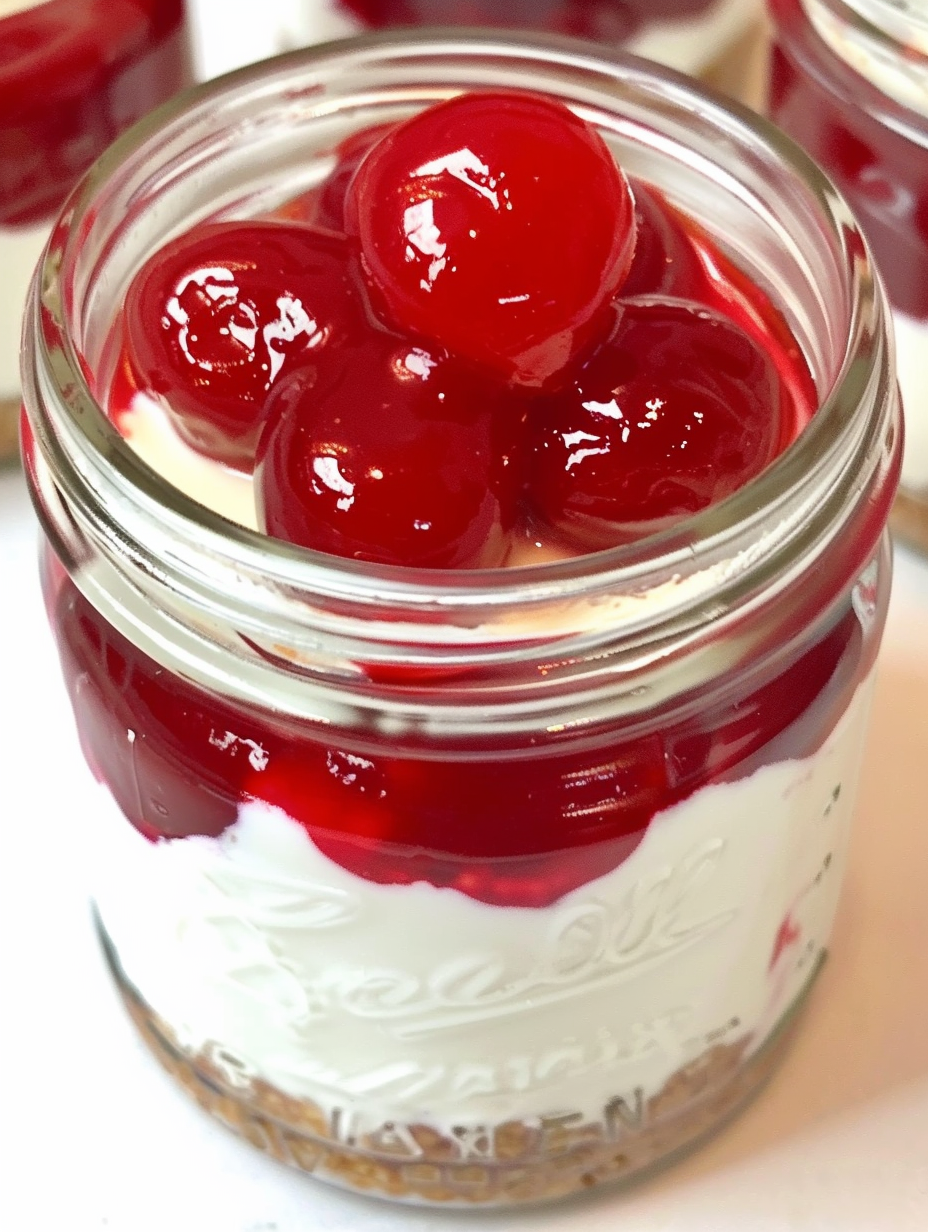
You Must Know
- This dessert is high in calcium and rich in flavor but should be stored refrigerated. It keeps well for up to three days in the refrigerator and freezes for up to one month if tightly sealed.
- Adjust sweetness by tasting the filling before chilling; more lemon will balance sweetness while additional condensed milk increases richness and sweetness.
- Crust texture: press the crumbs firmly and chill before adding the filling to avoid a soggy base. If assembling far ahead, keep the topping separate and add just before serving.
- For large gatherings you can double the recipe and use a 9-inch springform pan; expect slightly longer chilling time for a full pan.
My favorite thing about this dessert is how it evokes summer and small celebrations. I once prepared 24 jars for a family reunion and watched cousins trade empty jars like trophies. The combination of buttery crumbs, silky filling, and bright cherry topping always performs, and the jars add a charming, rustic touch to any table.
Storage Tips
Store sealed jars in the refrigerator for up to three days. If you plan to make ahead for a party, assemble the crust and filling up to one day before and keep the cherry topping separate in a sealed container to prevent crust softening. For longer storage, freeze covered jars without the pie filling for up to one month. Thaw overnight in the refrigerator and add cherry topping just before serving. Use glass jars with tight-fitting lids to minimize condensation during transport and place jars upright in a cooler with ice packs if you need to travel with them.
Ingredient Substitutions
If you need gluten-free, swap graham crumbs for certified gluten-free graham crackers or almond flour mixed with 2 tablespoons sugar and 4 tablespoons melted butter until it binds. For a vegan version, though texture will differ, use vegan cream cheese and sweetened condensed coconut milk; keep in mind that setting will be softer and additional chilling may be required. If you prefer a less sweet filling, reduce the sweetened condensed milk to three quarters of a can and add 2 tablespoons extra lemon juice to compensate. For a lighter crust flavor try vanilla wafers or shortbread crumbs for more buttery notes.
Serving Suggestions
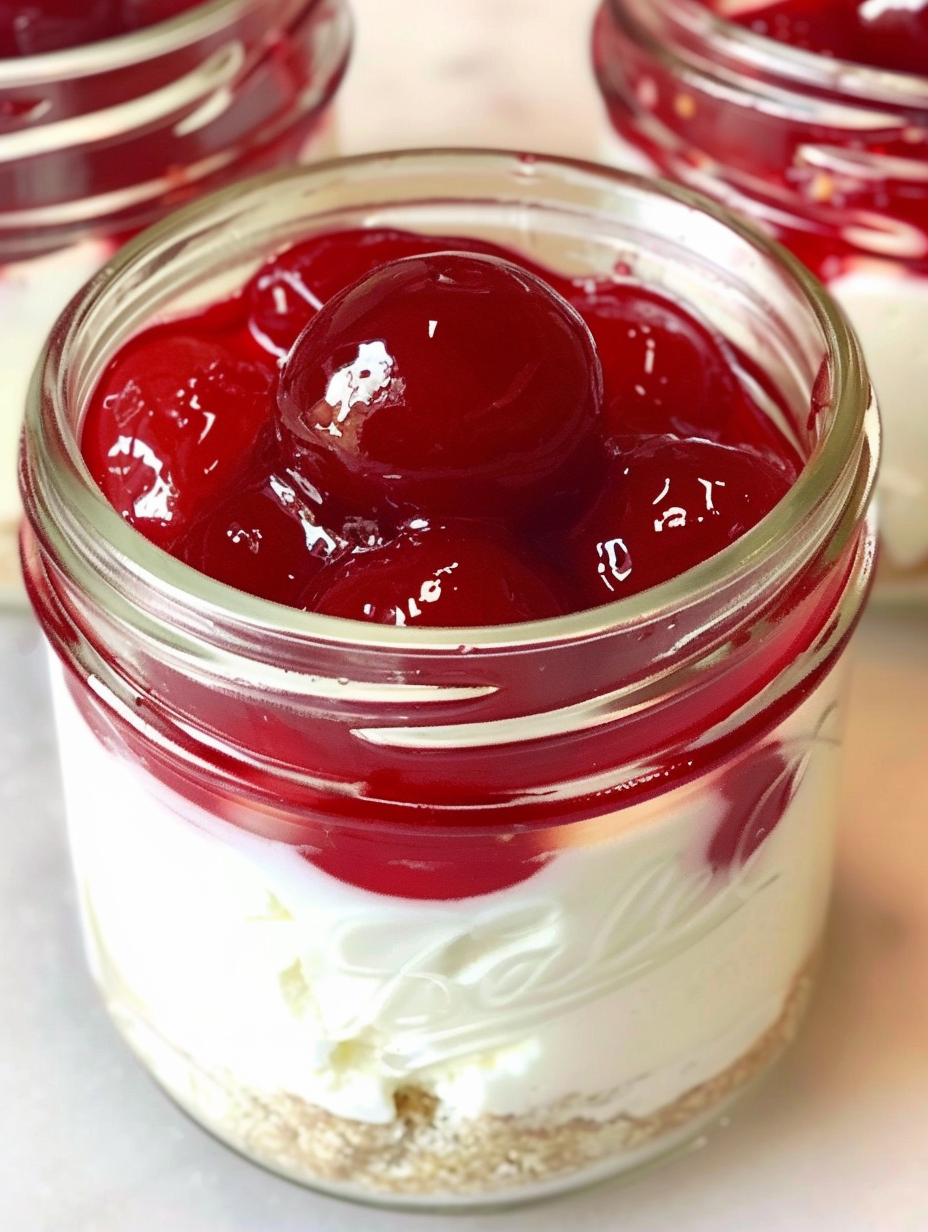
Serve the jars chilled with a sprig of mint, a dusting of finely grated lemon zest, or a few whole cherries on top for a polished look. Pair with a light dessert wine such as Moscato or a cup of strong coffee to balance the sweetness. For a party platter arrange jars on a tray with small spoons and labels indicating any dietary variations. For summer gatherings, top with fresh berries or a compote instead of canned pie filling for a brighter, fresher presentation.
Cultural Background
This style of creamy no-bake dessert draws on American traditions of instant-set desserts and pie fillings popularized in mid-20th century cookbooks. The use of sweetened condensed milk as a thickener became common in regions where refrigeration was more accessible than ovens for delicate custards. Serving individual portions in jars is a modern adaptation borrowed from European picnic and portable dessert practices, combining convenience and charm. Cherry as a topping reflects regional fruit preservation techniques and the long-standing popularity of cherry pie in American kitchens.
Seasonal Adaptations
In summer swap cherry pie filling for macerated fresh berries and a spoonful of high-quality honey. For autumn try spiced pear compote with a dusting of cinnamon on the crust. During the holidays top with a cranberry-orange relish for a festive twist, and consider adding a tablespoon of cocoa to the crust for a chocolate note. Each seasonal variation needs minimal technique adjustments and preserves the same easy assembly method while showcasing fresh produce.
Meal Prep Tips
For weekly meal prep, make a batch of crusts and keep them refrigerated while preparing fresh filling on the day you need it. Use uniform jars for consistent portion control and label lids with dates. If you need multiple days of desserts, stagger preparation: day one make crusts, day two prepare filling and assemble, day three add topping for peak freshness. Store jars upright in airtight containers to avoid jostling during transport and prevent topping from sliding off.
There is a quiet joy in handing a jar across the table. It feels homemade and thoughtful, and the recipe’s simplicity means you can make it often enough that it becomes a personal classic. Try it, make it your own, and enjoy sharing something easy yet delightful with people you care about.
Pro Tips
Always start with room-temperature cream cheese to avoid lumps and achieve a silky texture.
Press the crust firmly and chill before adding filling to prevent a soggy base.
Keep cherry topping separate if you need to transport jars so the crust stays crisp.
Taste and adjust lemon to balance sweetness from the condensed milk.
This nourishing no-bake cherry cheesecake recipe is sure to be a staple in your kitchen. Enjoy every moist, high protein slice — it is perfect for breakfast or as a wholesome snack any time.
FAQs about Recipes
How long will these keep in the refrigerator?
Yes. Refrigerate for up to three days. For longer storage freeze without the topping for up to one month and thaw overnight in the refrigerator before adding topping.
Can I use bottled lemon juice?
Use fresh lemon juice for best flavor and slight setting effect. Bottled lemon juice will work but flavor is less bright.
Tags
No-Bake Cherry Cheesecake
This No-Bake Cherry Cheesecake recipe makes perfectly juicy, tender, and flavorful steak every time! Serve with potatoes and a side salad for an unforgettable dinner in under 30 minutes.
Ingredients
Crust
Filling
Topping
Instructions
Make the crust mixture
Combine graham cracker crumbs, white sugar, and melted butter in a bowl until the mixture holds when pressed. Adjust with small amounts of butter or crumbs to reach a wet-sand texture.
Press crust into jars
Spoon 2 to 3 heaping tablespoons of the crust into each jar and press firmly with the bottom of a measuring cup. Chill jars for at least one hour to set the crust.
Beat cream cheese
Beat softened cream cheese on medium speed until smooth and fluffy, about 2 to 3 minutes, scraping down the sides to avoid lumps.
Add sweetened condensed milk
Gradually add the sweetened condensed milk while mixing until fully incorporated and silky. Avoid overbeating to prevent air incorporation.
Add lemon and vanilla
Stir in fresh lemon juice and vanilla extract until combined, tasting and adjusting lemon to balance sweetness as desired.
Assemble and chill
Spoon the filling over the chilled crusts, smooth the tops, cover, and refrigerate for 2 to 3 hours until set.
Top with cherries
Spoon cherry pie filling over each chilled portion before serving or transport with topping separate to preserve crust crispness.
Serve and enjoy
Serve chilled with optional lemon zest or mint garnish and enjoy individually portioned jars for easy sharing.
Last Step: Please leave a rating and comment letting us know how you liked this recipe! This helps our business to thrive and continue providing free, high-quality recipes for you.
Nutrition
Did You Make This?
Leave a comment & rating below or tag
@yummique on social media!
Categories:
You might also like...

Cheesy Zucchini Rollatini Bake
Tender grilled zucchini wraps basil ricotta, bathed in marinara and mozzarella, baking into a bubbly, lighter Italian comfort dinner ready in 30 minutes.

Air Fryer Zucchini and Squash
Crisp-edged, tender-in-the-middle zucchini and yellow squash made in 15 minutes with pantry spices. A vibrant, veggie-forward side everyone devours.

Chicken Meatball Parmesan
Tender chicken meatballs simmered in rich marinara and blanketed with melty mozzarella, bringing all the flavors of chicken parm in cozy, bite-sized form.
Did You Make This?
Leave a comment & rating below or tag @yummique on social media!
Rate This Recipe
Share This Recipe
Enjoyed this recipe? Share it with friends and family, and don't forget to leave a review!
Comments (1)
This recipe looks amazing! Can't wait to try it.
Comments are stored locally in your browser. Server comments are displayed alongside your local comments.

Hi, I'm Amira!
What's Popular

30-Minute Meals!
Join to receive our email series which contains a round-up of some of our quick and easy family favorite recipes.