
No-Bake Brownie Truffles

Bite-sized, fudge-like brownie truffles made with just a box mix and cream cheese — no baking required. Perfect for parties, gifts, or an easy chocolate fix.
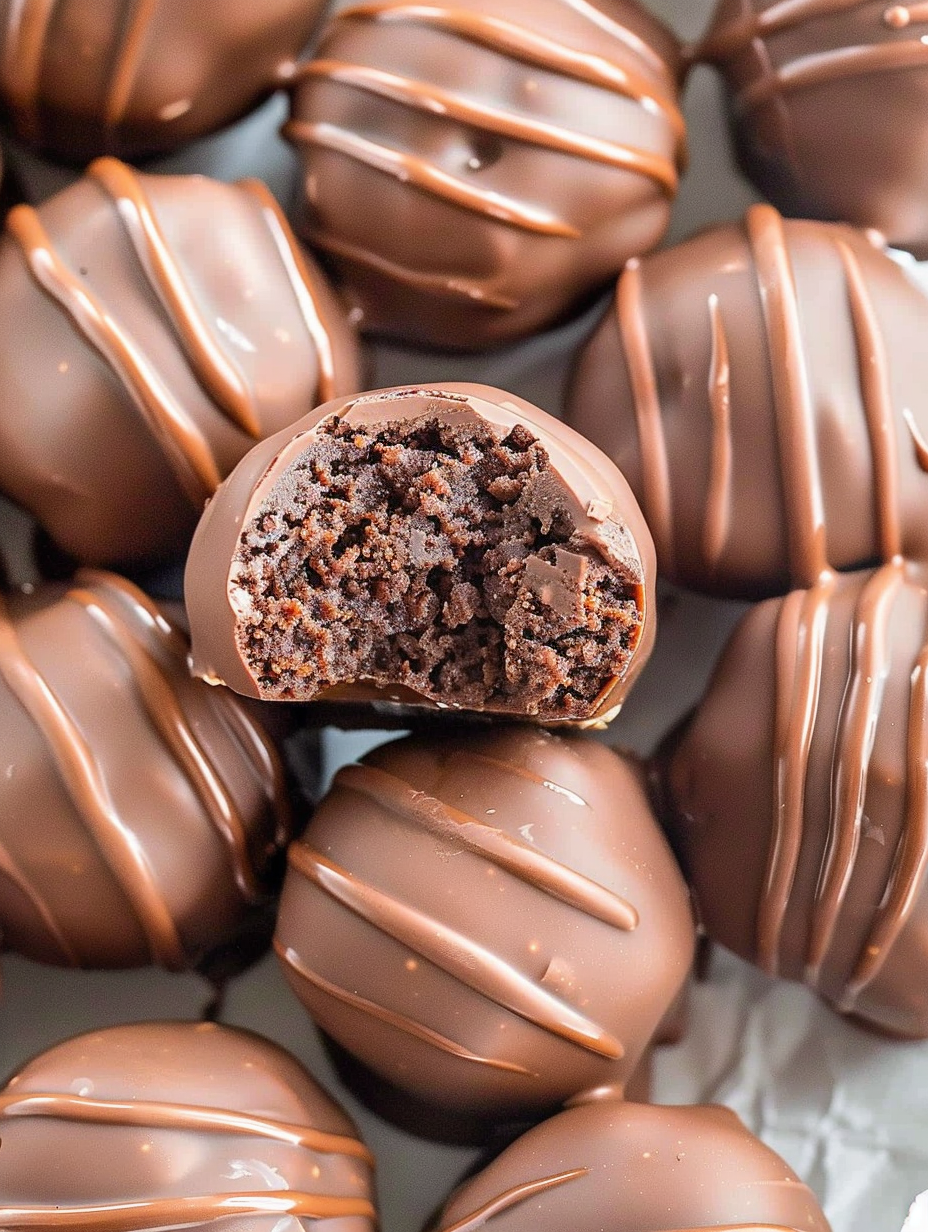
This recipe for Brownie Truffles has been a go-to in my kitchen ever since a friend brought them to a holiday party years ago. They taste like dense, fudgy brownie batter rolled into bite-sized balls and coated in glossy chocolate — rich enough to feel indulgent, but small enough to nibble with a cup of coffee. I discovered this method on a hectic evening when I wanted a chocolate treat without turning on the oven; the combination of boxed brownie mix and softened cream cheese produced a texture that is thick, moist, and satisfyingly soft. Each truffle gives that familiar brownie flavor with a melt-in-your-mouth center and a crisp chocolate shell.
What makes these especially memorable is how fast they come together and how reliably they please a crowd. The tang of the cream cheese balances the sweet, chocolatey mix, creating depth similar to a ganache. My family calls them "the little chocolate bombs" because one is enough to satisfy a sweet tooth, but they rarely stop at one. These are perfect for potlucks, last-minute gifts, or when you want a homemade dessert without a long ingredient list or complicated technique.
Why You'll Love This Recipe
- Ready in under 30 minutes of hands-on work and with only a few pantry staples: boxed fudge brownie mix, cream cheese, chocolate wafers, and a bit of shortening for shine and smoothness.
- Completely no-bake: no oven time required — just chilling. Ideal for hot days or when the oven is in use for other dishes.
- Extremely forgiving technique: you can shape the mixture by scoop or by weight, and chill time helps the truffles firm up uniformly so they dip cleanly in melted coating.
- Make-ahead friendly: you can prepare the centers and chill them for several hours or freeze up to 3 months, then finish with chocolate when needed.
- Crowd-pleasing presentation: glossy chocolate coating plus contrasting drizzle or sprinkles makes them look elevated for parties and gifts.
- Flexible for variations — roll in cocoa, chopped nuts, or coconut; add extracts or liqueur to customize flavor.
From my first batch to the most recent, the response has always been enthusiastic. Friends asked for the recipe and family requests keep it in my rotation. Once you taste the fudgy interior against the thin shell, these will likely become one of your favorite quick desserts too.
Ingredients
- Fudge brownie mix (18.3-ounce box): Use a high-quality brand labeled "fudge" for the deepest chocolate flavor. Heat-treat if required by manufacturer instructions when using mixes for no-bake applications; this helps with food safety if your brand recommends it.
- Cream cheese (8-ounce block): Full-fat, softened at room temperature (about 68–72°F). The cream cheese adds tang and fat that transforms the dry mix into a moist, pliable dough. Philadelphia brand works well for consistency.
- Vanilla extract (1 teaspoon): Use pure vanilla for the best aromatic lift. Avoid imitation if possible — pure vanilla brightens the chocolate notes.
- Chocolate melting wafers (1½ cups): Choose coating wafers or melting chips designed for dipping (Ghirardelli, Wilton, or Merckens). These melt smoothly and set with a nice sheen.
- Crisco shortening (1 tablespoon): A small amount thins and stabilizes the melted coating, giving a silkier mouthfeel and preventing bloom on the surface.
Instructions
Prepare your workspace: Line a large cookie sheet with parchment paper and leave a few inches of room to work. Chill one tray in the fridge if you have space; colder surfaces help truffles firm faster. Gather a medium mixing bowl, a 1-1/2 inch cookie scoop, forks or dipping tools, a rubber spatula, and a heatproof bowl for melting. Make the centers: In a medium bowl, add the entire 18.3-ounce box of fudge brownie mix, the softened 8-ounce block of cream cheese, and 1 teaspoon vanilla extract. Using a hand mixer or sturdy spatula, cream together until the mixture resembles a dense, uniform dough. You want no streaks of cream cheese remaining — scrape the bowl sides and press with the spatula to incorporate fully (about 1–2 minutes by hand, 30–45 seconds with a mixer). Shape the truffles: Use a 1½-inch cookie scoop to portion the mixture. Roll each portion between your palms into a smooth ball about 1–1½ inches in diameter. If the mixture feels sticky, chill it for 10–15 minutes to firm up, which makes rolling easier. Place each ball on the prepared parchment, spacing them about 1 inch apart. Chill the centers: Place the tray of rolled centers in the refrigerator for 1 hour. This firms them enough for dipping; if you're short on time, pop them into the freezer for 20–30 minutes until cold but not frozen solid. Melt the coating (first melt): About 5–10 minutes before the hour is up, set up a double boiler: simmer 3–4 inches of water in a saucepan, then place a heatproof bowl over it with 1¼ cups of chocolate wafers (reserve about ¼ cup for decoration). Stir with a rubber spatula as the wafers melt, then add 1 tablespoon Crisco. Continue stirring until smooth and glossy, remove from heat, and wipe any steam from the bottom of the bowl to avoid water getting into the chocolate. Dip the truffles: Using two forks or dipping tools, lower each chilled ball into the melted chocolate and roll to coat completely. Tap the fork gently on the bowl edge to remove excess coating, then transfer the coated truffle to the parchment. Work quickly but carefully — if chocolate cools and thickens, rewarm briefly over the double boiler. Set and decorate: Return the coated truffles to the refrigerator for 30 minutes to set. Meanwhile, melt the reserved ¼ cup of wafers for drizzling (add a small touch more shortening if needed). Fill a piping bag or small zip-top bag with the drizzle and pipe thin lines over each truffle. Chill another 30 minutes before serving so the drizzle firms fully.
You Must Know
- These are high-calorie, concentrated treats — each truffle is about 232 kcal, so plan portioning for parties.
- Storage: refrigerate in an airtight container for up to 7 days or freeze tightly wrapped for up to 3 months.
- If you have sensitive allergies, check the brownie mix and wafers label — common allergens include wheat, milk, and soy.
- Chilling solidifies the centers and prevents cracking during dipping; don’t skip the 1 hour initial chill.
I love the ritual of rolling and decorating these — it’s an easy, repetitive task that’s meditative and perfect to do with kids or at a kitchen party. Friends have told me they look fancy but taste like you spent hours — that’s the best compliment for a no-bake treat.
Storage Tips
Store finished truffles in a single layer or with parchment between layers in an airtight container. Refrigerate for up to 7 days; for longer storage, freeze in a sturdy container for up to 3 months — thaw in the fridge overnight before serving. Room temperature is fine for short periods (2–4 hours), but high heat will soften the shell and can make them sticky. When reheating or softening frozen truffles slightly, place them in the fridge for 2–3 hours rather than at room temperature to preserve texture.
Ingredient Substitutions
Swap the full-fat cream cheese for a lighter version for fewer calories, but expect a slightly tangier and less rich center. Use gluten-free boxed brownie mix if you need a wheat-free option — be sure the mix is intended for no-bake use or heat-treat any raw-ingredient concerns. For the coating, dark chocolate chips or couverture can replace melting wafers; add 1–2 teaspoons of neutral oil or shortening to ensure a smooth dip. For extra flavor, fold 1–2 tablespoons of cocoa powder or a splash of espresso into the mix.
Serving Suggestions
Arrange truffles on a pretty platter with garnishes like finely chopped toasted pecans, shaved chocolate, or a dusting of cocoa. They pair well with espresso, dessert wine, or salted caramel sauce on the side. For holiday platters, alternate truffles with peppermint bark or powdered sugar-covered cookies for contrast.
Cultural Background
These confections are a modern American take on classic chocolate truffles. While traditional truffles are ganache-based and rolled in cocoa or nuts, the boxed-mix plus cream cheese method evolved as an easy, rustic approach to achieving that dense, ganache-like bite without melting chocolate into cream. They reflect the pragmatic side of American home baking: elevating pantry staples into impressive treats.
Seasonal Adaptations
For winter holidays, add 1 teaspoon peppermint extract to the mix and top with crushed candy cane. Spring and summer can feature citrus: add 1 teaspoon orange zest and garnish with candied orange. For fall, fold in ¼ teaspoon ground cinnamon and roll truffles in finely chopped toasted pecans for a cozy spin.
Meal Prep Tips
Prep centers a day ahead and store them chilled; finish with the chocolate dip the next day to keep them looking freshly made. To transport, pack truffles in a rigid container with parchment layers and keep them cool with ice packs if traveling. Make a double batch and freeze half — pull out as guests arrive and allow them to thaw in the fridge while you finish the chocolate coating for a fresh finish.
These little bites are a beautiful example of how simple ingredients and a thoughtful technique produce something both accessible and special. Make them your own with variations and enjoy sharing — they vanish quickly, and for good reason.
Pro Tips
Chill the centers until firm before dipping; this prevents cracking and helps a smooth finish.
Use a 1½-inch cookie scoop for consistent truffle size and even chilling.
Reserve a small amount of wafers for drizzling so you can finish with a decorative touch.
Wipe the melting bowl dry before returning to the double boiler to avoid water contact which seizes chocolate.
If hands get sticky while rolling, rinse them with cold water and dry between batches for cleaner shaping.
This nourishing no-bake brownie truffles recipe is sure to be a staple in your kitchen. Enjoy every moist, high protein slice — it is perfect for breakfast or as a wholesome snack any time.
FAQs about Recipes
Can I freeze the truffles?
Yes — place them in an airtight container in the freezer for up to 3 months. Thaw overnight in the refrigerator before serving.
Do I need to bake the brownie mix first?
If the mix or coating contains raw eggs, follow any heat-treatment instructions on the box. Otherwise, this recipe is no-bake and safe when using commercial mixes and ready-to-eat ingredients.
What if my chocolate seizes while melting?
If the coating thickens, warm it gently over the double boiler, stirring constantly. Avoid direct microwave heating which can seize chocolate.
Tags
No-Bake Brownie Truffles
This No-Bake Brownie Truffles recipe makes perfectly juicy, tender, and flavorful steak every time! Serve with potatoes and a side salad for an unforgettable dinner in under 30 minutes.
Instructions
Prepare the tray and tools
Line a large cookie sheet with parchment paper and gather tools: mixing bowl, scoop, dipping forks, spatula, and a heatproof bowl for melting chocolate.
Make the truffle centers
Combine the 18.3-ounce brownie mix, softened 8-ounce cream cheese, and 1 teaspoon vanilla. Mix until a uniform, dough-like consistency forms with no streaks.
Shape and chill
Scoop 1½-inch portions and roll into smooth balls. Place on parchment and refrigerate for 1 hour (or freezer for 20–30 minutes) to firm up.
Melt chocolate for dipping
Set up a double boiler. Melt 1¼ cups wafers, reserving ¼ cup, stirring constantly. Add 1 tablespoon shortening and remove from heat when glossy and smooth.
Dip the truffles
Using forks or dipping tools, coat each chilled ball in melted chocolate, tapping off excess, and place back on parchment. Refrigerate 30 minutes to set.
Drizzle and set
Melt reserved wafers for drizzle, add small shortening if needed. Pipe thin lines over each truffle, then refrigerate another 30 minutes before serving.
Last Step: Please leave a rating and comment letting us know how you liked this recipe! This helps our business to thrive and continue providing free, high-quality recipes for you.
Nutrition
Did You Make This?
Leave a comment & rating below or tag
@yummique on social media!
Categories:
You might also like...

Cheesy Zucchini Rollatini Bake
Tender grilled zucchini wraps basil ricotta, bathed in marinara and mozzarella, baking into a bubbly, lighter Italian comfort dinner ready in 30 minutes.

Air Fryer Zucchini and Squash
Crisp-edged, tender-in-the-middle zucchini and yellow squash made in 15 minutes with pantry spices. A vibrant, veggie-forward side everyone devours.

Chicken Meatball Parmesan
Tender chicken meatballs simmered in rich marinara and blanketed with melty mozzarella, bringing all the flavors of chicken parm in cozy, bite-sized form.
Did You Make This?
Leave a comment & rating below or tag @yummique on social media!
Rate This Recipe
Share This Recipe
Enjoyed this recipe? Share it with friends and family, and don't forget to leave a review!
Comments (1)
This recipe looks amazing! Can't wait to try it.
Comments are stored locally in your browser. Server comments are displayed alongside your local comments.

Hi, I'm Amira!
What's Popular

30-Minute Meals!
Join to receive our email series which contains a round-up of some of our quick and easy family favorite recipes.