
>>

A quick, portable dessert that layers spiced apples, creamy no-bake filling and crunchy graham crumbs in mason jars. Perfect for portion control and entertaining.

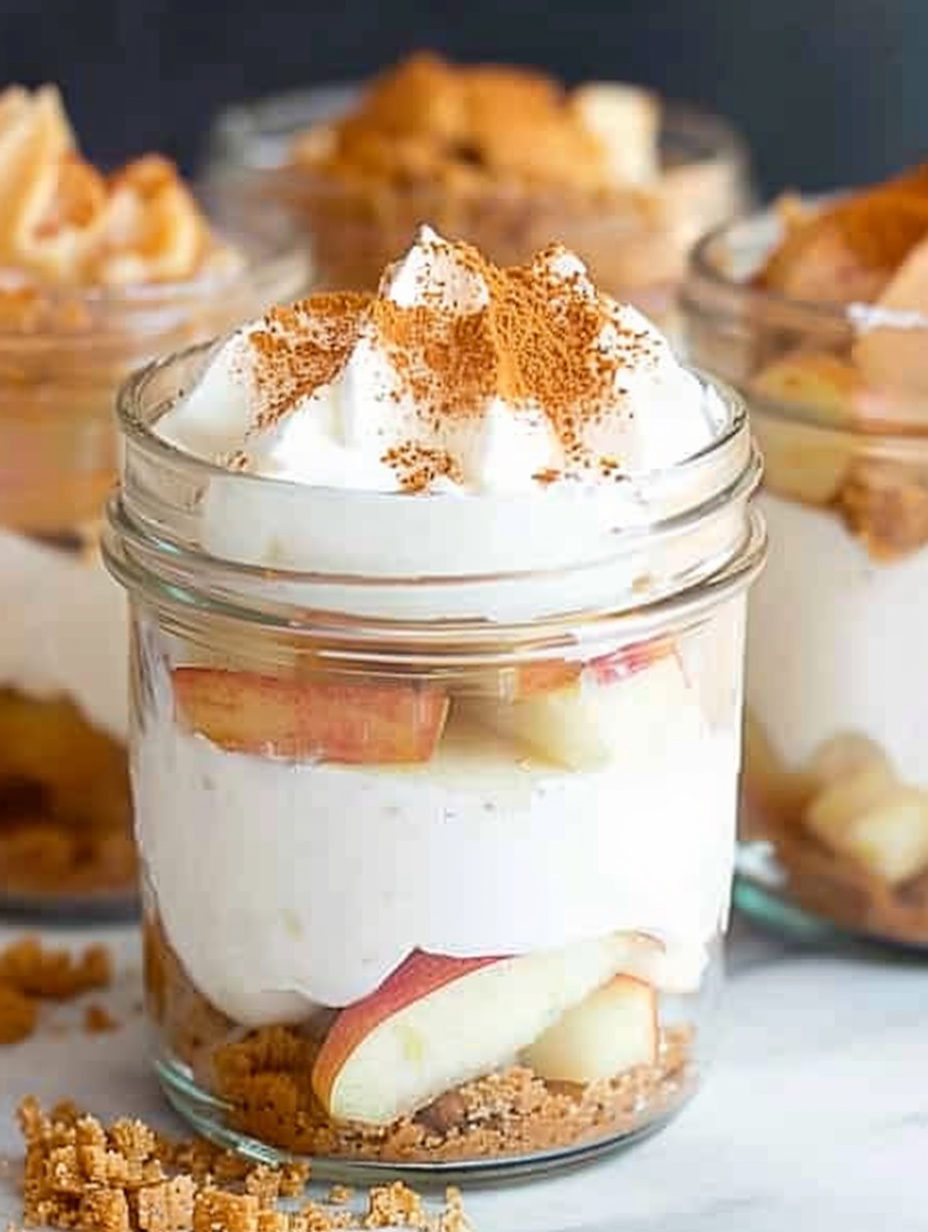
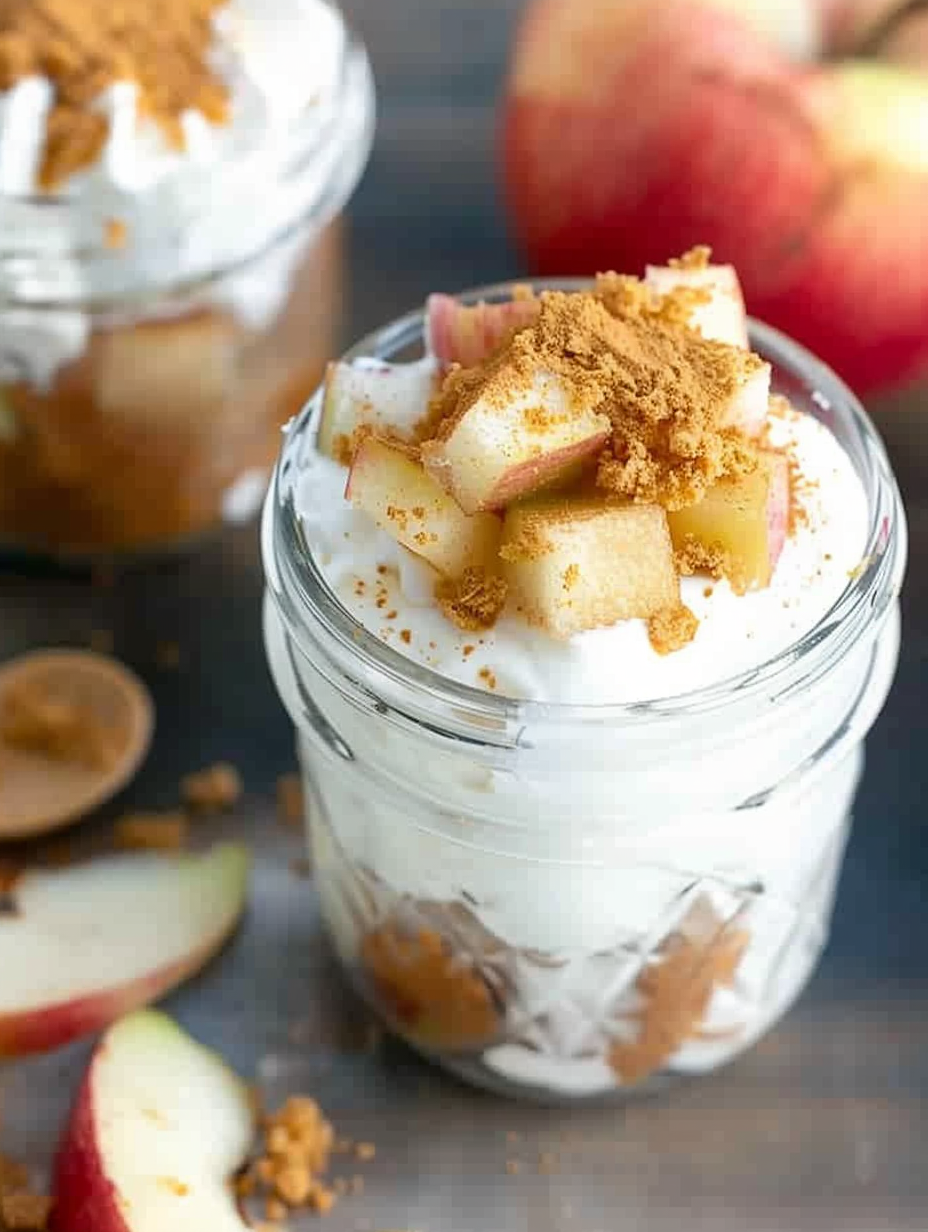
This no bake apple pie cheesecake in a jar is my shortcut to a cozy, nostalgic dessert without turning on the oven. I first put these together on a rainy autumn afternoon when I wanted the warm flavors of apple pie and the silky tang of cheesecake, but I only had a short window before guests arrived. The result was incredible: tender, cinnamon-spiced apples folded into creamy filling and layered with crunchy graham crumbs, all presented in little mason jars. The jars make them feel festive, control portions, and keep the layers intact for a pretty presentation.
I love that this treat bridges two worlds — the familiar warmth of apple pie and the smooth richness of cheesecake — but it comes together in minutes. The apples soften and caramelize slightly on the stovetop while the filling whips up in the time it takes to wash a bowl. These jars have become my go-to when I need an easy dessert for a potluck or a make-ahead sweet for busy weekdays. Family and friends always comment on the texture contrast: crisp crumbs, creamy filling, and the slightly syrupy apples on top.
I first served these at a small family gathering and watched people go back for seconds. My sister asked for the recipe immediately and my kids declared the jars “officially party food.” I especially enjoy how the layering looks through the glass, and how the apples stay pleasantly warm when served right after assembly or chilled for a firmer finish.
My favorite part of this jar dessert is the textural interplay: the gritty graham crumbs, the lush, slightly tangy filling and warm apple pockets. At a summer barbecue I served them chilled and they were a refreshing finish, while during a fall dinner they felt homey and comforting. Readers often tell me the jars are the perfect size for portion control and presentation — small but satisfying.
Store jars in an airtight container or cover each jar with a tight lid to prevent absorption of refrigerator odors. Refrigerated jars will stay fresh for up to 7 days; the filling firms as it chills and the apples settle slightly into the crumbs. For longer storage, freeze jars without the final apple topping for up to 3 months. Thaw slowly overnight in the refrigerator and add fresh apples or a quick warmed apple topping before serving to refresh the texture. Use glass or BPA-free plastic containers for best flavor preservation.
If you need dairy-free options, substitute full-fat dairy-free cream cheese and a coconut yogurt that is thick and full-bodied; note that the texture may be slightly looser and flavors will shift. Replace graham crumbs with gluten-free cookie crumbs to make it gluten-free. Swap agave for honey in equal amounts for a slightly more floral sweetness, or use maple syrup for a deeper flavor. To reduce sugar, replace some agave with a sugar-free syrup and increase vanilla and spice to maintain complexity.
Serve these jars as a polished dessert for dinner guests or pack them individually for picnics and potlucks. Garnish with a thin apple slice, a sprinkle of toasted pecans or a drizzle of caramel sauce for a decadent finish. They pair beautifully with black coffee or a cup of spiced tea. For brunch, place a jar alongside a small bowl of caramelized bananas or fresh berries to create a varied dessert spread.
This layered dessert blends two classic American favorites: apple pie and cheesecake. Apples have been a symbol of home baking in American culinary tradition, while graham cracker crusts and creamy cheese fillings are staples of the cheesecake family. Serving individual portions in jars is a modern twist that emerged from casual entertaining trends, combining portability with rustic presentation. Small-jar desserts are popular at fairs and cafés, nodding to both convenience and visual appeal.
In autumn, use apples such as Braeburn or Honeycrisp and increase the apple pie spice for warmth. For winter holidays, fold a pinch of ground cloves and allspice into the filling and top with candied orange zest. In summer, swap apples for lightly macerated peaches or berries and reduce the warming spices. For a spring bridal shower, add a layer of lemon curd for bright acidity that cuts through the creaminess.
To make multiple jars ahead, prepare the apple topping and filling separately. Label jars with the assembly date and stack them upright in the refrigerator. When packing lunches, keep the apple topping in a small separate container if the meal will sit for several hours to maintain the crispness of the crumbs. For faster assembly, scoop measured amounts of filling into piping bags so you can pipe neat, even layers into each jar.
These jars are a simple way to share comfort and elegance in one handheld serving. Try them once and you will find many excuses to make them again, from casual weeknight desserts to festive gatherings.
Soften cream cheese to room temperature to ensure a lump-free, silky filling when you beat it together.
Use firm, ripe apples like Honeycrisp or Fuji to ensure the pieces hold shape during the short cook time.
If making ahead, prepare apples and filling separately and assemble within 24 hours for best texture.
This nourishing no bake apple pie cheesecake in a jar recipe is sure to be a staple in your kitchen. Enjoy every moist, high protein slice — it is perfect for breakfast or as a wholesome snack any time.
Yes. The jars can be stored in the refrigerator for up to 7 days. For longer storage, freeze without the final apple topping for up to 3 months and thaw overnight in the refrigerator.
Use full-fat cream cheese and a thick Greek yogurt; ensure the cream cheese is softened to room temperature so the filling becomes completely smooth.
This No Bake Apple Pie Cheesecake In A Jar recipe makes perfectly juicy, tender, and flavorful steak every time! Serve with potatoes and a side salad for an unforgettable dinner in under 30 minutes.
Peel and chop 2 small apples into 1/2-inch pieces. Heat 1/2 tablespoon coconut oil in a small saucepan over medium heat. Add apples, 2 tablespoons brown sugar and 1/2 teaspoon apple pie spice. Cook for about 5 minutes until tender and lightly browned, stirring occasionally to prevent sticking.
In a medium bowl, beat 8 ounces softened cream cheese with 6 tablespoons agave nectar, 2/3 cup Greek yogurt, 1 tablespoon vanilla extract and 1/2 tablespoon apple pie spice until completely smooth and aerated, about 1 to 2 minutes.
Divide 2/3 cup graham cracker crumbs among four jars, putting about 2 tablespoons in each. Add 2 to 3 tablespoons filling, 2 tablespoons apples, another 2 to 3 tablespoons filling, 2 tablespoons crumbs, 2 tablespoons filling and finish with 2 tablespoons apples in each jar.
Serve immediately for warm apple pockets or refrigerate for at least 30 minutes. Store covered in the refrigerator up to 7 days, or freeze without the final apple topping for up to 3 months.
Last Step: Please leave a rating and comment letting us know how you liked this recipe! This helps our business to thrive and continue providing free, high-quality recipes for you.
Leave a comment & rating below or tag
@yummique on social media!

Tender grilled zucchini wraps basil ricotta, bathed in marinara and mozzarella, baking into a bubbly, lighter Italian comfort dinner ready in 30 minutes.

Crisp-edged, tender-in-the-middle zucchini and yellow squash made in 15 minutes with pantry spices. A vibrant, veggie-forward side everyone devours.

Tender chicken meatballs simmered in rich marinara and blanketed with melty mozzarella, bringing all the flavors of chicken parm in cozy, bite-sized form.
Leave a comment & rating below or tag @yummique on social media!
Enjoyed this recipe? Share it with friends and family, and don't forget to leave a review!
This recipe looks amazing! Can't wait to try it.
Comments are stored locally in your browser. Server comments are displayed alongside your local comments.

Join to receive our email series which contains a round-up of some of our quick and easy family favorite recipes.
