
Keto Philly Cheesesteak Roll Ups

Only 2g net carbs per roll up — savory Philly-style beef and peppers wrapped in a crispy Monterey Jack shell for a quick, satisfying low-carb appetizer or snack.
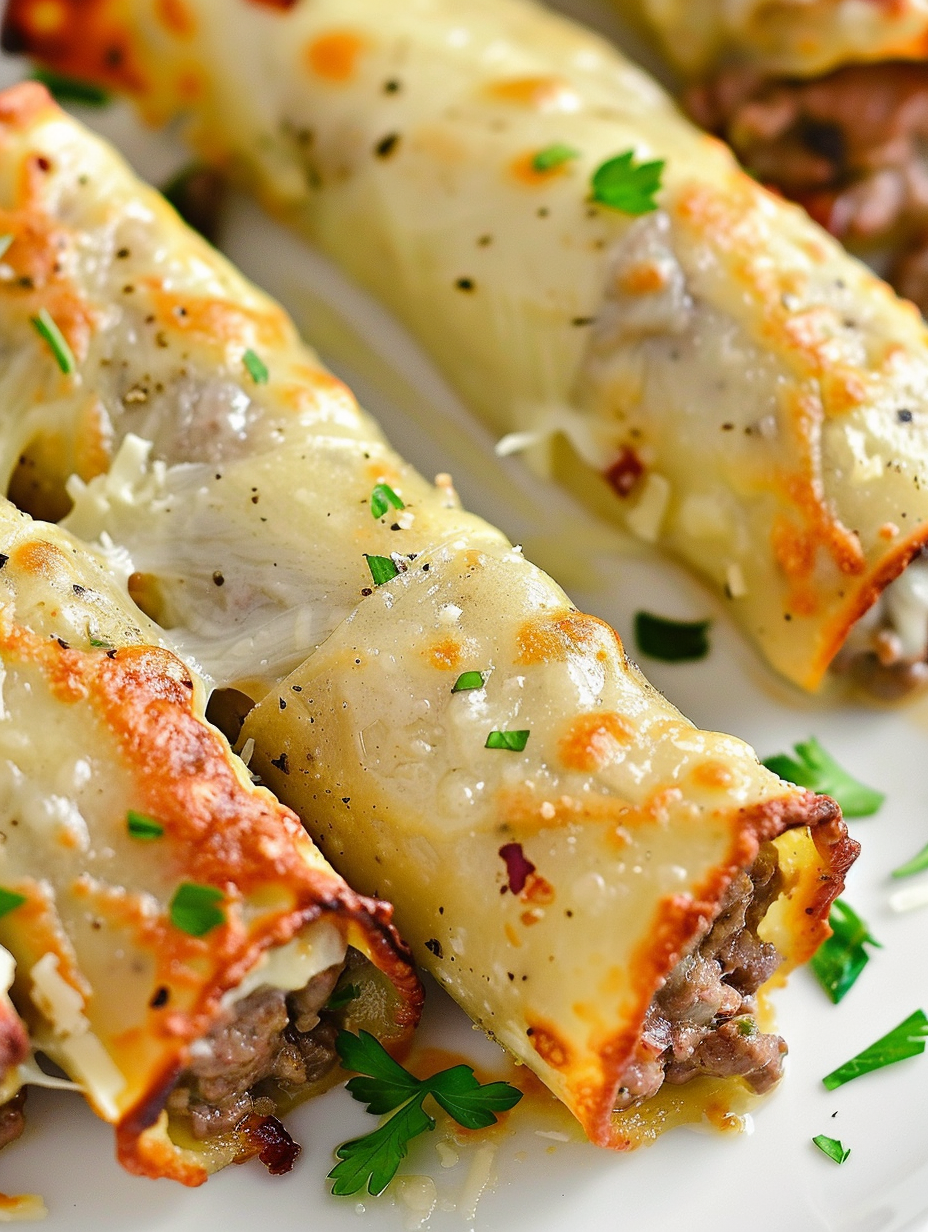
This recipe is my go-to when I want the flavors of a classic Philly cheesesteak without the bread. I first developed these roll ups on a busy weeknight when I was craving the charred sweetness of peppers and onions, melted Monterey Jack, and seasoned beef, but I was firmly committed to keeping things low carb. The result surprised me: a portable, crunchy cheese shell that crisps like lace in the oven and holds a rich, creamy filling. It quickly became a party favorite and a weeknight lifesaver.
I remember serving these at a small gathering and watching people hesitate at first because they look almost too good to be keto. One guest, a longtime carb lover, took a bite, closed their eyes, and said, "I could eat these instead of a sandwich every day." That memory sealed them as a regular on my menu. Between the creamy, slightly tangy cream cheese binder and the nutty Monterey Jack, the texture contrast—crispy exterior and tender, juicy interior—keeps you reaching for another.
Why You'll Love This Recipe
- Ready in about 25 minutes from start to finish, perfect for quick appetizers, after-school snacks, or last-minute guests.
- Only 2 grams net carbs per serving, making it a reliable low-carb option that still feels indulgent and satisfying.
- Uses pantry-friendly components like shredded cheese and ground beef — no specialty low-carb wraps needed.
- Make-ahead friendly: prepare the filling in advance and form the cheese shells just before baking for maximum crispness.
- Crowd-pleasing flavor inspired by the Philly classic with sautéed peppers and onions plus a creamy, seasoned filling.
- High-protein and gluten-free without sacrificing texture or that melty, cheesy appeal.
In my kitchen this dish has become shorthand for easy entertaining. I often double the filling and freeze half for quick reheats, and the family always requests them on game day. There is something inherently celebratory about a lacey cheese shell that holds warm, peppery meat — it feels like a small culinary triumph every time.
Ingredients
- Monterey Jack cheese: 2 cups shredded (about 8 ounces). Look for a block you shred yourself for the best melt and lace texture. Pre-shredded cheese often contains anti-caking agents that can affect browning.
- Ground beef: 16 ounces (1 pound). I use 80/20 for a good balance of flavor and moisture; leaner beef works but may be drier, so add a touch of olive oil when cooking if using 90/10 or leaner.
- Onion: 1/2 medium, thinly sliced. Sweet or yellow onion provides a gentle sweetness when sautéed; slice thin so it softens quickly without needing long cooking times.
- Bell pepper: 1, thinly sliced. Use green for a classic flavor or red for a sweeter note; slice into thin strips so they cook evenly with the onion.
- Worcestershire sauce: 1 teaspoon. Adds savory umami and deepens the meat flavor — do not skip.
- Cream cheese: 4 ounces, softened. Full fat gives the creamiest texture and helps bind the filling so it holds inside the cheese shell.
- Salt and pepper: To taste. I recommend starting with 1/2 teaspoon salt and 1/4 teaspoon black pepper for the filling, then adjust after tasting.
Instructions
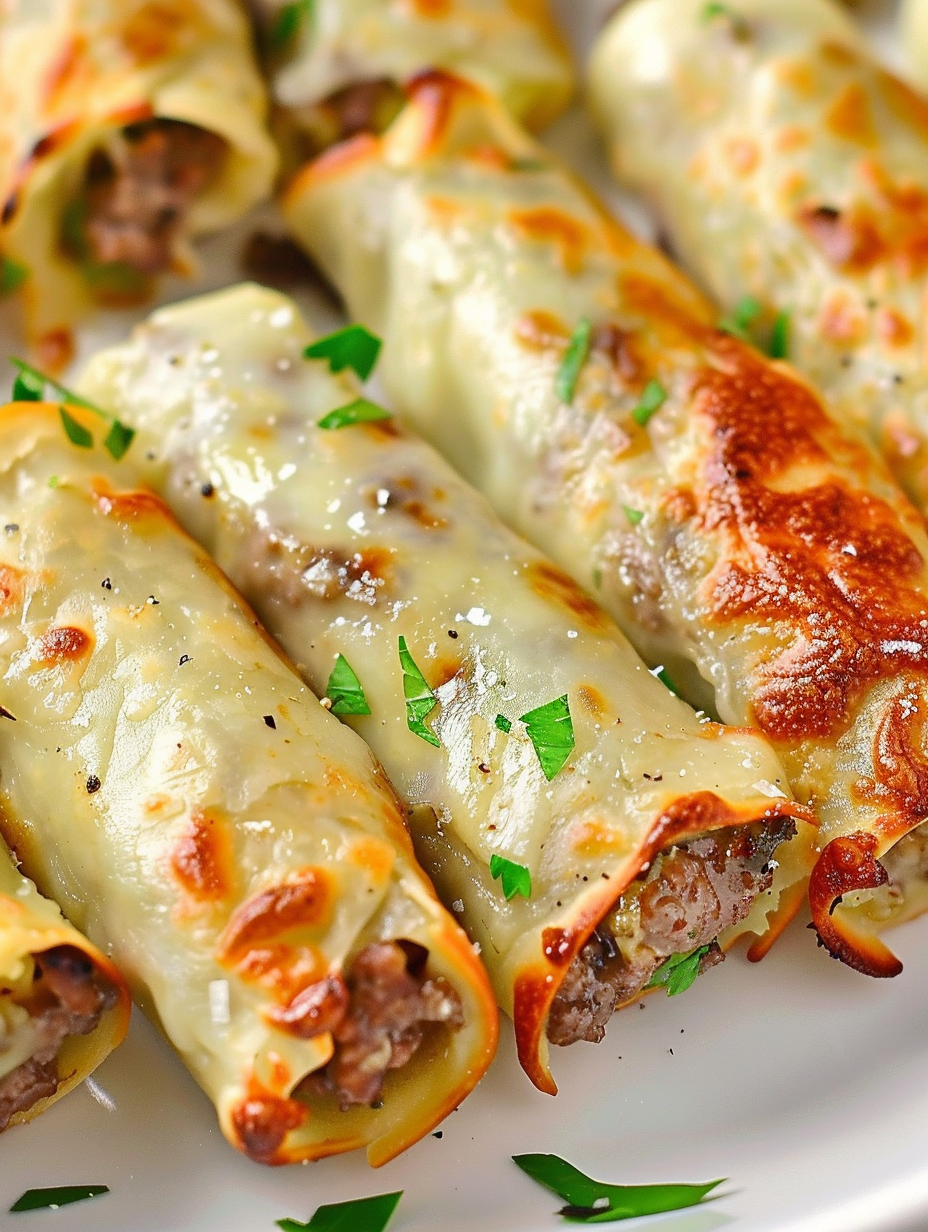
Preheat the oven: Set the oven to 350 degrees Fahrenheit and line a large baking sheet with parchment paper. Preheating ensures the cheese melts evenly and begins to lace at the same time you finish the filling. Sauté the vegetables and beef: In a skillet over medium-high heat, add the ground beef, sliced onion, and sliced pepper. Cook, breaking the beef apart, until the vegetables are softened and the meat is fully browned, about 6 to 8 minutes. Drain any excess grease to prevent a soggy filling. Season and finish the filling: Return the skillet to low heat. Stir in the Worcestershire sauce and the softened cream cheese until the cream cheese melts and binds the mixture into a creamy filling. Season with salt and pepper to taste. Keep warm off the heat while you prepare cheese shells. Form the cheese shells: Divide the shredded Monterey Jack into 8 even mounds on the prepared parchment, spacing them well apart. Flatten each mound slightly into a 3 to 4 inch circle. Bake for 8 to 10 minutes, watching for the edges to turn golden and the cheese to develop a lacy appearance. Do not overbake or it will become brittle. Assemble the roll ups: Remove the baking sheet and let the cheese cool for 1 to 2 minutes until still pliable but not piping hot. Spoon an even layer of the warm filling down the center of each cheese circle and gently roll the cheese around the filling, sealing the seam. Allow rolls to cool on the sheet until the cheese hardens into a wrap, about 5 minutes. Serve: Serve warm or at room temperature. These are best eaten the day they are made for the contrast of the crisp shell and creamy interior.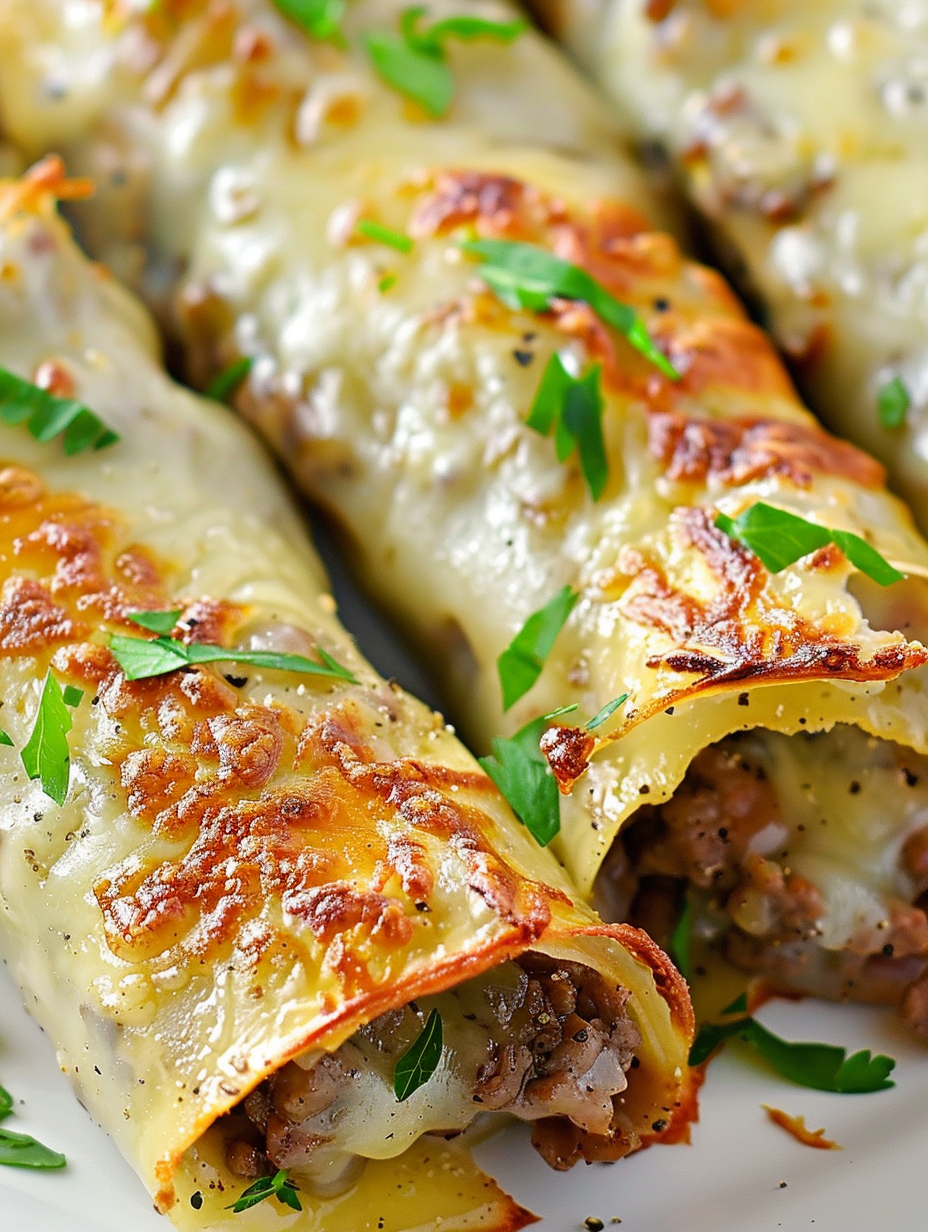
You Must Know
- Net carbs are only 2 grams per roll up, making this a strong option for low-carb or ketogenic eating plans.
- Store rolls in an airtight container in the refrigerator for up to 3 days; crispness will soften but reheating on a warm pan restores some texture.
- Freeze filling separately for up to 3 months; thaw in the refrigerator overnight before assembly and baking the cheese shells fresh.
- This recipe is high in protein and fat, which helps keep you satiated between meals.
- Use parchment paper to prevent cheese from sticking and to ensure easy removal of delicate lacey shells.
My favorite part of these roll ups is how versatile they are. I often halve the recipe for a quick snack, or double it for parties. Once I learned to bake the cheese until it just begins to brown at the edges, the texture transformed from floppy to delightfully crunchy while still flexible enough to roll without cracking.
Storage Tips
Store assembled roll ups in a single layer in an airtight container in the refrigerator for up to three days. To maintain the best texture, place a sheet of parchment between layers so the cheese shells do not stick together. If you need to refrigerate longer, freeze the filling separately in a freezer-safe container for up to three months, then bake fresh cheese shells and assemble when ready. Reheat refrigerated rolls briefly in a skillet over low heat for one to two minutes per side or under a broiler for a quick re-crisping, watching closely to avoid burning.
Ingredient Substitutions
If you prefer a different cheese profile, provolone or mozzarella can replace Monterey Jack, though mozzarella will produce a slightly chewier lace. For leaner protein, swap the ground beef for ground turkey or chicken and add a teaspoon of olive oil to the skillet to keep the filling moist. To make a spicier version, fold in a quarter teaspoon cayenne or use pepper jack instead of Monterey Jack. For dairy-sensitive eaters, this concept can be adapted using thin kale or collard leaves as wraps, though the distinct lacey crunch will be lost.
Serving Suggestions
These roll ups are perfect as an appetizer, game-day finger food, or part of a low-carb brunch spread. Serve with a simple dipping sauce such as sugar-free ketchup, a mustard aioli, or a garlic-herb cream cheese dip. Garnish with chopped parsley or chives for color. Pair with a crisp green salad or roasted vegetables to balance richness for a light dinner. For parties, arrange them on a platter with toothpicks and small bowls of dipping sauces for easy self-service.
Seasonal Adaptations
In summer, swap the bell pepper for charred sweet peppers or even quick-grilled mushrooms for an earthier note. In winter, caramelize the onion slowly for deeper sweetness and add a splash of balsamic vinegar to the filling. Around the holidays I sometimes mix in chopped leftover roast beef and a few chopped roasted chestnuts for texture. Small changes in the produce and seasoning can shift the profile without altering the quick assembly method.
Meal Prep Tips
For easy weekday meals, prepare the filling on Sunday and portion it into individual containers. Bake fresh cheese shells each morning or before serving to preserve crispness. Alternatively, make a large batch of filling and freeze it in 8-portion packs; when you need a quick meal, thaw a portion, warm it in a skillet, and roll into freshly baked cheese shells. Use silicone molds to shape cheese circles consistently so assembly is faster during busy times.
Success Stories
Readers have written to tell me they serve these at baby showers, tailgates, and low-carb potlucks with rave reviews. One reader replaced the beef with shredded pork and said the rolls vanished in minutes. Another shared that making mini versions turned them into popular hors d'oeuvres at cocktail parties. I love hearing how small adjustments—extra spice, different cheeses, or swapping proteins—make this idea feel entirely new.
These roll ups are proof that low-carb dishes can be joyful and satisfying. Whether you make them for a crowd or as a quick single-portion treat, they deliver big flavor with minimal fuss. Try them once and I suspect they will become one of those recipes you keep returning to.
Pro Tips
Shred Monterey Jack from a block for better melting and browning; pre-shredded cheese can contain anti-caking agents.
Drain excess beef grease after browning to prevent a soggy filling that will leak into the cheese shell.
Let baked cheese cool 1 to 2 minutes until pliable before adding filling to avoid breaking the shell.
This nourishing keto philly cheesesteak roll ups recipe is sure to be a staple in your kitchen. Enjoy every moist, high protein slice — it is perfect for breakfast or as a wholesome snack any time.
FAQs about Recipes
Can I make these ahead of time?
Yes. To keep the shells crisp, store filling separately and bake the cheese shells just before serving. If already assembled, reheat briefly in a skillet to restore some crunch.
How do I know when the cheese shells are done?
Use a 350 degree Fahrenheit oven and watch for the edges to brown and the cheese to look lacy. Remove when just golden to avoid becoming brittle.
Tags
Keto Philly Cheesesteak Roll Ups
This Keto Philly Cheesesteak Roll Ups recipe makes perfectly juicy, tender, and flavorful steak every time! Serve with potatoes and a side salad for an unforgettable dinner in under 30 minutes.
Ingredients
Cheese
Filling
Instructions
Preheat and prepare
Preheat the oven to 350 degrees Fahrenheit and line a large baking sheet with parchment paper. This ensures even melting of the cheese and easy removal of shells.
Cook beef and vegetables
In a skillet over medium-high heat, sauté ground beef with sliced onion and bell pepper until vegetables are softened and meat is browned, about 6 to 8 minutes. Drain excess grease.
Add seasoning and cream cheese
Return pan to low heat and stir in 1 teaspoon Worcestershire sauce and 4 ounces softened cream cheese until fully combined and creamy. Season with salt and pepper to taste.
Form cheese circles
Divide 2 cups shredded Monterey Jack into 8 even circles on the parchment-lined sheet, flattening slightly into 3 to 4 inch discs. Space well apart to allow spreading.
Bake until lacy
Bake the cheese discs for 8 to 10 minutes until edges brown and a lace-like texture forms. Remove and let cool for 1 to 2 minutes until pliable but not too hot to handle.
Assemble roll ups
Spoon a layer of warm filling along the center of each cheese circle and gently roll the cheese around the filling. Allow to cool until the shell firms into a wrap, about 5 minutes.
Serve
Serve warm or at room temperature with preferred dipping sauces. Store leftovers in the refrigerator up to 3 days, or freeze filling separately for up to 3 months.
Last Step: Please leave a rating and comment letting us know how you liked this recipe! This helps our business to thrive and continue providing free, high-quality recipes for you.
Nutrition
Did You Make This?
Leave a comment & rating below or tag
@yummique on social media!
Categories:
You might also like...

Cheesy Zucchini Rollatini Bake
Tender grilled zucchini wraps basil ricotta, bathed in marinara and mozzarella, baking into a bubbly, lighter Italian comfort dinner ready in 30 minutes.

Air Fryer Zucchini and Squash
Crisp-edged, tender-in-the-middle zucchini and yellow squash made in 15 minutes with pantry spices. A vibrant, veggie-forward side everyone devours.

Chicken Meatball Parmesan
Tender chicken meatballs simmered in rich marinara and blanketed with melty mozzarella, bringing all the flavors of chicken parm in cozy, bite-sized form.
Did You Make This?
Leave a comment & rating below or tag @yummique on social media!
Rate This Recipe
Share This Recipe
Enjoyed this recipe? Share it with friends and family, and don't forget to leave a review!
Comments (1)
This recipe looks amazing! Can't wait to try it.
Comments are stored locally in your browser. Server comments are displayed alongside your local comments.

Hi, I'm Amira!
What's Popular

30-Minute Meals!
Join to receive our email series which contains a round-up of some of our quick and easy family favorite recipes.