
>>

Crispy, golden-brown cheese curds with a light, airy batter—just like the fair but made at home. Ready to fry in minutes and impossible to resist.
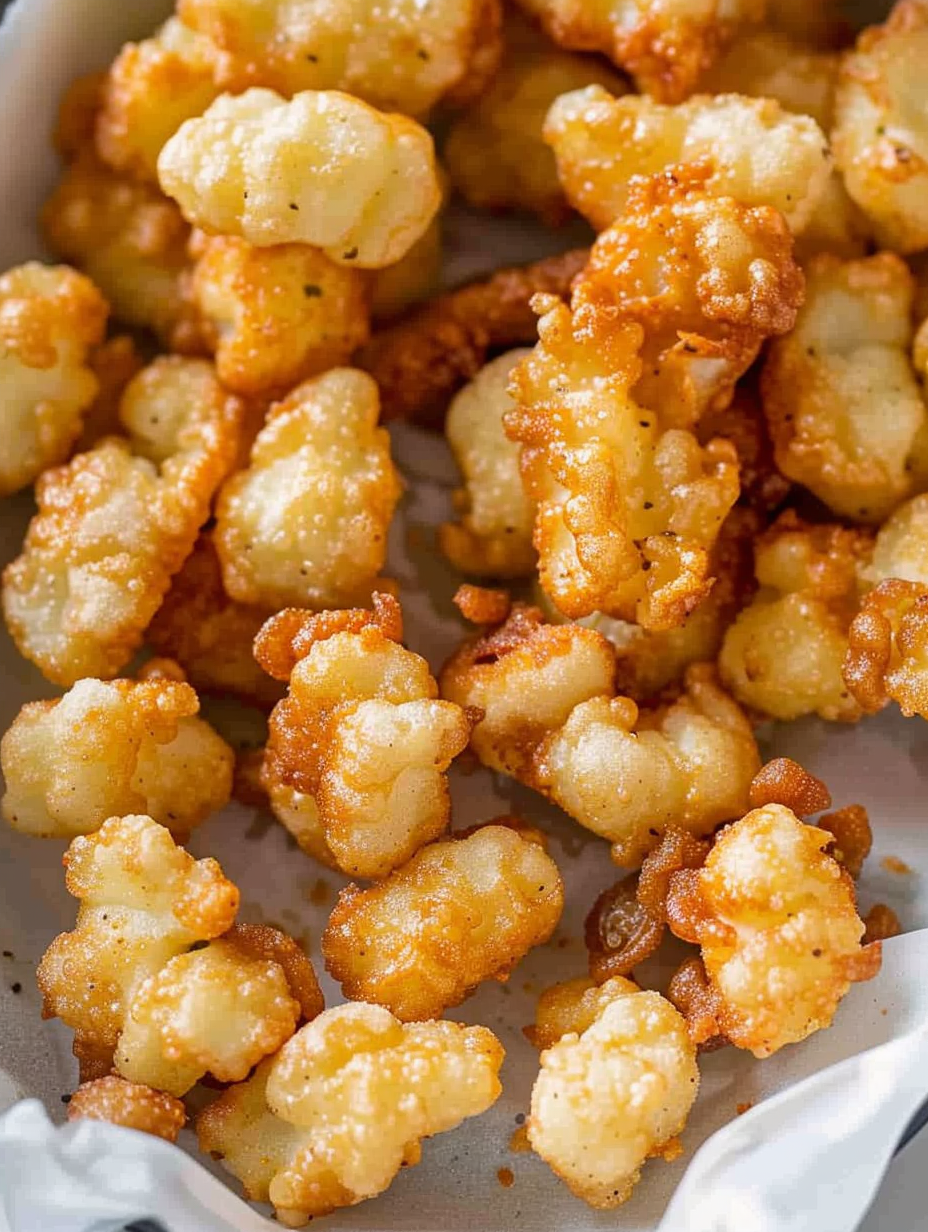
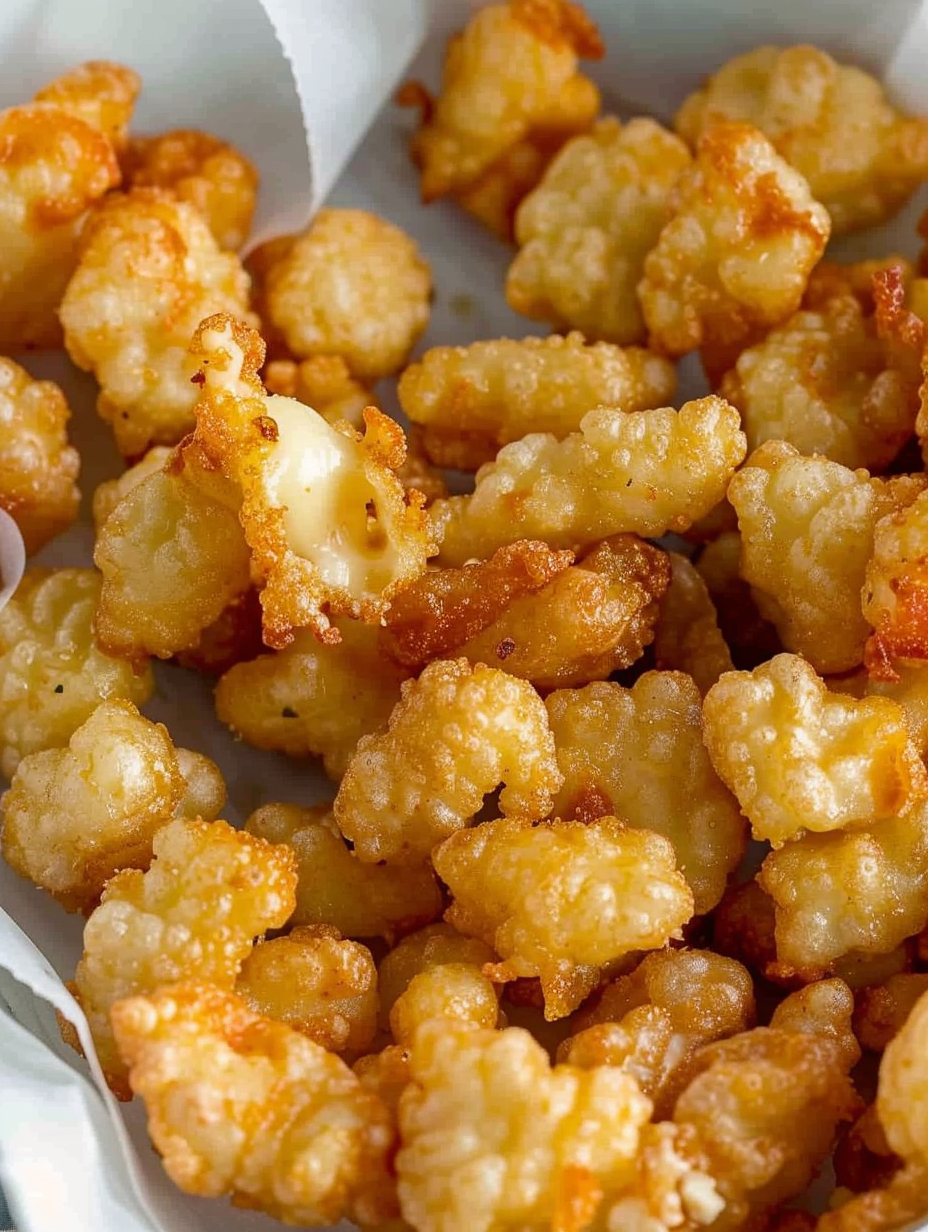
This batch of fried cheese curds is the sort of comfort food that instantly transports me to summer evenings and county fairs. I first learned this technique on a hectic weekend when I wanted the fair experience without the lines; the batter came together in minutes, and the honest-to-goodness sizzle of curds hitting hot oil filled my kitchen with a memory-making aroma. The contrast of the ultra-crispy shell and the warm, squeaky center is exactly what makes these irresistible—each bite gives you a satisfying crunch followed by gooey, salty cheese that stretches in the best way. I still remember my teenage nephew sneaking back to the pan for a third helping while pretending he was “just testing the oil.”
What makes this preparation special is its simplicity and timing. A quick toss in flour, a short freeze to set a dry coating, and a bubbly batter made with club soda result in curds that hold their shape yet deliver that light fair-style crust. There’s no need for elaborate dredging stations or complicated tempura batters—this version focuses on technique: room-temperature curds, an ultra-cold rest, and frying at a steady 360°F. It’s fast, dependable, and crowd-pleasing—perfect for game nights, potlucks, or an indulgent appetizer at home.
In my kitchen the first time I made these, I was surprised at how quickly the batter came together and how reliably the curds held their shape. Family members who usually avoid deep-frying confessed they were converted, and we started pairing the curds with everything from classic ranch to spicy sriracha mayo—each sauce bringing a new personality to the same crunchy bite.

What I love most is the element of surprise when guests break into a curd and find a warm, squeaky center. The first time I made these for a book club, someone asked if I’d secretly hired a fair vendor. It’s that convincing. The trickiest part is timing—plan to fry right before serving so everyone enjoys the peak texture.
If you plan to prep ahead, coat the curds in flour and freeze them on a tray as instructed; transfer frozen curds to a freezer bag for up to 1 month. Do not fry straight from a sealed bag—space them on a tray so they don’t stick. Once fried, keep servings on a wire rack in a warm oven (200°F) for up to 20 minutes to maintain crispness; refrigeration will soften the crust and alter texture. Reheating in a 400°F oven for 5–7 minutes can revive some crunch, but freshly fried is best.
For a gluten-free option, substitute a 1:1 gluten-free flour blend and add 1/4 teaspoon xanthan gum to mimic the structure. For a lighter crust, swap half the flour for cornstarch (maintain same volume). If you prefer a different effervescence for the batter, chilled beer works well and adds depth—use a light lager and reduce salt slightly. Use a low-sodium cheese curd if you want a milder final flavor.
Plate the curds on a simple wooden board with small bowls of dipping sauces: classic ranch, buttermilk aioli, smoky barbecue sauce, and marinara are all winners. Garnish with chopped fresh chives or parsley and a lemon wedge to brighten the rich bite. They pair wonderfully with cold beer, sparkling lemonade, or seasonal slaws for a complete appetizer spread.
Cheese curds are an iconic Midwestern specialty, especially in Wisconsin where fresh curds are beloved for their unique squeak and mild flavor. Deep-frying curds is a festival and fair tradition—vendors perfected a quick, light batter that crisps up while keeping the curd whole. This home approach honors that heritage while making the technique approachable for any kitchen.
In spring and summer, serve with herb-forward sauces like basil pesto mayo. In fall, try a maple-mustard dip or add a pinch of smoked paprika to the batter for warmth. For winter entertaining, pair curds with cranberry mustard and roasted root vegetables to contrast the richness with tart or earthy accompaniments.
Do as much ahead as possible: toss curds in flour and freeze for up to a month, pre-mix dry batter ingredients (store in a jar), and chill club soda. On the day, whisk batter, heat oil, and fry in waves. Use a heavy pot and an instant-read thermometer to keep oil steady. For portioning, place six curds per small paper cone or ramekin for easy passing at parties.
Making these at home is one of those small kitchen triumphs that rewards good technique and timing. Share them hot, watch faces light up, and don’t forget a napkin or two—these bites are gloriously messy in the best possible way.
Toss curds lightly in flour before freezing to help the batter adhere and reduce oil leakage.
Maintain oil between 350–365°F and fry in small batches to avoid temperature drops.
Use cold club soda for a lighter batter; avoid over-mixing to keep the batter airy.
Drain on a wire rack instead of paper towels to keep the crust crisp all around.
This nourishing fried cheese curds recipe is sure to be a staple in your kitchen. Enjoy every moist, high protein slice — it is perfect for breakfast or as a wholesome snack any time.
Yes—coat and freeze the curds for up to 1 month; fry them straight from the freezer for best results.
Reheat briefly in a 400°F oven for 5–7 minutes to revive some crispness, though fresh is best.
This Fried Cheese Curds recipe makes perfectly juicy, tender, and flavorful steak every time! Serve with potatoes and a side salad for an unforgettable dinner in under 30 minutes.
Lightly toss cheese curds in about 1/4 cup flour to give each piece a dry coating. Let them sit at room temperature until they start to sweat slightly so the batter adheres better.
Arrange the floured curds on a parchment-lined baking sheet in a single layer and freeze for 60 minutes. This firms the surface and helps the curds keep their shape when fried.
Whisk remaining 3/4 cup flour with 1 1/2 teaspoons baking powder and 1/2 teaspoon kosher salt. Slowly whisk in 1 cup cold club soda until smooth; batter should be thick but pourable.
Fill a heavy pot with oil to about 3 inches deep and heat to 360°F. Use a thermometer to monitor and keep the temperature steady while frying in batches.
Dip a few frozen curds into the batter, let excess drip off, then carefully lower into the hot oil. Fry for about 1 minute, turning once so they brown evenly to a deep golden color.
Transfer fried curds to a wire rack or paper towel-lined tray to drain. Season lightly with kosher salt and serve immediately with preferred dipping sauces.
Last Step: Please leave a rating and comment letting us know how you liked this recipe! This helps our business to thrive and continue providing free, high-quality recipes for you.
Leave a comment & rating below or tag
@yummique on social media!

Tender grilled zucchini wraps basil ricotta, bathed in marinara and mozzarella, baking into a bubbly, lighter Italian comfort dinner ready in 30 minutes.

Crisp-edged, tender-in-the-middle zucchini and yellow squash made in 15 minutes with pantry spices. A vibrant, veggie-forward side everyone devours.

Tender chicken meatballs simmered in rich marinara and blanketed with melty mozzarella, bringing all the flavors of chicken parm in cozy, bite-sized form.
Leave a comment & rating below or tag @yummique on social media!
Enjoyed this recipe? Share it with friends and family, and don't forget to leave a review!
This recipe looks amazing! Can't wait to try it.
Comments are stored locally in your browser. Server comments are displayed alongside your local comments.

Join to receive our email series which contains a round-up of some of our quick and easy family favorite recipes.
