
>>

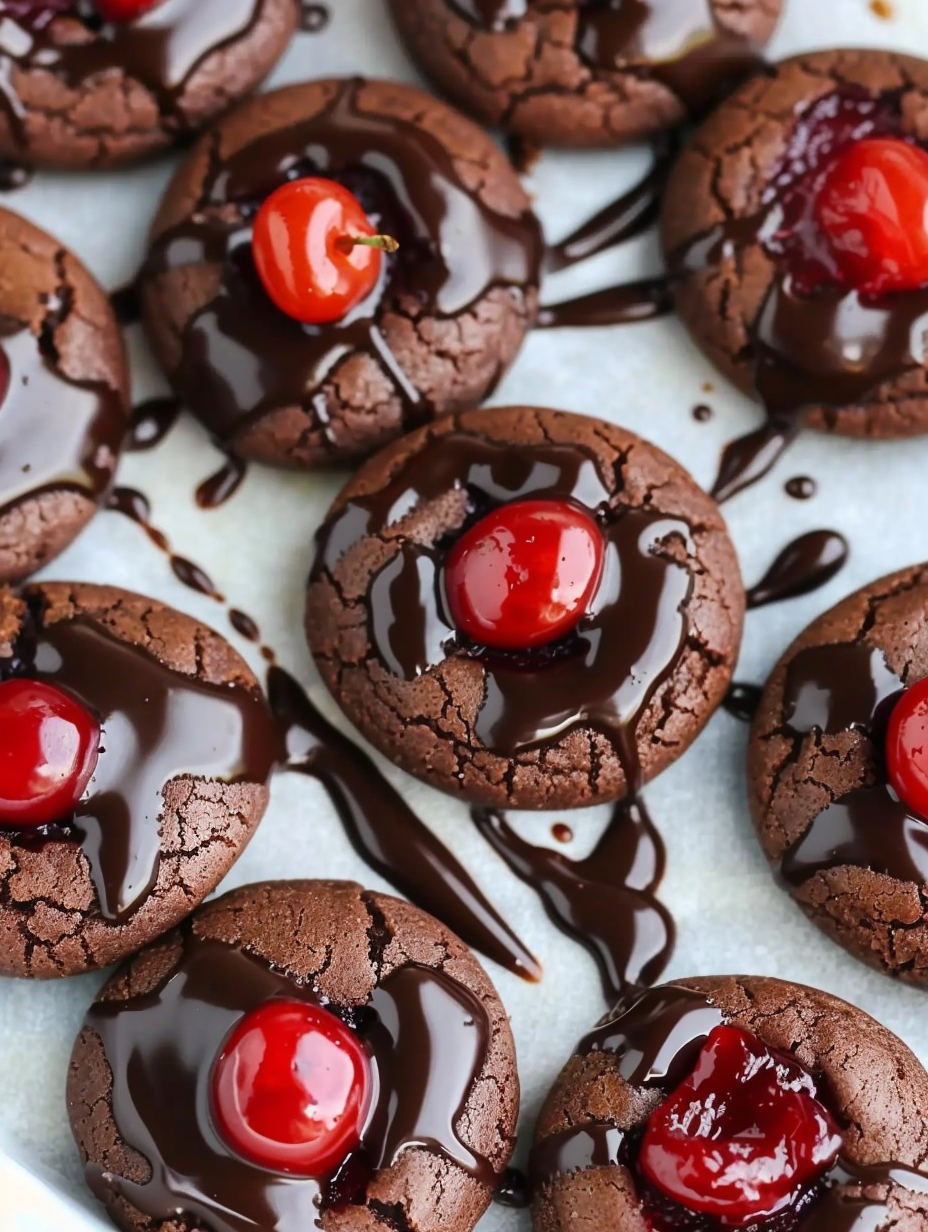
Soft, chewy chocolate cookies with a glossy cherry-filled center and a silky chocolate glaze — a nostalgic treat that’s easy to make and impossible to resist.

This recipe for Chocolate Cherry Thumbprint Cookies has been my go-to for holiday trays, potlucks, and any afternoon when I want something both comforting and a little bit elegant. I first discovered this combination when a friend brought similar cookies to a winter cookie swap; the contrast of tender chocolate dough, tart-sweet cherries, and a smooth chocolate glaze was so memorable that I recreated it again and again until the texture and flavor were exactly where I wanted them. The dough stays soft and yields a chewy bite while holding a little well in the center for the cherry filling. The final glaze sets glossy, adding a refined finish that makes these cookies feel special even when they are made from pantry staples.
These cookies are the kind I bake when I want an approachable project that still impresses friends. They take less than half an hour from start to finish, and the steps are forgiving: the dough is simple to mix, the thumbprints are easy to make, and the cherry filling brings bright flavor without extra prep. When I bake a batch, neighbors drop by, plates disappear fast, and even people who say they do not love chocolate cookies take seconds. If you are looking for an approachable sweet that balances soft chewiness, chocolate depth, and a burst of fruit, this recipe will feel like a winning discovery in your own kitchen.
On my first try I learned a small trick that became a habit: pressing the thumb twice, making a small X, creates a shallow pocket that keeps the fruit from sinking into the dough during baking. Family members always comment on the glossy chocolate glaze — it looks fancy, but it is fast to make. Over the years I have arrived at the exact balance of cherry quantity per cookie and a glaze that cools to a thin, shiny finish rather than a hard shell.
My favorite part of this recipe is how reliably it brings people together. At holiday gatherings these disappear first, and I have a habit of setting aside a few for myself because the contrast of melting chocolate and bright cherries is a small, perfect indulgence. Over the years I have tweaked the cherry quantity and pressing technique until the cookies bake evenly and each bite carries fruit, chocolate, and a tender base.

To maintain texture and flavor, store baked cookies in an airtight container at room temperature for up to 48 hours. If you need longer storage, place them in a single layer separated by parchment in a freezer-safe container and freeze for up to three months. Thaw overnight in the refrigerator or at room temperature for an hour before serving. If the glaze loses a bit of shine after freezing, allow cookies to come to room temperature; a quick gentle reheat in a warm oven for 3 to 4 minutes will revive the gloss without melting the cherries.
If you prefer a slightly different chocolate note, swap semi-sweet chips for dark chocolate chips (60 to 70 percent cacao) in the glaze for a less sweet finish. To reduce sugar slightly, replace half the granulated sugar with a sugar substitute that measures cup-for-cup, but note this may alter spread and texture. For a dairy-free version, use vegan butter and dairy-free chocolate chips and substitute plant-based milk in the glaze. Do not replace the cherry pie filling with fresh cherries unless you macerate and thicken them; canned filling provides the right syrupy consistency.
Serve these cookies on a dessert platter with a dusting of powdered sugar or alongside a scoop of vanilla ice cream for a contrast of temperature and texture. They pair beautifully with coffee or a cup of black tea and make an elegant finish to a dinner party when plated two to a small dessert fork. For holiday presentation, arrange cookies in alternating rows with nut clusters or shortbread to create a visually appealing assortment.
Thumbprint-style cookies trace roots to European baking traditions where small wells in dough were filled with jams or preserves. This chocolate-cherry adaptation embraces classic jam thumbprints while adding cocoa and a chocolate glaze for American holiday flair. The cherry pie filling used here nods to pie tradition, creating a crossover that is festive and familiar, combining two beloved dessert elements: chocolate cookies and fruit-filled pastries.
For efficient prep, portion dough into rounded tablespoon balls and freeze them on a tray for an hour. Transfer frozen balls to a zip-top bag; when you need fresh cookies, bake directly from frozen, adding a minute or two to the bake time. Alternatively, bake the full batch and freeze baked cookies in layers separated by parchment. Pack finished cookies in small boxes for gifting, using tissue paper and a ribbon for a professional touch.
These cookies are a flexible, crowd-pleasing treat that reward small techniques like the double-thumb press and a finishing glaze. Try baking a double batch for company — they disappear fast and are endlessly adaptable to your pantry and preferences.
Enjoy the balance of chocolate, fruit, and soft chew every time you bake them, and feel free to make them your own with different chocolates or fillings. Happy baking!
Press the thumb twice in an X to create a shallow pocket that keeps cherry filling from sinking during baking.
Spoon roughly three cherries into each cookie for ideal fruit-to-cookie balance.
Use room temperature butter and egg for consistent dough texture and easier mixing.
If glaze thickens while cooling, rewarm gently over low heat while stirring until glossy again.
This nourishing chocolate cherry thumbprint cookies recipe is sure to be a staple in your kitchen. Enjoy every moist, high protein slice — it is perfect for breakfast or as a wholesome snack any time.
Yes. You can freeze baked cookies for up to three months in an airtight container. Thaw at room temperature before serving.
Room temperature butter blends more evenly and helps create a tender, chewy texture.
This Chocolate Cherry Thumbprint Cookies recipe makes perfectly juicy, tender, and flavorful steak every time! Serve with potatoes and a side salad for an unforgettable dinner in under 30 minutes.
Whisk together flour, baking soda, baking powder, salt, and cocoa powder in a medium bowl until evenly combined.
Beat room temperature butter with granulated and brown sugar until light and fluffy. Add egg and vanilla and mix until incorporated.
Slowly mix dry ingredients into the wet mixture on low speed until just combined and no flour streaks remain. Dough should be soft and scoopable.
Scoop rounded tablespoons of dough, roll into balls, and place on parchment-lined sheet. Press a thumb into the center, then press again crossing the first to create an X-shaped pocket.
Spoon roughly three cherries from the pie filling into each pocket. Bake at 350 degrees Fahrenheit for 9 to 10 minutes until edges are set and centers are slightly soft.
Warm chocolate chips, butter, corn syrup, and milk in a small saucepan over low heat, stirring until glossy. Spoon warm glaze over cherries and allow to set for 20 to 30 minutes.
Last Step: Please leave a rating and comment letting us know how you liked this recipe! This helps our business to thrive and continue providing free, high-quality recipes for you.
Leave a comment & rating below or tag
@yummique on social media!

Tender grilled zucchini wraps basil ricotta, bathed in marinara and mozzarella, baking into a bubbly, lighter Italian comfort dinner ready in 30 minutes.

Crisp-edged, tender-in-the-middle zucchini and yellow squash made in 15 minutes with pantry spices. A vibrant, veggie-forward side everyone devours.

Tender chicken meatballs simmered in rich marinara and blanketed with melty mozzarella, bringing all the flavors of chicken parm in cozy, bite-sized form.
Leave a comment & rating below or tag @yummique on social media!
Enjoyed this recipe? Share it with friends and family, and don't forget to leave a review!
This recipe looks amazing! Can't wait to try it.
Comments are stored locally in your browser. Server comments are displayed alongside your local comments.

Join to receive our email series which contains a round-up of some of our quick and easy family favorite recipes.
