
>>

Ultra-moist chocolate cherry bars topped with a rich chocolate frosting—an easy potluck favorite that's ready in 30 minutes and yields 36 crowd-pleasing squares.
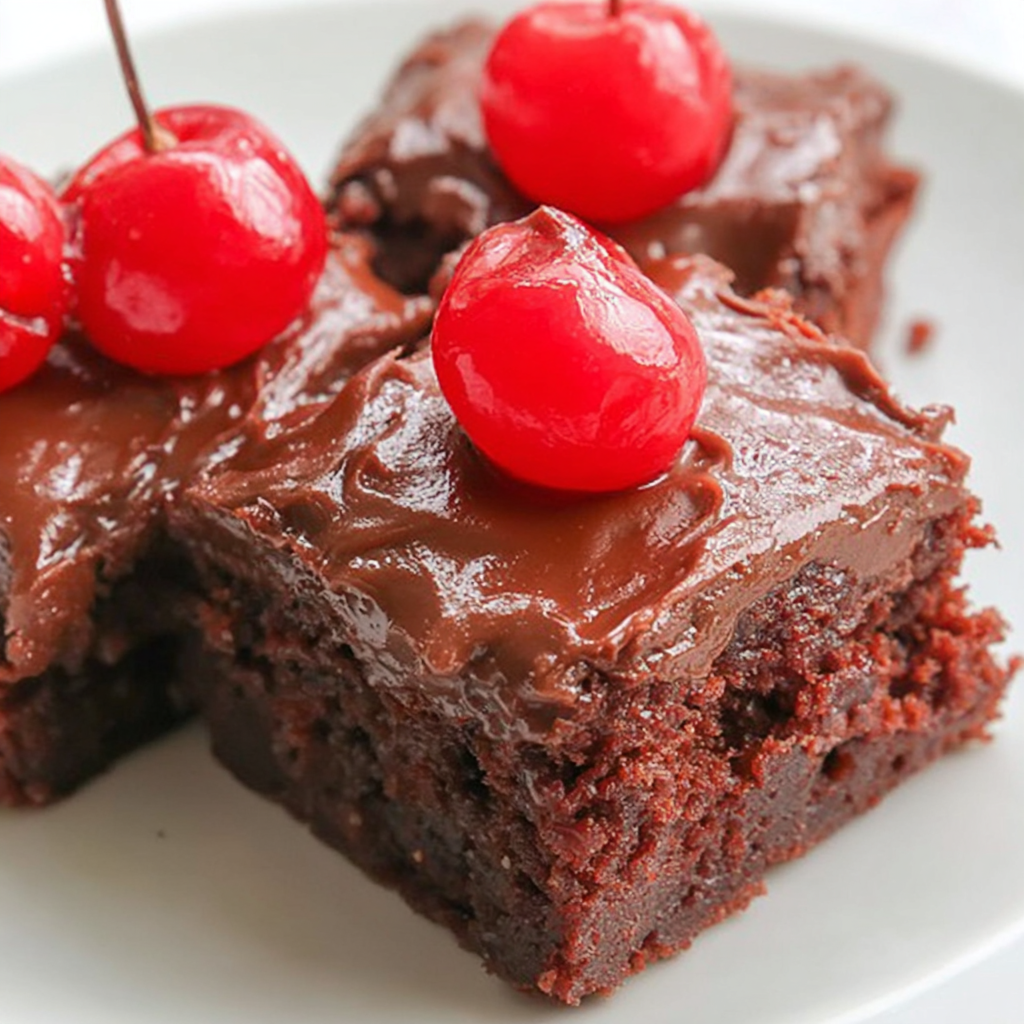
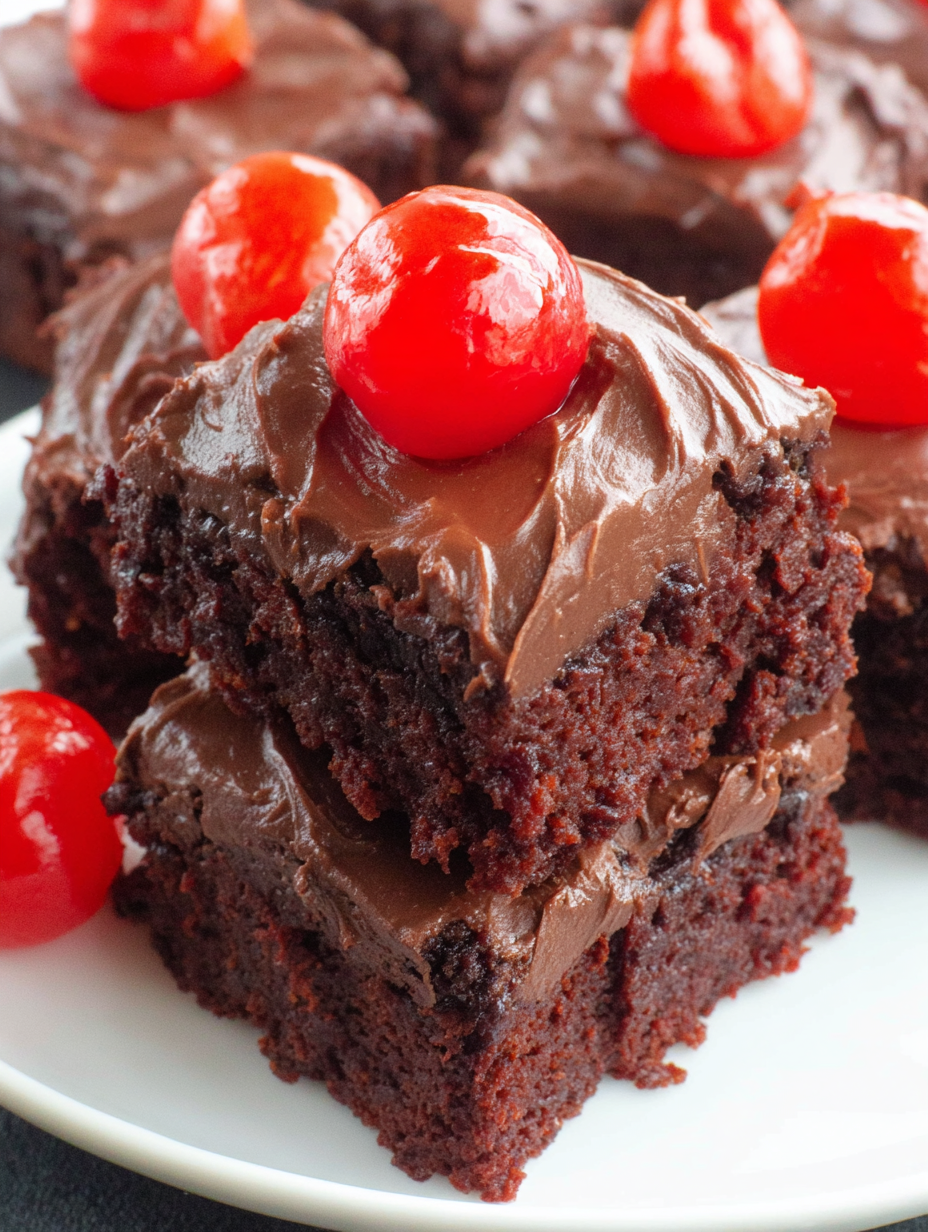
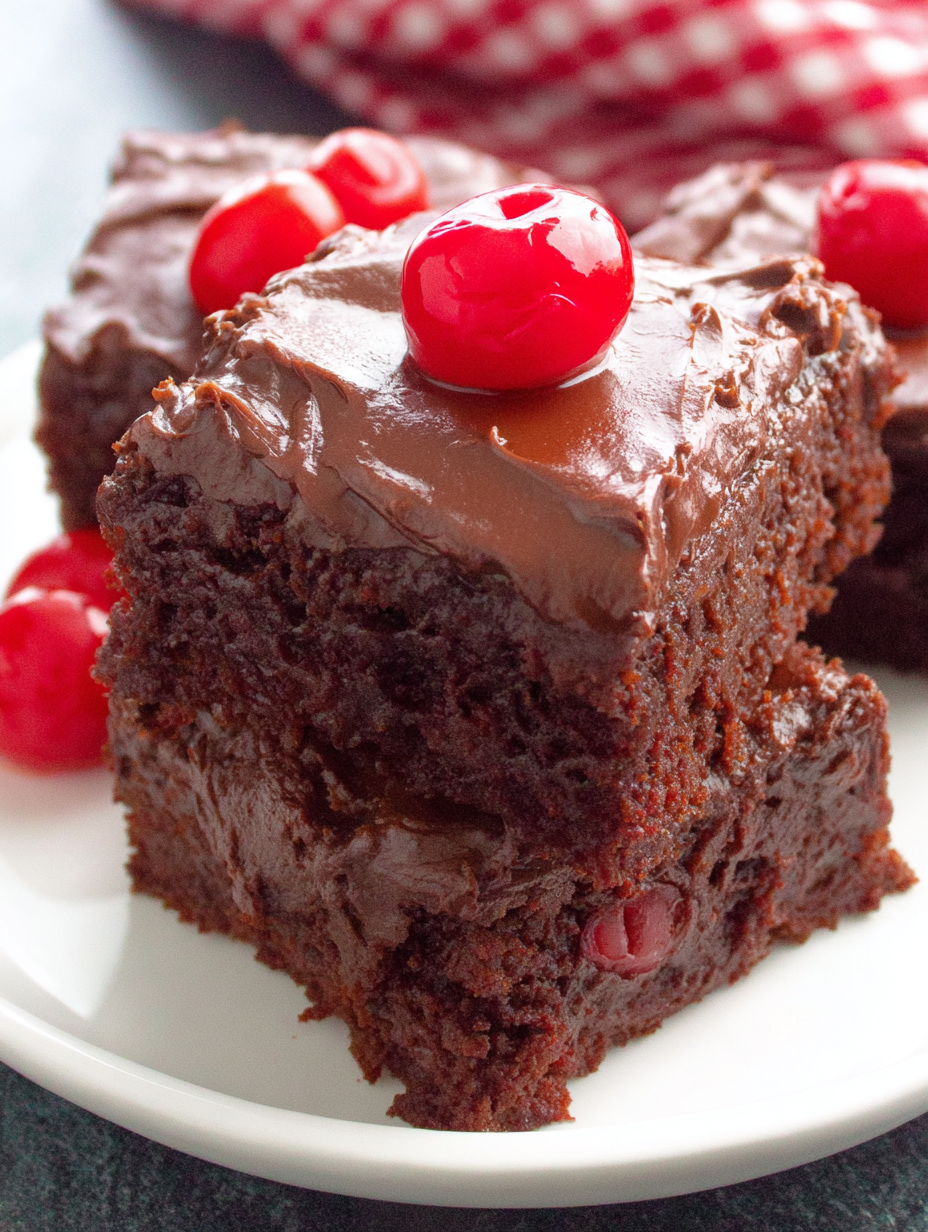
These Chocolate Cherry Bars have been a potluck superstar in my family for years. I first found the combination when I wanted something that felt special but could be made quickly from pantry staples. The moment I pulled the warm bars from the oven and spread the glossy chocolate frosting over them, I knew this was a keeper: the cake is tender and almost brownie-like, punctuated by pockets of bright cherry, while the frosting melts into a silky coating that makes every bite feel decadent.
I remember bringing a batch to a summer church picnic; they disappeared so fast that someone joked we should serve them in slices the size of a postage stamp so everyone could have one. They work brilliantly for bake sales, potlucks, or just an indulgent weeknight treat. The texture is surprisingly moist given how simple the method is—no measuring of flour or sugar—just a few folds, a single pan, and a short bake. If you love the chocolate-and-cherry pairing (think Black Forest flavors without the fuss), these bars will become one of your go-to desserts.
Personally, I love that the almond extract lifts the cherry flavor and plays so nicely with the semisweet chocolate. My sister said it tastes like a childhood bakery treat, and my husband calls it “dangerously good” because one bar almost always leads to two.
My favorite memory with these bars is cutting them warm and watching friends argue over the last square. They feel both nostalgic and elevated, a dessert that’s simple to scale but delivers on texture and flavor every time.
Store the bars in a single layer or separated by parchment in an airtight container. At room temperature they keep for 2–3 days; refrigeration extends shelf life to about a week but can firm the frosting. For freezing, cut into bars and arrange in a single layer on a baking sheet to flash-freeze for 1 hour, then stack with parchment between layers in a freezer-safe container for up to 3 months. Thaw in the fridge overnight or at room temperature for an hour before serving.
If you have dietary needs, there are easy swaps: use a gluten-free devil's food mix for a gluten-free option (check that other ingredients are certified GF), substitute dairy-free butter and non-dairy milk for a lactose-free version, or replace almond extract with vanilla if nut extracts are a concern. For a deeper chocolate layer, stir in 1/2 cup chopped dark chocolate to the batter or switch semisweet chips to bittersweet for the frosting.
Serve squares plain, dusted with powdered sugar, or with a dollop of whipped cream or vanilla ice cream for extra indulgence. They pair well with a cup of strong coffee or a scoop of cherry or chocolate gelato. For potlucks, arrange on a platter with decorative parchment and a garnish of maraschino cherries or grated chocolate for visual appeal.
The chocolate-cherry duo is a classic pairing in American and European desserts—think Black Forest cake—but these bars are an American interpretation that prioritizes speed and portability. Using cake mix as a base is a mid-20th-century convenience technique that home cooks embraced to create reliably moist desserts without complex baking chemistry.
In winter, use tart cherry filling and a dusting of orange zest to add warmth. For summer gatherings, switch to fresh cherry compote (reduced with sugar) and fold in slightly chopped fresh cherries. Around the holidays, add a pinch of cinnamon or nutmeg to the batter and top with chopped toasted almonds or pecans for crunch.
Prepare the bars up to 24 hours in advance and store chilled; the flavors meld and the texture firms slightly, which can make slicing cleaner. If transporting, slide the pan into a shallow cooler with ice packs around the base to keep the frosting intact. For individual meals, wrap bars in parchment and refrigerate; they thaw quickly for a grab-and-go dessert.
These bars are one of those dependable treats that make hosting easier and more delightful. Whether you’re bringing dessert to a party or simply craving a chocolate-and-cherry fix, this recipe delivers consistent results with minimal fuss—give it a try and make it your own.
If you want distinct cherry pockets, mix the batter by hand; a stand mixer will break the cherries more finely into the batter.
Boil the frosting base for a full minute while stirring constantly to ensure the sugar dissolves and the topping sets smoothly.
To slice clean bars, chill the pan until the frosting firms, then use a sharp knife warmed under hot water and wiped dry between cuts.
This nourishing chocolate cherry bars recipe is sure to be a staple in your kitchen. Enjoy every moist, high protein slice — it is perfect for breakfast or as a wholesome snack any time.
Yes—if you prefer a thicker bar, use a 13x9-inch baking dish and bake 25–35 minutes; for a thinner sheet, use a 15x10x1-inch pan and bake 20–30 minutes.
Store in an airtight container at room temperature for up to 3 days, refrigerate up to 1 week, or freeze for up to 3 months.
This Chocolate Cherry Bars recipe makes perfectly juicy, tender, and flavorful steak every time! Serve with potatoes and a side salad for an unforgettable dinner in under 30 minutes.
Preheat oven to 350°F. Grease and flour a 15x10x1-inch baking pan for thinner bars or a 13x9-inch baking dish for thicker bars. Lining with parchment makes removal and slicing easier.
In a large bowl combine the cake mix, entire can of cherry pie filling, 1 teaspoon almond extract, and the beaten eggs. Stir until evenly blended—mix by hand to preserve cherry chunks or use a stand mixer for a more uniform texture.
Pour batter into the prepared pan and smooth the top. Bake at 350°F until a toothpick comes out clean. Bake 20–30 minutes for a 15x10x1-inch pan or 25–35 minutes for a 13x9-inch dish. Look for edges pulling away and a springy top.
In a small saucepan combine 1 cup sugar, 1/3 cup milk, and 5 tablespoons butter. Bring to a boil and boil for 1 minute while stirring constantly. Remove from heat and stir in 1 cup chocolate chips and 1/4 teaspoon almond extract until smooth and glossy.
Pour the warm frosting over the hot bars and spread evenly. Cool at room temperature about 2 hours until set, or refrigerate for 45–60 minutes to speed the process. Cut into 36 squares and serve.
Last Step: Please leave a rating and comment letting us know how you liked this recipe! This helps our business to thrive and continue providing free, high-quality recipes for you.
Leave a comment & rating below or tag
@yummique on social media!

Tender grilled zucchini wraps basil ricotta, bathed in marinara and mozzarella, baking into a bubbly, lighter Italian comfort dinner ready in 30 minutes.

Crisp-edged, tender-in-the-middle zucchini and yellow squash made in 15 minutes with pantry spices. A vibrant, veggie-forward side everyone devours.

Tender chicken meatballs simmered in rich marinara and blanketed with melty mozzarella, bringing all the flavors of chicken parm in cozy, bite-sized form.
Leave a comment & rating below or tag @yummique on social media!
Enjoyed this recipe? Share it with friends and family, and don't forget to leave a review!
This recipe looks amazing! Can't wait to try it.
Comments are stored locally in your browser. Server comments are displayed alongside your local comments.

Join to receive our email series which contains a round-up of some of our quick and easy family favorite recipes.
