
Cherry Pie Bombs

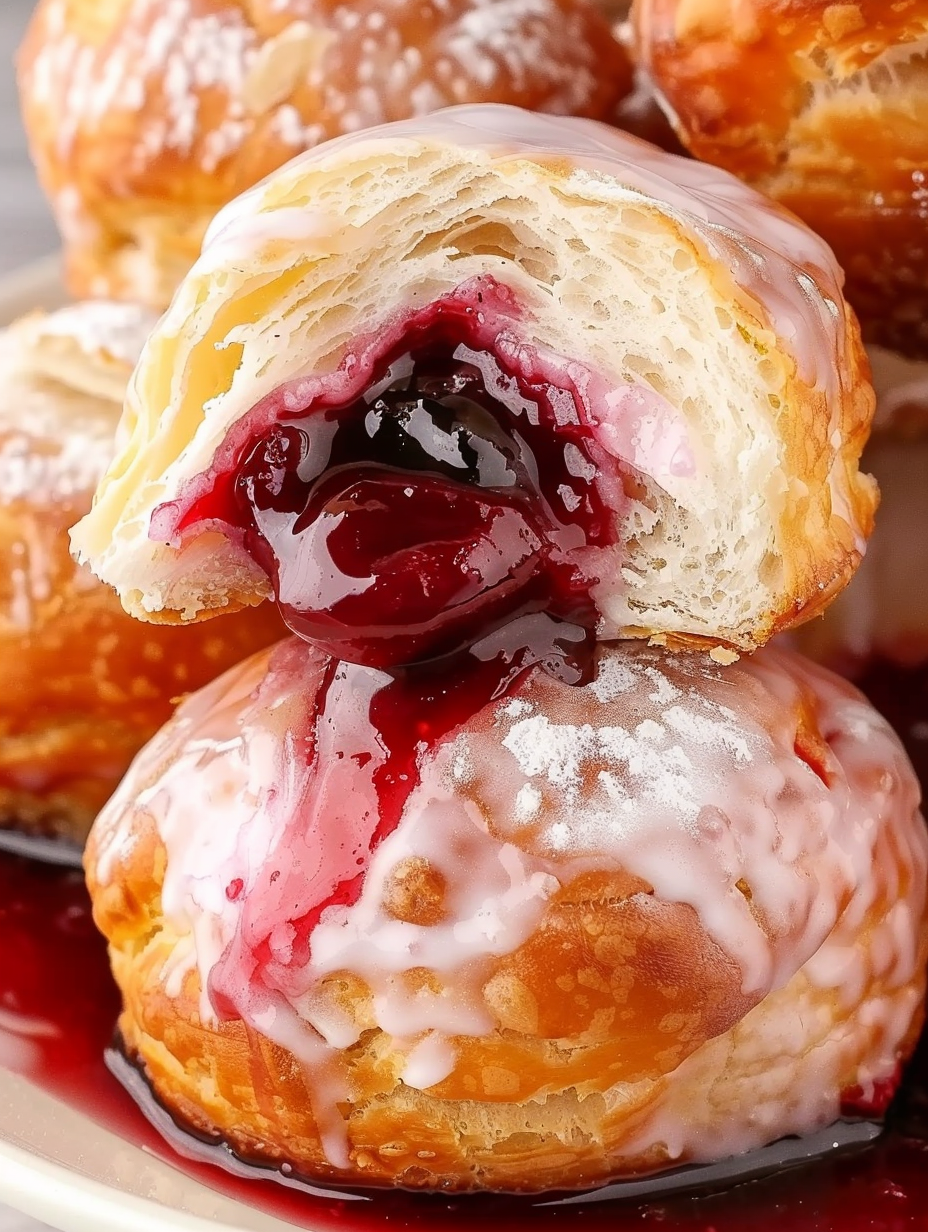
Tiny fried pockets of cherry pie filling wrapped in flaky biscuit dough, glazed with a sweet sugar coating. A quicker, crowd-pleasing way to enjoy classic cherry pie flavor.
This is a simple, joyful dessert I first made on a busy summer evening when I wanted the comforts of a cherry pie without the fuss of rolling dough and waiting for an oven. Cherry pie bombs are little pockets of warm fruit and syrup wrapped in flaky biscuit layers, fried until golden, and coated in a glossy sugar glaze. They arrive at the table hot, sticky, and impossible to resist. I remember my partner coming into the kitchen and calling them "little hand pies from heaven" after the first bite. They are the kind of sweet I make when guests drop by unannounced or when the kids want a special weekend treat.
What I love most is how they preserve the characteristic tart-sweet burst of cherry pie in a single-bite format. The biscuit dough puffs and forms thin layers around the filling, creating a contrast of pillowy interior and crisp exterior. Because they are fried, the exterior develops a subtle caramelized note that pairs beautifully with the simple powdered sugar glaze. I discovered this version using canned flaky biscuits and cherry pie filling, which keeps the assembly fast and predictable. With a thermometer to hold the oil at 325 degrees Fahrenheit and a few small technique tricks, you can get consistent results every time.
Why You'll Love This Recipe
- Makes classic cherry pie flavor in a fraction of the time: ready from start to finish in about 25 minutes, perfect for last-minute desserts.
- Uses pantry-friendly ingredients: canned flaky biscuits and store-bought cherry pie filling streamline prep yet yield fantastic taste.
- Crowd-pleasing and portable: bite-sized portions are great for parties, potlucks, and kid-friendly serving sizes.
- Flexible and forgiving: swap biscuit dough for pie dough for a slightly different texture, and omit corn syrup in the glaze if you prefer.
- Easy to freeze and finish later: assemble ahead, freeze on a baking sheet, and fry directly from frozen for quick entertaining.
- Minimal equipment required: a heavy saucepan, a candy thermometer, and a slotted spoon are all you need to get professional results.
On the first night I made these, my kitchen smelled like summer cherries and warm oil, and the family circled with plates in hand. My teenagers declared them a party staple and asked that I double the batch next time. The glaze gives a shiny finish that photographs beautifully and lasts through the first hour, making these perfect for school events and bake sales.
Ingredients
- 16.3-ounce can Grands "Big" biscuits, flaky: These refrigerated biscuits are designed to separate into layers, creating a quick flaky shell. Look for Pillsbury Grands for consistent size. If you prefer a thinner crust, press the layers slightly thinner with your fingers or a rolling pin.
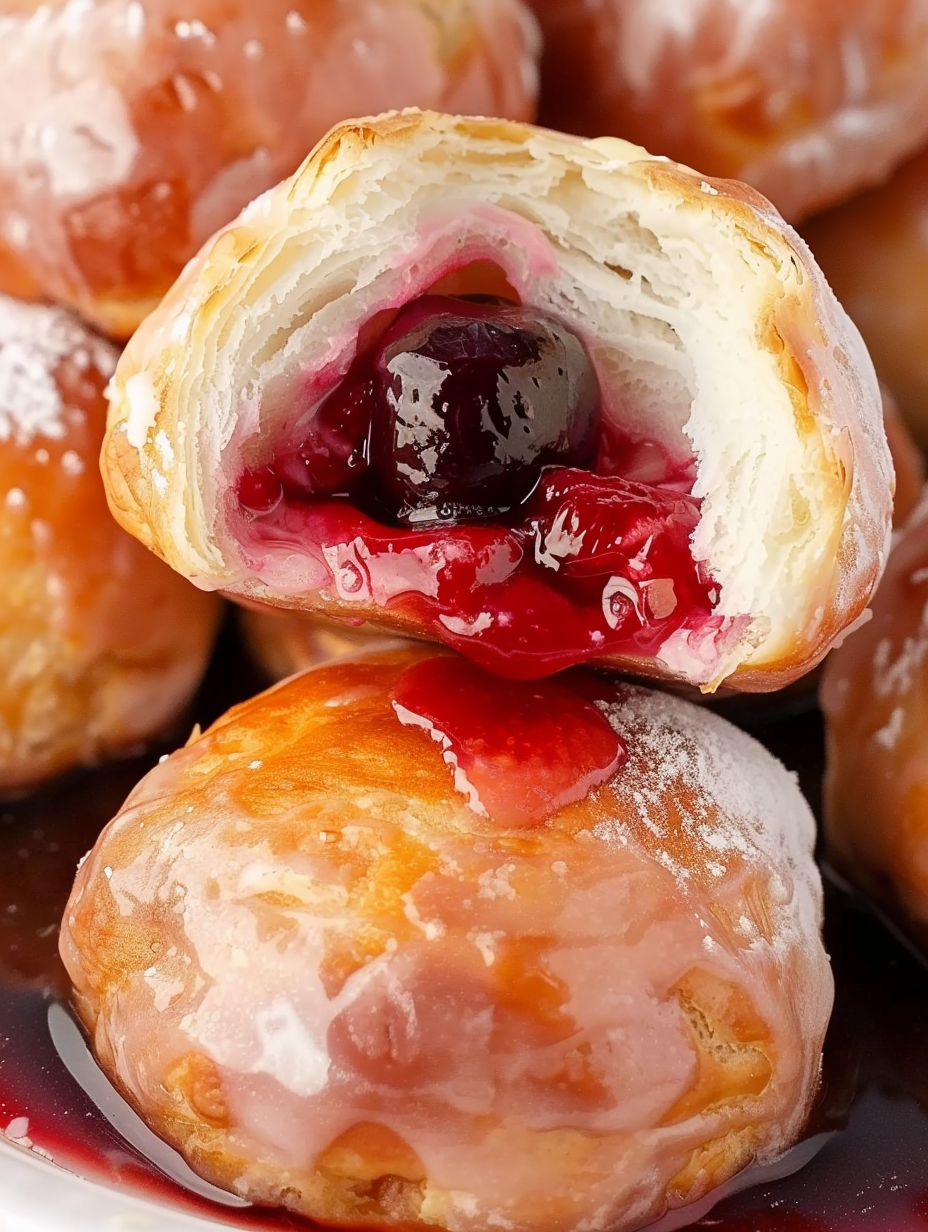
- 21-ounce can cherry pie filling: Use a good-quality brand with whole cherries and thick syrup for the right texture and flavor. The filling provides both fruit and syrup, so measure by tablespoons to avoid overfilling.
- 2 cups powdered sugar: Sift if you notice any lumps to ensure a smooth glaze. Powdered sugar dissolves quickly in the milk to create a glossy coating.
- 1/4 cup milk: Whole milk yields a richer glaze, but 2 percent or skim works in a pinch. Adjust quantity slightly to reach desired glaze thickness.
- 1 tablespoon light corn syrup: Optional but helpful for a sheen and a stable finish that resists cracking. Can be omitted for a more matte glaze.
- Vegetable oil for frying: Use a neutral oil with a high smoke point, such as canola or vegetable oil. You will need enough oil to fill a 2 to 3 quart heavy-bottomed saucepan halfway, so the dough balls are fully submerged during frying.
Instructions
Prepare the oil and equipment: Fill a 2 to 3 quart heavy-bottomed saucepan a little over half full with vegetable oil. Attach a candy or deep-fry thermometer to the side and heat to 325 degrees Fahrenheit. Maintaining exactly 325 degrees is critical to cook the interior without over-browning the outside. Have a slotted spoon, a plate lined with paper towels, and a cooling rack ready. Shape the dough: Open the can of biscuits and separate each into its flaky layers by pulling gently at the center. Flatten each layer with your fingers or a rolling pin into a circle roughly 3 to 3 1/2 inches across. Do not roll paper-thin; you want enough dough to contain a tablespoon of filling and still seal. Fill and seal: Place 1 tablespoon of cherry pie filling in the center of the dough round. Be careful to avoid large, hard cherry pits if present. Pinch the edges of the dough tightly together to form a seam, then roll the seam under and smooth into a ball so there are no exposed gaps. A well-sealed seam prevents oozing while frying. Fry carefully: Lower 2 to 3 dough balls gently into the 325-degree oil using a slotted metal spoon. Move them frequently so they do not stick to the pan and so all sides color evenly. Cook until golden brown on all sides, about 4 to 6 minutes, adjusting heat as needed to hold 325 degrees. Remove to paper towels to drain excess oil. Glaze and finish: While bombs cool slightly, whisk powdered sugar, milk, and light corn syrup until smooth. Toss each warm dough ball in the glaze to coat, lift and allow excess to drip off, then place onto parchment paper or a rack to set. Serve warm for the best contrast between crisp exterior and hot jammy interior.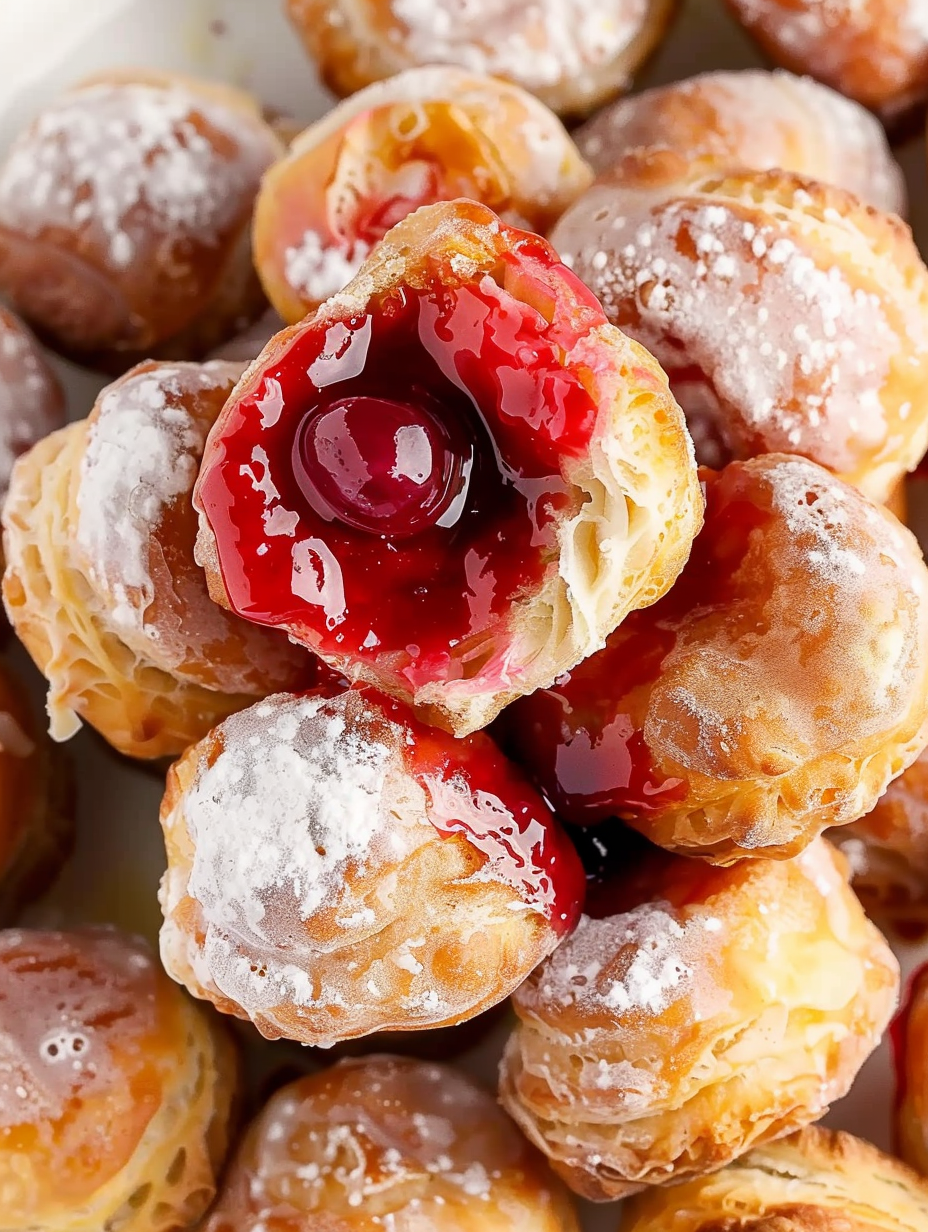
You Must Know
- These treats are best eaten the day they are fried; stored at room temperature in an airtight container they keep for about 2 days without becoming soggy.
- They freeze well before frying on a sheet tray and then go into a freezer bag for up to 3 months; fry directly from frozen and add a couple minutes to the cook time.
- Holding oil temperature at 325 degrees Fahrenheit prevents the outside from over-browning while the inside heats through; too hot and the outside burns, too cool and the dough absorbs excess oil.
- Omit corn syrup in the glaze if you prefer, but expect a slightly less glossy finish and a glaze that sets a bit quicker to a matte look.
I love that these are adaptable for kids and grown-ups. My sister once brought them to a summer picnic and guests ate them warm off a tray. The size makes them ideal for sampling, and I frequently halve the recipe when I only want a small batch. They are a real conversation starter and a simple way to serve classic pie flavor without turning on the oven.
Storage Tips
For short-term storage keep the cooled, glazed pieces in a single layer in an airtight container at room temperature for up to 48 hours. Avoid refrigeration as it can cause the glaze to sweat and the dough to become firmer. For longer storage, freeze un-fried assembled balls on a baking sheet until solid, then transfer to a freezer bag for up to three months. When ready to serve fry from frozen at the same oil temperature but add 1 to 2 minutes of cook time. To re-crisp leftovers, warm briefly in a 350 degree Fahrenheit oven for 6 to 8 minutes.
Ingredient Substitutions
If you do not have flaky biscuits, use one full biscuit per bomb and reduce frying time slightly because thicker dough cooks faster. You can substitute apple pie filling or peach filling for a different fruit profile. For a lighter glaze, replace milk with half-and-half or almond milk, though the sheen will be slightly different. To make these gluten-free use a store-bought gluten-free biscuit dough and check the pie filling label for certification. Use pie dough for a flakier, thinner shell and increase frying temperature to 350 degrees Fahrenheit with closer monitoring.
Serving Suggestions
Serve warm with a scoop of vanilla ice cream or a dollop of whipped cream for contrast between hot and cold. Garnish with a sprinkle of flaky sea salt for a modern twist or a dusting of extra powdered sugar for a classic look. For brunch offer with coffee and a fruit salad. For a party arrange on a platter with decorative doilies and small forks. These pair well with sparkling wine for an adult gathering or milk and hot chocolate for kids.
Cultural Background
The idea of encasing fruit in dough is central to many culinary traditions, from turnovers to empanadas. Cherry pie bombs are an American shortcut inspired by classic hand pies and fairground-style fried desserts. In the southern United States fried fruit-filled doughs have a long history at county fairs, where portability and quick cooking were essential. This version modernizes the concept using refrigerated biscuit dough to capture the layered texture of a conventional pie crust without the labor of rolling and crimping.
Seasonal Adaptations
In summer use fresh cooked cherry preserves instead of canned filling for a brighter fruit flavor; reduce added sugar in the glaze to compensate. For fall swap to apple cinnamon filling and add a pinch of ground nutmeg to the dough edge before sealing. During winter use canned blueberry or cranberry-orange filling and finish with an orange-flavored glaze by adding 1 teaspoon of zest to the sugar mixture. For holiday parties make mini-bombs and dust with edible glitter or colored sugar for festive appeal.
Meal Prep Tips
Assemble the filled balls and place them on a parchment-lined tray in a single layer to freeze solid before transferring to bags. Label with the date and fry straight from frozen, keeping an eye on color. Prepare the glaze while the first batch is frying so you can glaze as they come out for maximum shine. Use a digital probe thermometer to maintain oil temperature and rotate batches so each bomb cooks evenly. Keep extra parchment and paper towels handy to manage oil and glazing stations efficiently.
These little bombs capture the heart of cherry pie in every bite. They are forgiving, festive, and fast, making them a go-to when you want a homemade dessert with minimal fuss. I encourage you to make a small batch first to practice sealing and frying, then scale up for gatherings. Share them warm and watch them disappear quickly.
Pro Tips
Keep oil temperature steady at 325 degrees Fahrenheit to ensure even cooking and avoid greasy results.
Seal the dough seams well and roll them under into a smooth ball to prevent the filling from leaking during frying.
Fry only 2 to 3 at a time to avoid crowding which causes the oil temperature to drop and uneven browning.
Sift powdered sugar for a silky glaze and adjust milk in small increments to reach the right coating consistency.
If glaze thickens before you finish, add a teaspoon of milk at a time and whisk to loosen it.
This nourishing cherry pie bombs recipe is sure to be a staple in your kitchen. Enjoy every moist, high protein slice — it is perfect for breakfast or as a wholesome snack any time.
FAQs about Recipes
Can I make these ahead of time?
Yes, you can assemble and freeze them un-fried for up to 3 months and fry directly from frozen, adding a couple minutes to the cook time.
What oil temperature should I use?
Maintain oil at 325 degrees Fahrenheit for biscuit dough to prevent over-browning before the inside is hot. If using pie dough, increase to 350 degrees Fahrenheit and reduce frying time slightly.
Tags
Cherry Pie Bombs
This Cherry Pie Bombs recipe makes perfectly juicy, tender, and flavorful steak every time! Serve with potatoes and a side salad for an unforgettable dinner in under 30 minutes.
Ingredients
Dough
Filling
Glaze
Frying
Instructions
Prepare oil and tools
Fill a 2 to 3 quart heavy-bottomed saucepan a little over half full with vegetable oil. Attach a deep-fry thermometer and heat oil to 325 degrees Fahrenheit. Prepare a slotted spoon, paper towels, and a cooling rack.
Separate and flatten dough layers
Open the biscuit can and pull each biscuit into its flaky layers. Gently flatten each layer into a 3 to 3 1/2-inch circle with your fingers or a rolling pin, leaving it slightly thick to hold filling.
Fill and seal
Place 1 tablespoon of cherry pie filling into the center of each dough round. Pinch edges together tightly and roll the seam under to make a smooth ball so no filling escapes while frying.
Fry until golden
Carefully lower 2 to 3 balls into the oil at 325 degrees Fahrenheit. Move them with a slotted spoon so they brown evenly. Fry about 4 to 6 minutes until golden on all sides. Drain on paper towels.
Glaze and serve
Whisk powdered sugar, milk, and corn syrup until smooth. Toss warm bombs in the glaze and set on parchment to let excess drip off and the glaze set. Serve warm.
Last Step: Please leave a rating and comment letting us know how you liked this recipe! This helps our business to thrive and continue providing free, high-quality recipes for you.
Nutrition
Did You Make This?
Leave a comment & rating below or tag
@yummique on social media!
Categories:
You might also like...

Cheesy Zucchini Rollatini Bake
Tender grilled zucchini wraps basil ricotta, bathed in marinara and mozzarella, baking into a bubbly, lighter Italian comfort dinner ready in 30 minutes.

Air Fryer Zucchini and Squash
Crisp-edged, tender-in-the-middle zucchini and yellow squash made in 15 minutes with pantry spices. A vibrant, veggie-forward side everyone devours.

Chicken Meatball Parmesan
Tender chicken meatballs simmered in rich marinara and blanketed with melty mozzarella, bringing all the flavors of chicken parm in cozy, bite-sized form.
Did You Make This?
Leave a comment & rating below or tag @yummique on social media!
Rate This Recipe
Share This Recipe
Enjoyed this recipe? Share it with friends and family, and don't forget to leave a review!
Comments (1)
This recipe looks amazing! Can't wait to try it.
Comments are stored locally in your browser. Server comments are displayed alongside your local comments.

Hi, I'm Amira!
What's Popular

30-Minute Meals!
Join to receive our email series which contains a round-up of some of our quick and easy family favorite recipes.