
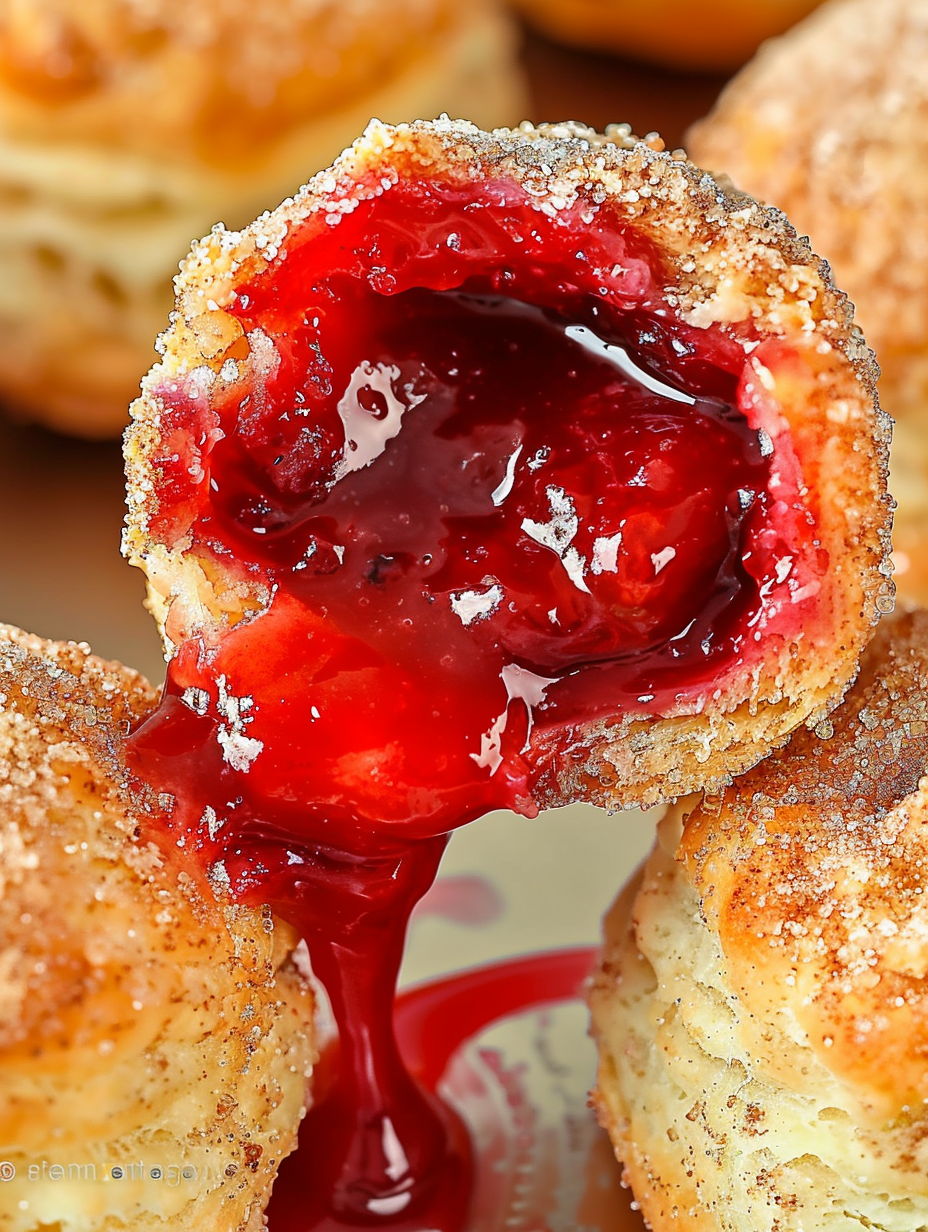
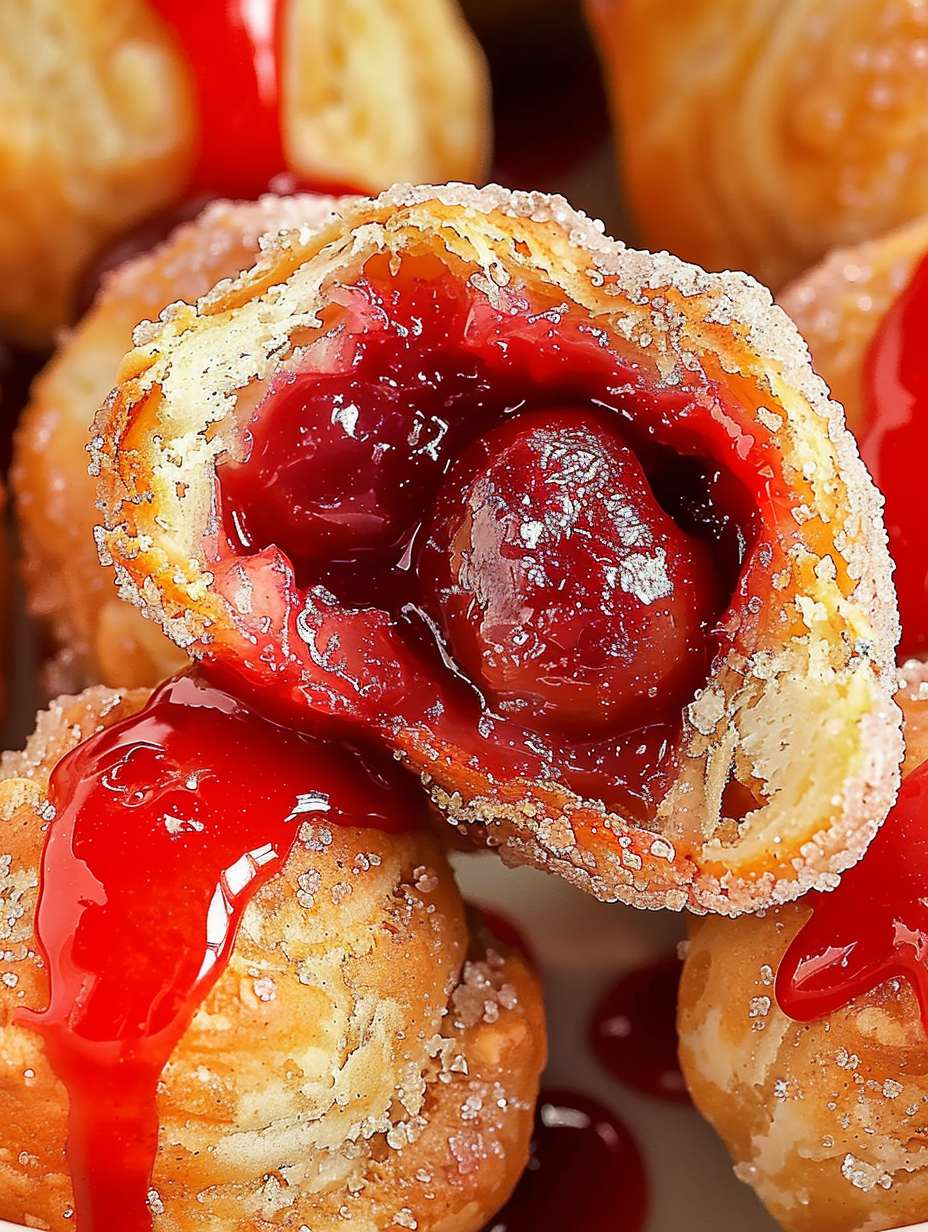
Cherry Pie Bombs

Mini cherry pie pockets: cherry pie filling wrapped in biscuit dough, coated in cinnamon sugar, and cooked in an air fryer for a crispy, gooey treat perfect for spring and summer gatherings.
Why You'll Love This Recipe
- Ready in about 18 minutes from start to finish when using the air fryer — ideal when you want a quick, crowd-pleasing dessert with minimal hands-on time.
- Uses pantry staples: a can of refrigerated biscuits and a jar or homemade cherry filling; no special pastry skills required.
- Portable, bite-sized portions that are perfect for picnics, potlucks, and kid-friendly parties — everyone can grab one without utensils.
- Air fryer method provides a crisp, golden exterior without deep-frying, and the oven option gives a classic bake for larger batches.
- Make-ahead friendly: assemble bombs and refrigerate for a few hours, then cook right before serving; filling can be made in advance and chilled.
- Customizable: swap the fruit filling for blueberry, apple, or peach to suit the season or dietary preferences.
I remember bringing a tray to an early-summer neighborhood block party and watching them disappear within minutes. One neighbor confessed he sneaked back for a second while pretending to help clean up. My kids like to help assemble these—pinching the edges closed is almost always the best part when they’re small helpers in the kitchen.
Ingredients
- Refrigerated biscuit dough (1 can, 8-count): I use a standard brand like Pillsbury Grands (not crescent dough). Separate the layers to get 16 rounds—these dough rounds bake up fluffy and golden and are sturdy enough to hold the filling.
- Cherry pie filling (1 cup): Use your favorite jarred filling or make the quick homemade version below. Look for fillings with whole cherries for texture, or use chopped if you prefer fewer whole pieces.
- Unsalted butter (1/2 cup, 1 stick), melted: Brushing with butter helps the cinnamon-sugar adhere and yields a rich, golden crust. If you prefer, use melted coconut oil for a dairy-free swap (texture will shift slightly).
- Cinnamon-sugar blend (1/2 cup): Mix 1/3 cup granulated sugar with 2 teaspoons ground cinnamon for a bright, crunchy coating; adjust cinnamon to taste.
- For homemade filling (optional): 1/2 cup granulated sugar; 2 cups fresh or frozen cherries (pitted); 1 tablespoon lemon juice (recommended with sweet cherries); 3 tablespoons cornstarch; 4 tablespoons warm water.
Instructions
Prepare the dough: Separate the biscuit can into two layers on a clean, lightly floured surface. Gently roll each biscuit round with a rolling pin—or stretch with your hands—until each is about 4 inches in diameter. This step ensures even thickness so the bomb seals easily and cooks through without bursting. Fill and seal: Place about 1 tablespoon of cherry pie filling in the center of each round. Be careful not to overfill; excess filling can leak. Pinch the edges together firmly to seal, then roll the sealed dough between your palms to form a neat ball. If you see any gaps, press and reseal. Butter and coat: Brush each ball all over with the melted butter using a silicone brush. Roll immediately in the cinnamon-sugar mixture until evenly coated. The butter both helps the sugar adhere and promotes browning in the fryer or oven. Air fryer setup: Lightly spray the air fryer basket or racks with cooking oil to prevent sticking. Arrange the bombs in a single layer, spaced about 2 inches apart to allow expansion. Cook in batches if necessary; overcrowding prevents even browning. Air fry: Set the air fryer to 330°F and cook for 6–7 minutes. Gently wiggle each bomb to check for release; if they’re not golden, continue for 1–2 more minutes until crisp and deep golden brown. Internal filling should bubble lightly when ready. Oven alternative: Preheat the oven to 375°F. Line a baking sheet with parchment and place the bombs 2 inches apart. Bake 12–15 minutes until golden brown. The oven method is ideal for making larger batches at once.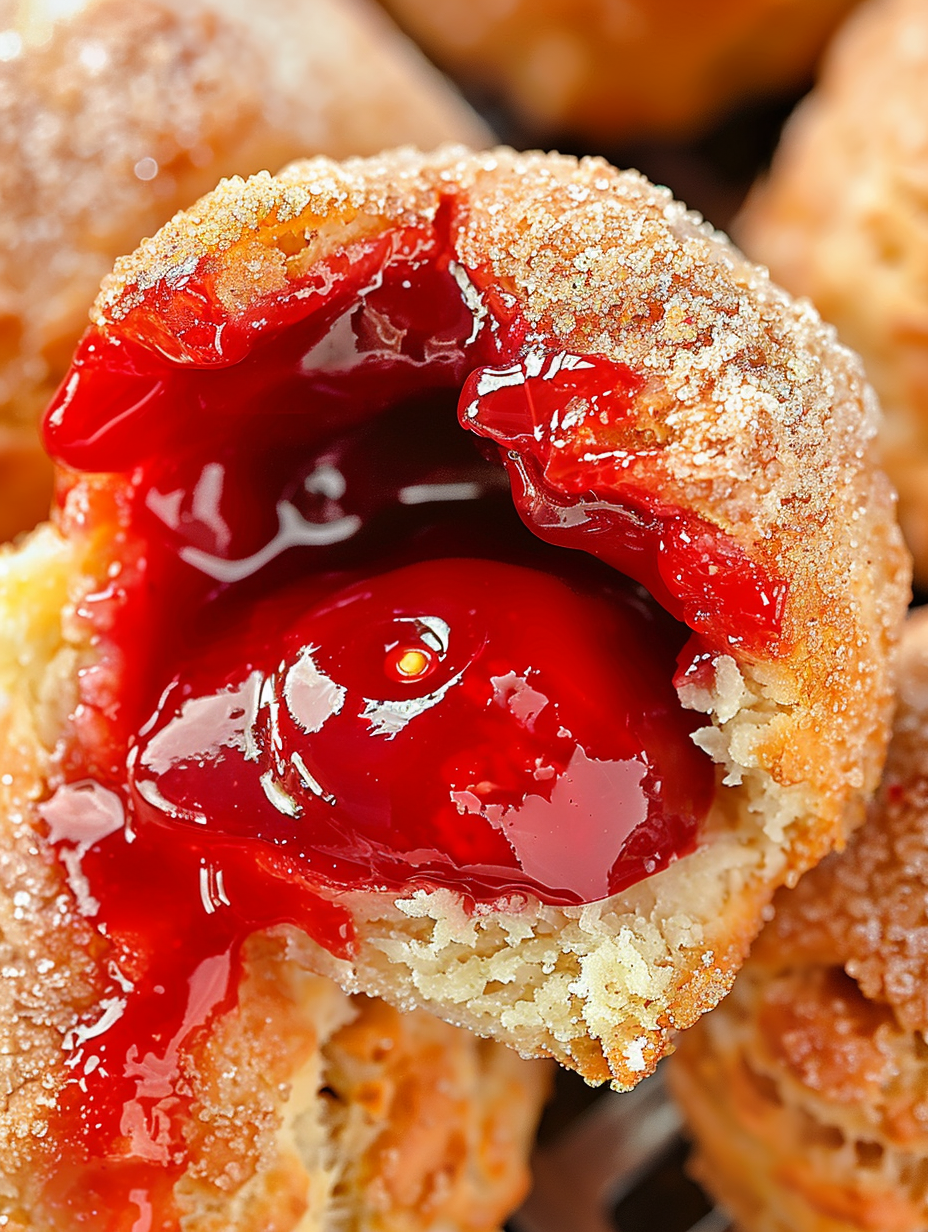
You Must Know
- These are best served warm so the cherry centers remain gooey—reheat briefly in the air fryer or oven for best texture.
- They freeze well before cooking: place assembled bombs on a tray, freeze until solid, then transfer to a freezer bag for up to 3 months. Cook from frozen, adding 2–3 minutes to the cook time.
- High in simple carbohydrates and sugar—serve as an occasional indulgence; they’re great for parties and special treats.
- If using store-bought filling, choose brands with visible cherries and a slightly thick syrup so the filling doesn’t thin out during baking.
- Air fryer batches should not touch; allow at least 2 inches of space for expansion and even browning.
My favorite aspect is how quickly these elevate a simple can of biscuits into something festive. They’ve been requested for Memorial Day brunches, end-of-school parties, and even an impromptu dessert after a summer barbecue. Watching the cherry centers bubble out slightly when you break one open is a small, satisfying victory.
Storage Tips
To store cooked bombs, cool them completely, then place in an airtight container in the refrigerator for up to 3 days. Reheat in the air fryer at 330°F for 2–3 minutes to re-crisp the coating and warm the filling. For longer storage, freeze assembled but uncooked bombs on a tray until solid, then transfer to a freezer bag for up to 3 months. When baking from frozen, add a few minutes to the cook time and watch for a deep golden color. Avoid microwaving for reheating—the filling will heat unevenly and the exterior will become soggy.
Ingredient Substitutions
If you prefer a different fruit, swap the cherry filling for apple pie filling (drain excess liquid), blueberry filling, or peach preserves. For a dairy-free option, replace melted butter with melted coconut oil or a plant-based spread; the flavor will shift slightly toward the substitute but the texture remains pleasant. If you need a gluten-free variation, use a gluten-free biscuit dough or a small circle of pre-made gluten-free pastry; results will vary since gluten-free doughs handle differently and may need a slightly lower cook temperature to avoid overbrowning.
Serving Suggestions
Serve warm with a dusting of powdered sugar or a small scoop of vanilla ice cream for an elevated presentation. For a brunch spread, pair with coffee, sparkling water, or a citrusy mimosa. Garnish with fresh mint leaves or a few fresh cherries on the side for seasonal flair. These also work well on a dessert board next to cookies and other mini pastries where guests can nibble and mingle.
Cultural Background
Handheld fruit pockets like these echo traditions of portable pies and fried turnovers found in many cultures. In the United States, mini pies and hand pies are beloved fair and picnic foods—easy to eat while walking. Using biscuit dough streamlines the classic pie-making process, borrowing from Southern biscuit traditions where quick bread doughs transform into everything from savory to sweet handheld bites.
Seasonal Adaptations
During summer, use ripe fresh cherries or berries for a bright, fresh filling; in fall, spiced apple or pear filling with a pinch of nutmeg and clove makes these cozy and autumnal. For holiday parties, add a tablespoon of orange zest to the cinnamon-sugar and serve alongside mulled cider. When cherries are out of season, good-quality canned or frozen cherries are excellent—thaw and drain excess liquid before assembling.
Meal Prep Tips
Assemble bombs the day before for faster party service: seal them, roll in butter and cinnamon-sugar, and refrigerate on a tray covered with plastic wrap. Bake or air fry just before serving for best texture. If transporting to an event, pack cooled bombs in a shallow box lined with parchment and reheat briefly on-site if possible; they travel well when kept in a single layer to avoid crushing.
Whether you’re serving these at a casual weekend brunch, a potluck, or a summer party, Cherry Pie Bombs are a simple, satisfying way to deliver big flavor with minimal fuss. Give them a try, and make them your own with different fillings and coatings—there’s a version for every taste and season.
Pro Tips
Don’t overfill each round—about 1 tablespoon of filling prevents leaks and ensures a neat seal.
Brush generously with melted butter for even browning and a crunchy sugar coating.
Space bombs at least 2 inches apart in the air fryer basket to allow for expansion and even air circulation.
Chill homemade filling to room temperature before filling the rounds to avoid making the dough soggy.
This nourishing cherry pie bombs recipe is sure to be a staple in your kitchen. Enjoy every moist, high protein slice — it is perfect for breakfast or as a wholesome snack any time.
FAQs about Recipes
Can I prepare these ahead and freeze them?
Yes. Assemble the bombs, freeze them on a tray until solid, then transfer to a sealed container. Cook from frozen, adding 2–3 minutes to the air fryer time.
Why did the outside brown before the inside cooked?
Use a lower oven rack if they brown too quickly on top. Cover loosely with foil if needed and check for a golden color and bubbling filling.
Tags
Cherry Pie Bombs
This Cherry Pie Bombs recipe makes perfectly juicy, tender, and flavorful steak every time! Serve with potatoes and a side salad for an unforgettable dinner in under 30 minutes.
Ingredients
Dough
Filling
Coating
Homemade Cherry Filling (optional)
Instructions
Prepare biscuit rounds
Separate biscuits into two layers on a clean surface and roll or stretch each round to about 4 inches in diameter so you have 16 rounds in total.
Portion filling
Place about 1 tablespoon cherry filling in the center of each round. Avoid overfilling to prevent leaking during cooking.
Seal and shape
Pinch edges together firmly to seal. Roll the sealed pieces between your palms to form smooth balls and check for any gaps; reseal if necessary.
Butter and sugar coat
Brush each ball with melted butter and roll in cinnamon-sugar until evenly coated. Work quickly so the sugar adheres.
Air fryer setup
Spray air fryer basket with oil and arrange bombs in a single layer with 2 inches spacing. Cook in batches if needed.
Air fry
Air fry at 330°F for 6–7 minutes, then check. Continue 1–2 minutes if not golden and crispy. Filling should be warm and bubbly when done.
Oven method (alternative)
Preheat oven to 375°F, place bombs on parchment-lined sheet 2 inches apart, and bake 12–15 minutes until golden brown.
Serve
Allow to cool a few minutes (filling is hot) and serve warm. Optionally dust with powdered sugar or pair with vanilla ice cream.
Last Step: Please leave a rating and comment letting us know how you liked this recipe! This helps our business to thrive and continue providing free, high-quality recipes for you.
Nutrition
Did You Make This?
Leave a comment & rating below or tag
@yummique on social media!
Categories:
You might also like...

Cheesy Zucchini Rollatini Bake
Tender grilled zucchini wraps basil ricotta, bathed in marinara and mozzarella, baking into a bubbly, lighter Italian comfort dinner ready in 30 minutes.

Air Fryer Zucchini and Squash
Crisp-edged, tender-in-the-middle zucchini and yellow squash made in 15 minutes with pantry spices. A vibrant, veggie-forward side everyone devours.

Chicken Meatball Parmesan
Tender chicken meatballs simmered in rich marinara and blanketed with melty mozzarella, bringing all the flavors of chicken parm in cozy, bite-sized form.
Did You Make This?
Leave a comment & rating below or tag @yummique on social media!
Rate This Recipe
Share This Recipe
Enjoyed this recipe? Share it with friends and family, and don't forget to leave a review!
Comments (1)
This recipe looks amazing! Can't wait to try it.
Comments are stored locally in your browser. Server comments are displayed alongside your local comments.

Hi, I'm Amira!
What's Popular

30-Minute Meals!
Join to receive our email series which contains a round-up of some of our quick and easy family favorite recipes.