Cherry Danish with Cream Cheese | Yummique
30-MINUTE MEALS! Get the email series now
Yummique

Cherry Danish with Cream Cheese

5 from 1 vote
1 Comments
Amira
By: AmiraUpdated: Dec 23, 2025
This post may contain affiliate links. Please read our disclosure policy.

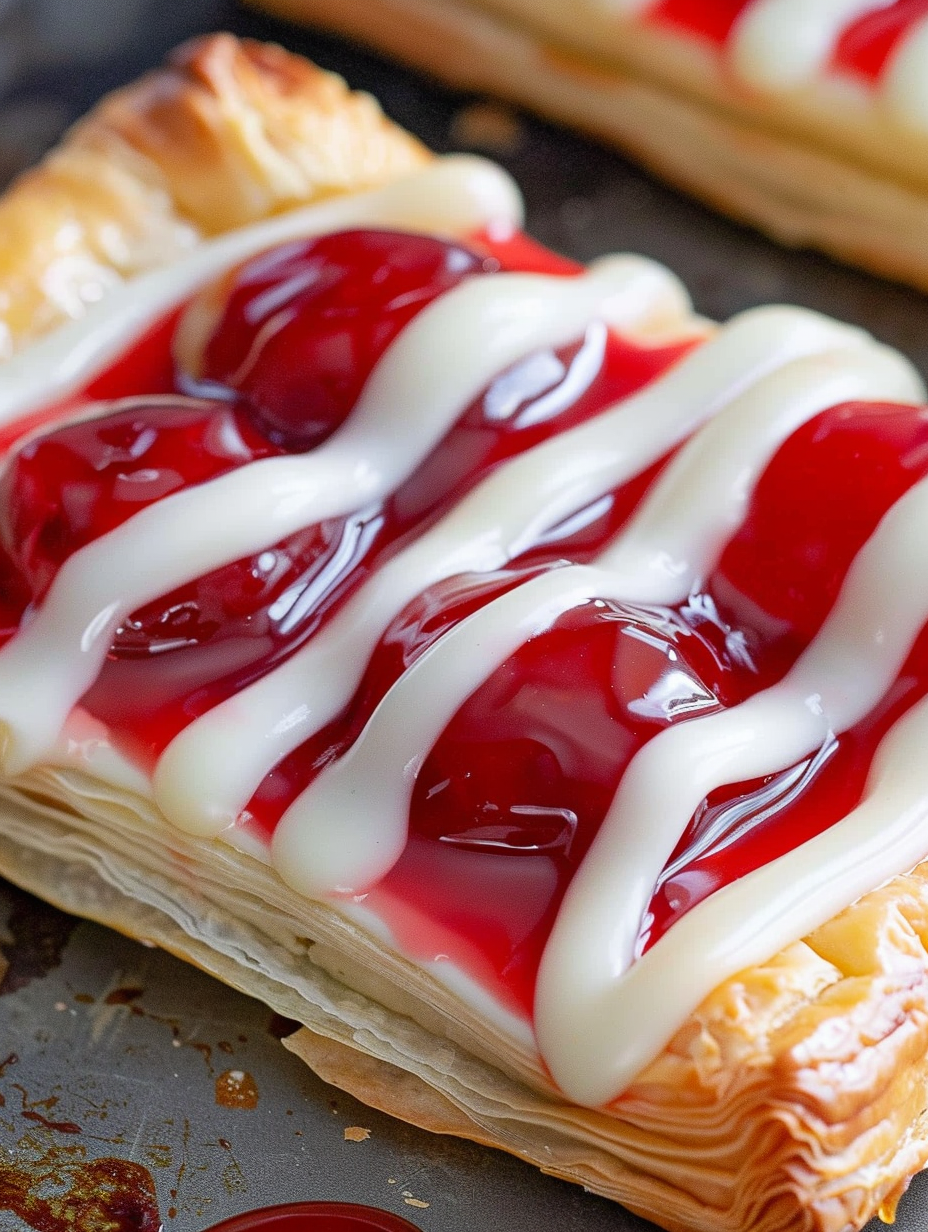
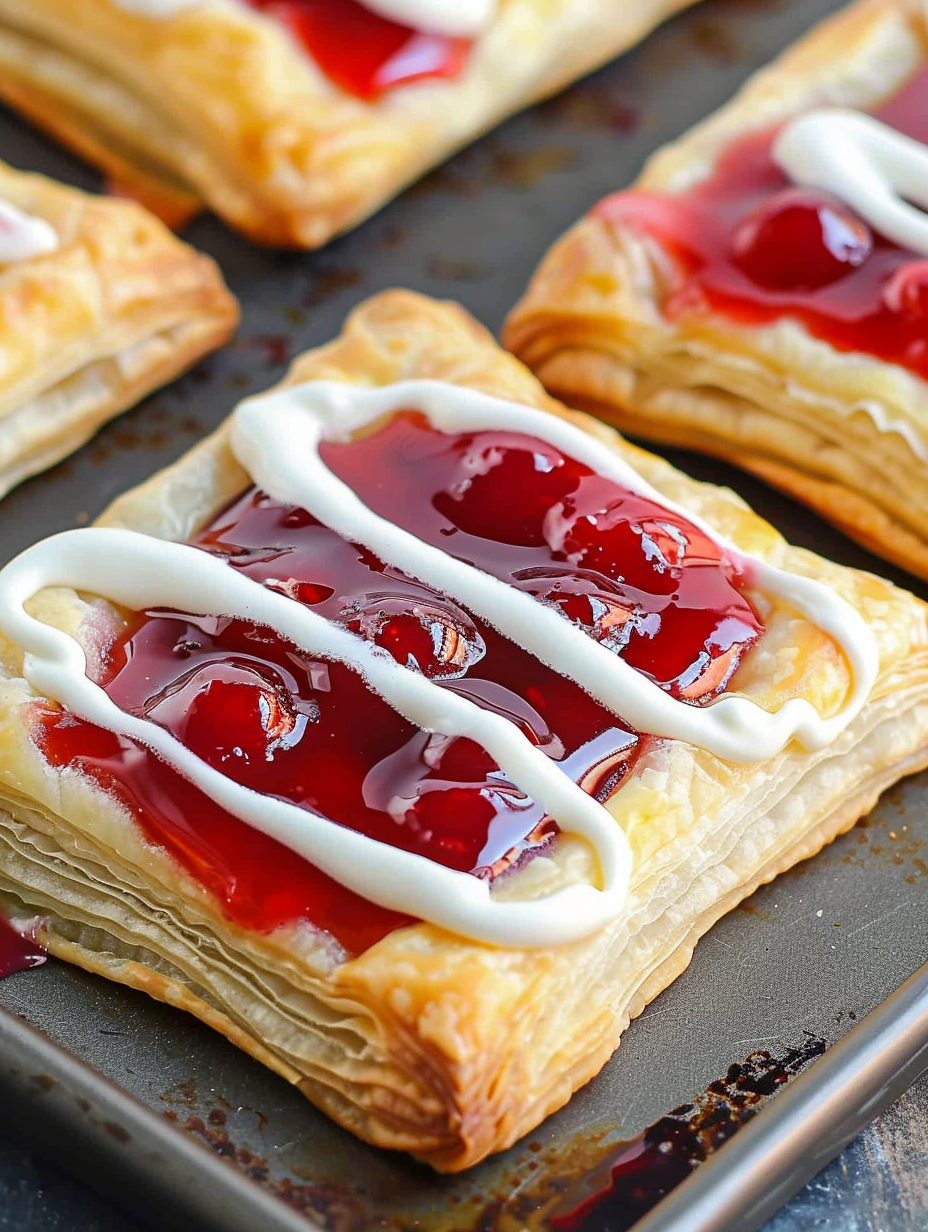
Flaky puff pastry squares filled with sweetened cream cheese and bright cherry pie filling, finished with a silky glaze — perfect for brunch or special mornings.

Cherry Danish with Cream Cheese
This Cherry Danish with cream cheese is one of those breakfast treats that instantly elevates a weekend morning. I first discovered a similar combination at a small bakery while traveling through New England, and after a few experiments in my own kitchen I developed this quicker, approachable version using store-bought puff pastry. The texture contrast — crisp, airy layers of pastry giving way to a tangy-sweet cream cheese center and jewel-red cherries — is what makes this so irresistible. It’s the kind of pastry that brings neighbors to the porch and convincing even the most committed snooze-button fan to roll out of bed. I adapted this method to be fast and reliable: two thawed sheets of puff pastry, a lightly sweetened cream cheese filling, and cans of cherry pie filling make it work without hours of laminating dough. The cream cheese adds body and a slight tang that balances the sweetness of the cherries and glaze. I love how the scored border puffs into a neat frame, keeping the filling glossy and contained. Over the years I’ve served these at holiday mornings, book club brunches, and busy school mornings — they always disappear first.

Why You'll Love This Recipe

  • Ready in about 30 minutes from start to finish using pantry-friendly ingredients and thawed puff pastry for a bakery-style finish without the effort.
  • Uses store-bought puff pastry and canned cherry pie filling, so it’s time-efficient but still tastes homemade and elegant.
  • The sweetened cream cheese layer provides a rich, slightly tangy counterpoint to the gelled cherries for balanced flavor with each bite.
  • Scoring the 1/2-inch border creates a beautifully puffed edge and a flat center for neat assembly and consistent results.
  • Make-ahead friendly: assemble and refrigerate for a short time before baking, or freeze assembled pastries for future breakfasts.
  • Perfect for feeding a crowd — the recipe yields 12 individual pastries, ideal for brunches or potlucks.

In my family the first time I made these my daughter declared them “officially the best pastry ever” and my partner compared them to the town bakery. I love that I can make something that looks and tastes special with minimal fuss — a real weekday or weekend win.

Ingredients

  • Puff pastry: 1 (17.3 ounce) package thawed — use the classic rectangular sheets from a reliable brand like Pepperidge Farm for consistent rise and layers; thaw according to package instructions in the fridge overnight or on the counter for 30–40 minutes.
  • Cream cheese: 8 ounces at room temperature — full-fat cream cheese creates the creamiest filling and spreads smoothly; avoid low-fat varieties if you want the richest texture.
  • Granulated sugar: 1/4 cup — sweetens the cream cheese just enough to balance the cherries without becoming cloying.
  • Vanilla extract: 1 1/2 teaspoons divided — use pure vanilla for best aroma; 1 teaspoon for the filling and 1/2 teaspoon for the glaze.
  • Egg: 1 large — beaten with water to form an egg wash that yields a glossy, golden edge on the pastry.
  • Water: 2 tablespoons — mixed with the egg to thin the wash for even brushing.
  • Cherry pie filling: 1 (21 ounce) can — the gelled cherries provide vibrant color and a jammy finish; reserve 1 teaspoon of the filling if you like a stronger cherry note, otherwise one spoonful per pastry is perfect.
  • Powdered sugar: 1/3 cup — for a simple glaze that finishes the pastries with shine and sweetness.
  • Heavy cream: 2 teaspoons — thins the glaze and adds a touch of richness; milk can be substituted but glaze will be thinner in flavor.

Instructions

Preheat and prepare: Preheat your oven to 400°F (205°C). Line one large or two medium baking sheets with parchment paper or a silicone mat to prevent sticking and to promote even browning. If your pastry is still cool but pliable, handle it gently to avoid tearing. Cut and score pastry: Lay both thawed puff pastry sheets on a lightly floured surface and use a sharp knife or pizza cutter to divide each sheet into six equal rectangles (12 total). With a sharp paring knife, lightly score a 1/2-inch border around each rectangle, cutting only about halfway through the dough so the border puffs independently. Using a fork, prick the center area of each rectangle several times to create docking holes; this keeps the center from over-rising and ensures a flat bed for the filling. Place on sheets and prepare filling: Transfer the rectangles to the prepared baking sheet(s), spacing them about 1 inch apart to allow for expansion. In a medium bowl, beat the softened cream cheese with the granulated sugar and 1 teaspoon vanilla extract until smooth and spreadable. If the cream cheese is too firm, warm it briefly in 5–10 second bursts in the microwave until pliable but not melted. Assemble and egg wash: Spoon an even portion of the cream cheese mixture onto the center of each rectangle, staying inside the scored border. In a small bowl whisk together the egg and 2 tablespoons water to make an egg wash. Using a pastry brush, lightly brush the 1/2-inch border of each pastry with the egg wash — this step is key to achieving a deep golden, glossy crust. Bake: Bake in the preheated oven for 18–20 minutes, rotating the pan halfway through for even color, until the borders have puffed and turned golden brown. Visual cues: the scored edge should be a deep golden color and the central cream cheese layer should look set but not browned. Remove the pastries from the oven and transfer to a wire rack to cool slightly. Add cherries and glaze: While the pastries are still warm but not piping hot, spoon a small mound of cherry pie filling into the center of each one and gently spread to cover most of the cream cheese layer. Whisk together the powdered sugar, heavy cream, and remaining 1/2 teaspoon vanilla until smooth. Once the pastries are cooled to warm or room temperature, drizzle the glaze over each for a pretty finish. Cherry Danish on a cooling rack with glaze

You Must Know

  • These keep best in an airtight container at room temperature for up to 24 hours; for longer storage refrigerate up to 3 days or freeze unglazed for up to 1 month.
  • The recipe yields 12 individual pastries — plan on one per person for a light breakfast or two per person if serving with other items.
  • Nutrition: about 163 calories per pastry with roughly 22 g carbohydrates and 7 g fat; the cream cheese contributes protein and richness while cherries add natural fruit sugar and color.
  • Scoring and docking are simple techniques that control how the pastry rises — do not skip them if you want a crisp frame and flat center.

My favorite part of making these is the moment you brush the egg wash — the transformation in the oven is immediate and dramatic. Guests often comment on how bakery-fresh they look, which always makes me smile. These little pastries also make excellent gifts in a box when cooled and wrapped neatly.

Storage Tips

Store cooled pastries in an airtight container at room temperature for 24 hours; beyond that refrigerate to maintain quality for up to 3 days. If you plan to freeze, assemble the pastries through the baking step, allow them to cool fully, then freeze on a sheet tray until firm before transferring to a freezer-safe container for up to one month — glaze after thawing. When reheating, warm in a 350°F oven for 6–8 minutes to crisp the pastry again; avoid microwaving which makes puff pastry soggy.

Ingredient Substitutions

If you need dairy-free options, use a plant-based cream cheese and non-dairy milk in the glaze; note that flavor and texture will be slightly different. For a lower-sugar version, reduce the granulated sugar in the filling by half and choose a light fruit filling or fresh macerated cherries with a touch of cornstarch to thicken. If you prefer whole cherries to canned, simmer pitted cherries with a little sugar and cornstarch until jammy (about 10 minutes) and cool before topping.

Serving Suggestions

Serve warm or at room temperature alongside coffee, cappuccino, or a sparkling mimosa for brunch. Garnish with a few fresh cherries or a light dusting of extra powdered sugar for presentation. These pair nicely with scrambled eggs or a simple green salad for a brunch buffet. For a dessert twist, serve with a scoop of vanilla ice cream and a drizzle of warmed cherry sauce.

Close-up of a glazed Cherry Danish

Cultural Background

Cheese-filled pastries have roots in European baking traditions, with the Danish pastry itself influenced by Austrian and German laminated dough methods brought to Denmark in the 19th century. The Americanized version uses convenient puff pastry and local fruit fillings, making it accessible to home cooks. This sweet-tart cherry variation is a classic in American bakeries and brunch tables, marrying New World fruit with Old World technique.

Seasonal Adaptations

In summer, swap the canned cherries for fresh roasted cherries reduced with a little sugar and lemon zest for brighter flavor. In winter, use apple butter or poached pear slices with warmed spices. For holiday mornings, add a pinch of cardamom to the cream cheese or top with candied orange peel for festive aroma.

Meal Prep Tips

For efficient morning prep, assemble the pastries up to the point of baking and refrigerate covered for a few hours; brush with egg wash and bake directly from the fridge, adding 1–2 minutes to baking time. You can also fully bake, cool, and freeze in a single layer — reheat in a 350°F oven until warmed through. Pack cooled pastries in single layers separated by parchment for lunchboxes or brunch buffets.

These cherry and cream cheese pastries are a simple way to bring bakery-quality treats to your table without long prep times. They reward a small handful of techniques — scoring, docking, and a glossy egg wash — with impressive presentation and crowd-pleasing flavor. Make them your own by swapping fillings, adjusting sweetness, or gifting a dozen to friends. Happy baking and even happier mornings!

Pro Tips

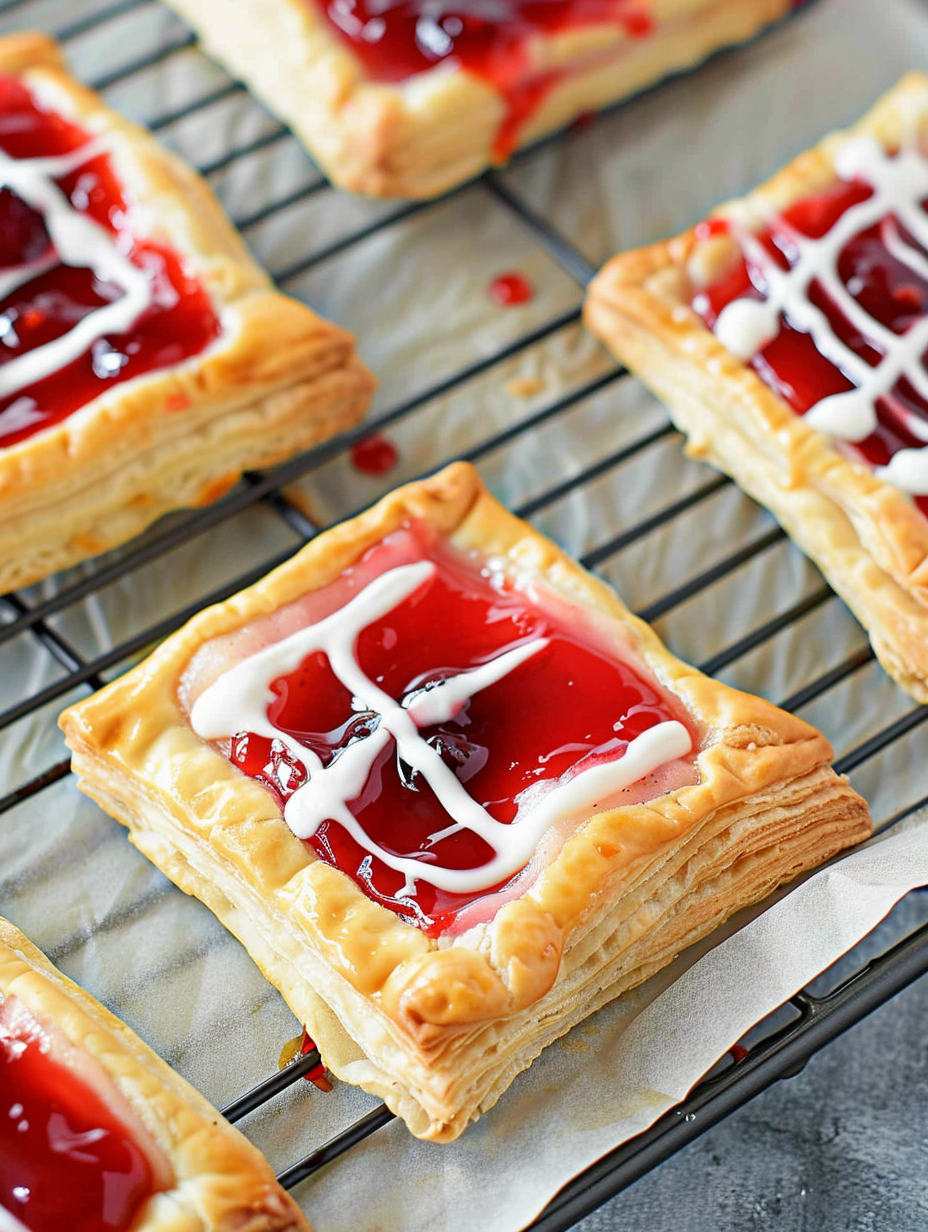
  • Score a 1/2-inch border and dock the center to control how the pastry puffs for a neat presentation.

  • Use room-temperature cream cheese for a smooth filling; if it’s too firm, microwave in 5–10 second bursts until pliable.

  • Brush the border with egg wash right before baking for a consistent golden-brown crust.

  • If using fresh cherries, simmer briefly with a teaspoon of sugar and 1/2 teaspoon cornstarch to thicken before topping.

This nourishing cherry danish with cream cheese recipe is sure to be a staple in your kitchen. Enjoy every moist, high protein slice — it is perfect for breakfast or as a wholesome snack any time.

FAQs about Recipes

How should I thaw puff pastry?

Thaw puff pastry according to package directions; for best texture thaw in the refrigerator overnight or on the counter for 30–40 minutes until pliable but still cool.

Can these be frozen?

Yes — bake, cool, and freeze in a single layer on a tray until solid, then transfer to a freezer container for up to 1 month. Glaze after reheating.

Tags

Family-FriendlyBreakfastPastryCherry DanishCream CheeseBrunchAmerican
No ratings yet

Cherry Danish with Cream Cheese

This Cherry Danish with Cream Cheese recipe makes perfectly juicy, tender, and flavorful steak every time! Serve with potatoes and a side salad for an unforgettable dinner in under 30 minutes.

Servings: 12 steaks
Cherry Danish with Cream Cheese
Prep:10 minutes
Cook:20 minutes
Rest Time:10 mins
Total:30 minutes

Ingredients

Pastry

Filling

Glaze

Instructions

1

Preheat and prepare baking surface

Preheat oven to 400°F (205°C). Line baking sheets with parchment paper or a silicone mat. Thaw puff pastry as directed until pliable but cool.

2

Cut and score pastry

Cut each thawed sheet into six rectangles (12 total). Score a 1/2-inch border around each rectangle, cutting only halfway through the dough, then prick the center area with a fork to dock.

3

Make cream cheese filling

Beat the cream cheese with granulated sugar and 1 teaspoon vanilla until smooth and spreadable. Keep the mixture chilled if the kitchen is warm.

4

Assemble and egg wash

Spoon cream cheese into the center of each rectangle, staying inside the scored border. Whisk egg with 2 tablespoons water and brush the border lightly with egg wash.

5

Bake until golden

Bake at 400°F for 18–20 minutes until the borders are puffed and golden and the cream cheese is set. Rotate pans halfway through for even browning.

6

Top with cherries and glaze

While warm, spoon cherry pie filling into each center. Whisk powdered sugar, heavy cream, and remaining vanilla; drizzle over cooled pastries.

Last Step: Please leave a rating and comment letting us know how you liked this recipe! This helps our business to thrive and continue providing free, high-quality recipes for you.

Nutrition

Calories: 163kcal | Carbohydrates: 22g | Protein:
2g | Fat: 7g | Saturated Fat: 2g |
Polyunsaturated Fat: 1g | Monounsaturated Fat:
3g | Trans Fat: 1g | Cholesterol: 253mg | Sodium:
0mg | Potassium: 953mg | Fiber: 0g | Sugar:
0g | Vitamin A: 577IU | Vitamin C: 3mg | Calcium:
47mg | Iron: 6mg

Did You Make This?

Leave a comment & rating below or tag
@yummique on social media!

Cherry Danish with Cream Cheese

Categories:

Cherry Danish with Cream Cheese

Did You Make This?

Leave a comment & rating below or tag @yummique on social media!

Rate This Recipe

Share This Recipe

Enjoyed this recipe? Share it with friends and family, and don't forget to leave a review!

Comments (1)

Leave a Comment

0/1000 characters
Food Lover
1 day ago

This recipe looks amazing! Can't wait to try it.

Rating:

Comments are stored locally in your browser. Server comments are displayed alongside your local comments.

Family photo

Hi, I'm Amira!

Chef and recipe creator specializing in delicious Family-Friendly cooking. Passionate about sharing easy-to-follow recipes that bring families together around the dinner table.

30-Minute Meals!

Join to receive our email series which contains a round-up of some of our quick and easy family favorite recipes.