
>>

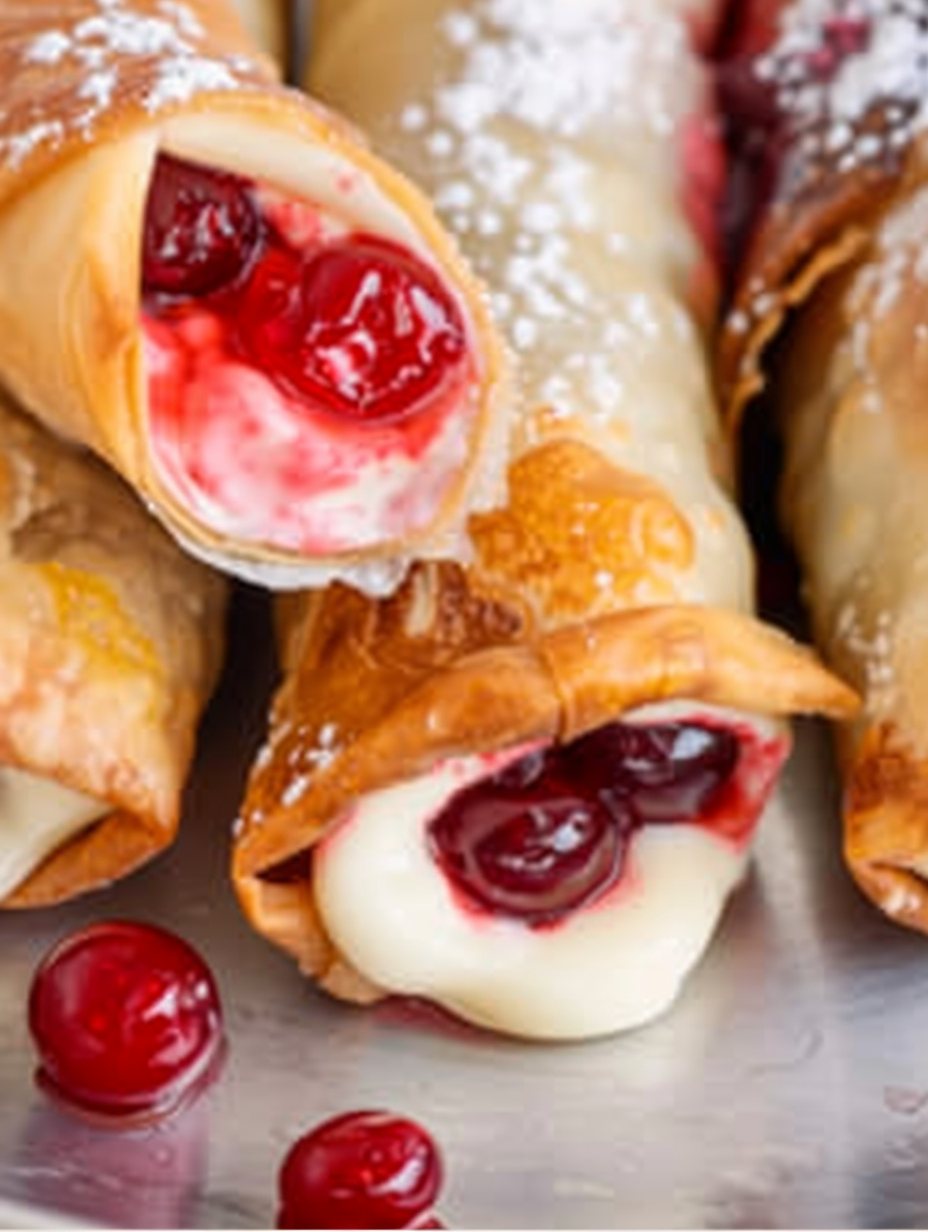
Creamy cheesecake filling and bright cherry pie filling wrapped in a crisp egg roll wrapper—ready in about 35 minutes. A playful, shareable dessert that’s perfect for parties or a cozy night in.
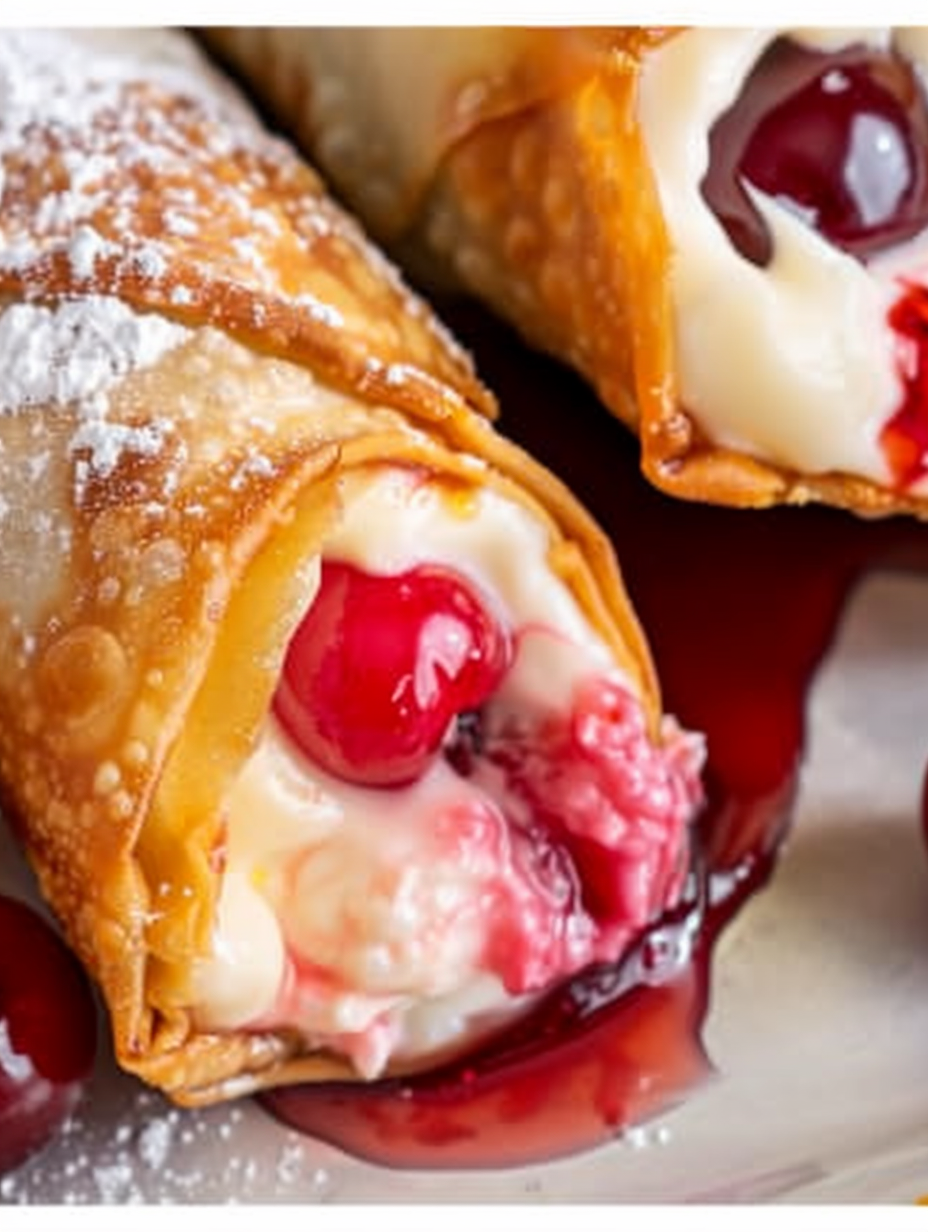
This dessert mash-up has been a joyful discovery in my kitchen: Cherry Cheesecake Egg Rolls are a crunchy, golden shell giving way to a silky cheesecake center speckled with bright cherry pockets. I found the idea while riffing on store-bought desserts one weekend when friends were coming over; I wanted something that felt indulgent but was fast enough to pull together between errands and a late afternoon nap. The combination of tangy cream cheese, a touch of fresh lemon zest, and the jewel-like cherries creates a contrast of textures and flavors—creamy, crisp, sweet, and slightly tart—in each bite. It’s surprising how a few pantry staples and a handful of wrappers can transform into a dessert that feels special.
What makes these particularly memorable is the theater of assembly and frying: guests love watching the egg rolls go from flat squares to tightly sealed parcels, and there’s always a small chorus of “oohs” when the first one is cut open and the cherry filling peeks out. Whether you choose to pan-fry for the classic crunch, air-fry for a lighter finish, or bake them when you want less oil, the technique stays approachable. The result is a shareable dessert that’s casual enough for weeknight treats yet festive enough for gatherings—my go-to when I want something buttery, bright, and utterly irresistible.
My family’s reaction the first time I served these was priceless: even the most skeptical teenager forked one down and then asked for two more. Over time I’ve learned small adjustments—like chilling the filling slightly for easier piping and placing the cherries precisely so the wrapper seals well—that make assembly faster and foolproof. These little discoveries have turned a fun idea into a reliable treat I reach for again and again.

I love that these are as fun to assemble as they are to eat—my kids insist on piping the filling (with supervision) and arranging cherries like tiny jewels. Watching the first batch emerge from the oil—steaming and crackling—is one of my simple cooking pleasures. They’re a small indulgence that makes weeknight dessert feel celebratory and potlucks feel extra special.
Store cooled egg rolls in an airtight container in the refrigerator for up to 3 days. To preserve crispness, layer with paper towels and avoid stacking more than two high. For longer storage, flash-freeze on a sheet pan until firm, then transfer to a freezer-safe bag for up to 3 months. Reheat frozen rolls from frozen in a preheated oven at 375°F for 10–12 minutes or in an air-fryer at 360°F for 6–8 minutes; avoid microwaving, which will make the wrapper soggy. If refrigerated, reheat in a 350°F oven for 6–8 minutes to restore crispness.
If you don’t have canned cherry pie filling, substitute raspberry preserves or apricot jam—thicker fillings keep moisture in check. For a lighter cream layer, use a 2:1 mix of full-fat cream cheese and mascarpone for silkier texture. Gluten-free wrappers are available and can be used, though they may be more fragile—seal carefully and consider baking rather than frying. To reduce sugar, cut the granulated sugar by one tablespoon and finish with an optional light drizzle of honey or a dusting of powdered sugar.
Serve warm with a scoop of vanilla ice cream or a dollop of whipped cream and a drizzle of cherry syrup for an elegant plate. Garnish with finely grated lemon zest or a few fresh cherries for color. These are perfect for brunch, dessert buffets, and cocktail parties—offer small forks and napkins as the filling can be luscious. For a playful presentation, cut each roll in half on the diagonal and arrange like little boats alongside dipping sauces such as chocolate ganache or caramel.
The idea plays on the American love of handheld sweets and the tradition of fusion snacks—wrapping cheesecake flavors inside egg roll wrappers borrows technique from East Asian dim sum and snack culture while using distinctly American flavors like cheesecake and cherry pie filling. Fried desserts have long been a part of many culinary traditions, and this combination reflects a modern, playful approach to comfort food where texture contrasts are prized. It’s a modern American hybrid that celebrates convenience and nostalgia at once.
In spring and summer, swap cherries for fresh macerated berries for a brighter, fresher flavor—stir 1 tablespoon sugar into sliced strawberries before assembling. In fall, try apple pie filling with a pinch of cinnamon and nutmeg for a spiced variation. For the holidays, add a teaspoon of orange zest and a splash of Grand Marnier to the cream cheese for a festive aroma. Temperature and oven time remain similar across versions; adjust filling thickness to avoid soggy wrappers.
Prepare the cheesecake filling and store it chilled up to 24 hours in advance; pipe directly from the bag when assembling to save time. Assemble un-fried rolls and place them on a sheet pan covered with plastic wrap in the fridge for several hours before frying to firm up the seal. For party service, fry ahead and re-crisp in the oven just before guests arrive. Use a designated station with a shallow bowl of water for sealing and a tray of cherries to speed assembly into an efficient production line.
These cherry cheesecake parcels are an approachable way to make dessert feel festive without hours of work. With a little planning they come together quickly, travel well, and always get a smile. Try them once and you’ll understand why they keep showing up on my dinner table—simple, crisp, and deliciously nostalgic.
Chill the cream cheese filling briefly before piping if it becomes too soft; this makes piping cleaner and prevents leaks.
Maintain oil temperature between 330–340°F to achieve a golden exterior without absorbing excess oil—use a thermometer.
If baking or air-frying, brush the wrappers lightly with oil to develop even browning and crispness.
This nourishing cherry cheesecake egg rolls recipe is sure to be a staple in your kitchen. Enjoy every moist, high protein slice — it is perfect for breakfast or as a wholesome snack any time.
This Cherry Cheesecake Egg Rolls recipe makes perfectly juicy, tender, and flavorful steak every time! Serve with potatoes and a side salad for an unforgettable dinner in under 30 minutes.
Beat softened cream cheese with granulated sugar, lemon zest, and vanilla on medium-high until smooth, about 1½–2 minutes, ensuring no lumps remain.
Transfer filling to a decorator’s bag or quart-size zip-top bag and snip a corner to create a controlled opening for piping.
Pour vegetable oil into a deep 10-inch skillet and heat to 330–340°F using a candy thermometer; adjust heat to maintain temperature.
Lay a wrapper diamond-side toward you, pipe a 3½-inch line of filling placed 1 inch from the side and 3 inches from the bottom, top with 6–8 cherries, dampen edges, fold bottom over filling, fold sides, roll tightly and seal.
Fry 2–3 egg rolls at a time for 1½–2 minutes per side until golden, transfer to a paper towel-lined tray to drain; for baking/air-frying, cook at recommended temperatures and times.
Dust with powdered sugar if desired and serve warm. Allow to rest 1–2 minutes after cooking before cutting to prevent hot filling from spilling.
Last Step: Please leave a rating and comment letting us know how you liked this recipe! This helps our business to thrive and continue providing free, high-quality recipes for you.
Leave a comment & rating below or tag
@yummique on social media!

Tender grilled zucchini wraps basil ricotta, bathed in marinara and mozzarella, baking into a bubbly, lighter Italian comfort dinner ready in 30 minutes.

Crisp-edged, tender-in-the-middle zucchini and yellow squash made in 15 minutes with pantry spices. A vibrant, veggie-forward side everyone devours.

Tender chicken meatballs simmered in rich marinara and blanketed with melty mozzarella, bringing all the flavors of chicken parm in cozy, bite-sized form.
Leave a comment & rating below or tag @yummique on social media!
Enjoyed this recipe? Share it with friends and family, and don't forget to leave a review!
This recipe looks amazing! Can't wait to try it.
Comments are stored locally in your browser. Server comments are displayed alongside your local comments.

Join to receive our email series which contains a round-up of some of our quick and easy family favorite recipes.
