
>>

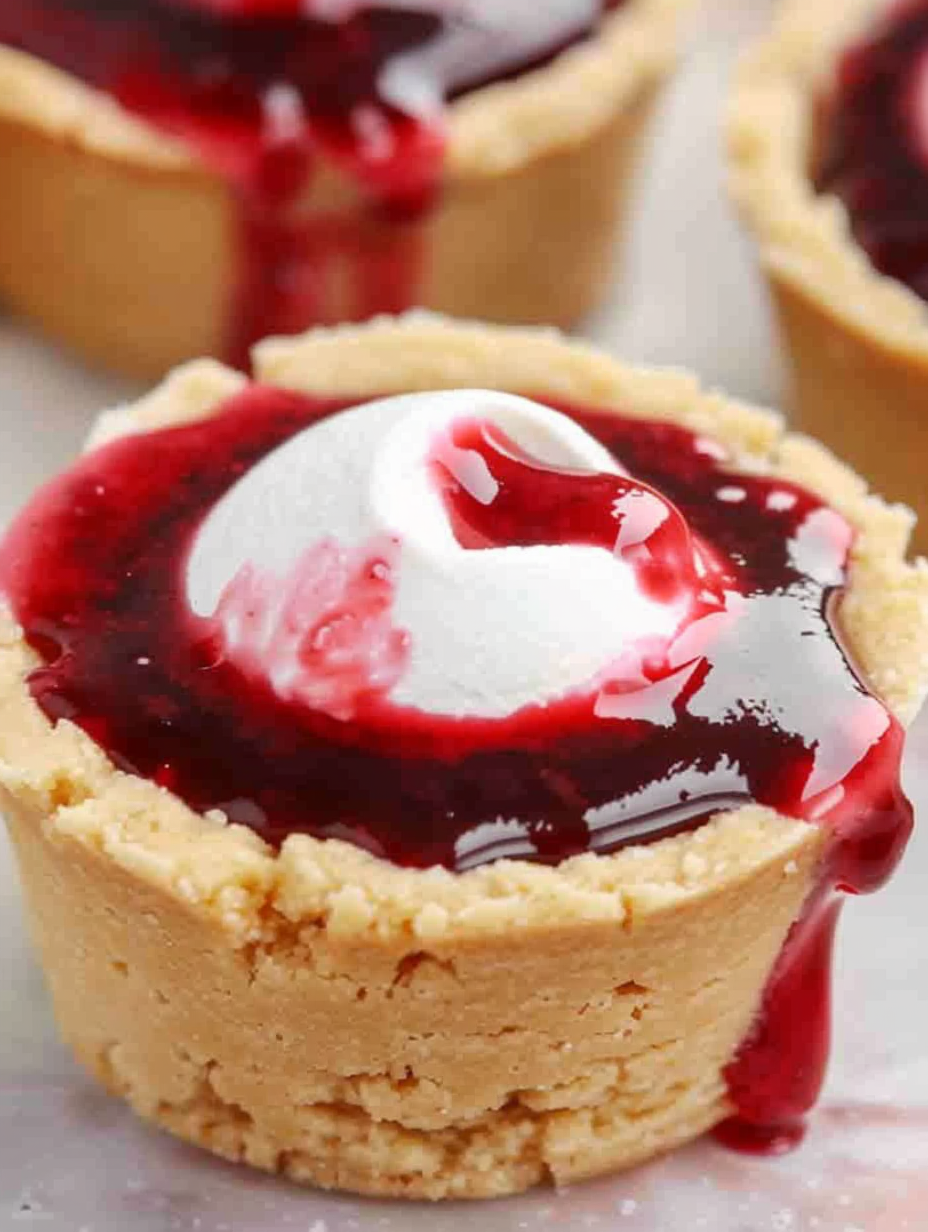
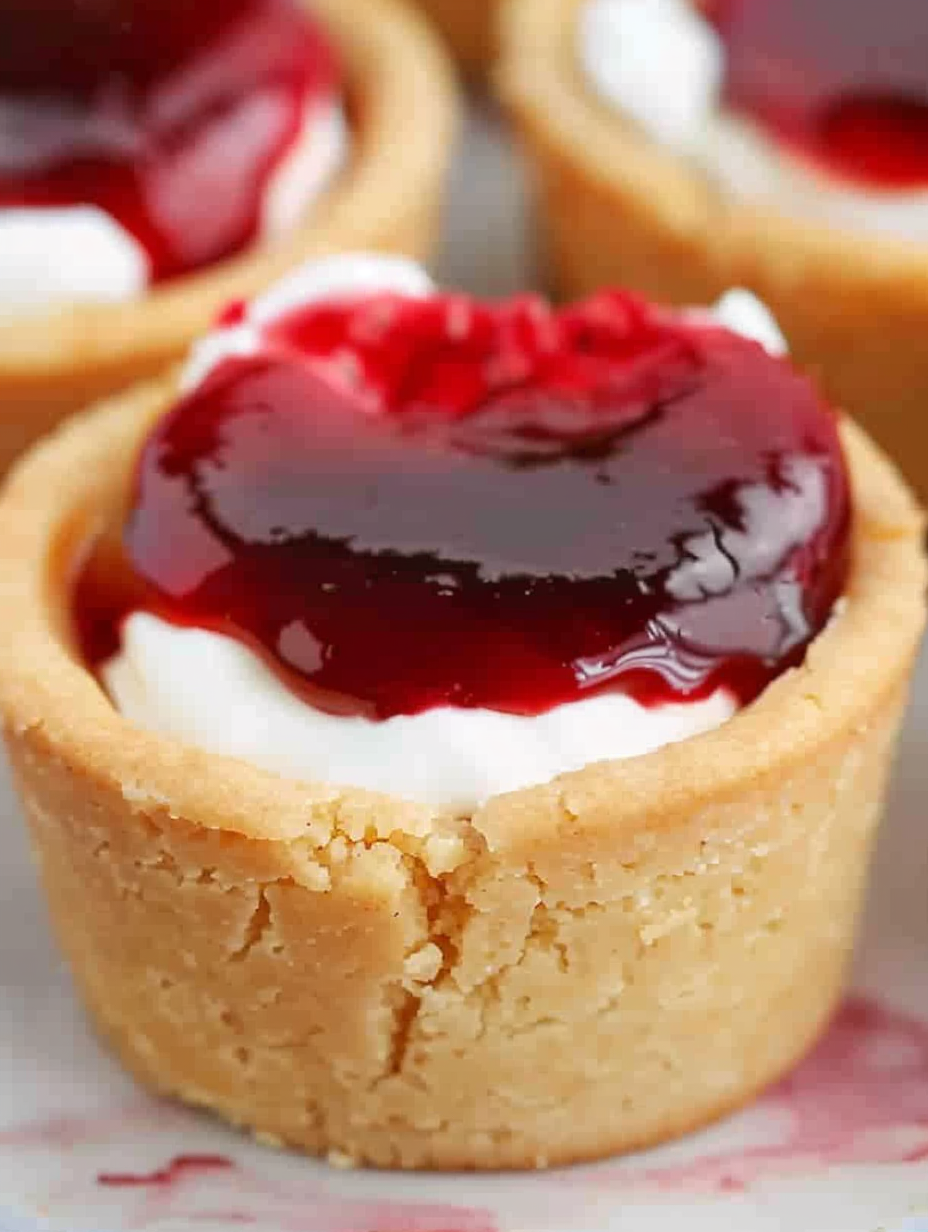
Bite-sized cherry cheesecake cups made with a buttery sugar cookie shell, creamy vanilla filling, and bright cherry topping—perfect for parties and last-minute desserts.
This Cherry Cheesecake Cups recipe is a semi-homemade favorite that I reach for when I want an impressive but simple dessert. I first made these on a busy holiday when I realized I had cookie dough and a can of cherry pie filling in the pantry. The result was a crowd pleaser: a crisp-edged sugar cookie shell holding a velvety cream cheese filling topped with a spoonful of bright, glossy cherries. They taste like cheesecake without the fuss and come together fast enough to save the day when guests arrive unexpectedly.
What I love most is the contrast of textures and flavors. The cookie cup bakes up with a slightly caramelized rim that gives a toasty crunch. The filling is smooth and tangy from the cream cheese and rounded out by sweet vanilla and whipped topping for lightness. The cherry pie filling provides nostalgia and pops of color. These little cups have become my go-to for potlucks, after-school treats and impromptu dinner parties because they travel well and look charming on a platter.
In practice these have rescued more than one dinner plan. I once brought them to a neighborhood barbecue and ended up trading the recipe for another neighbor's grilled corn secret. My kids insist on helping spoon the cherries, and the presentation always gets compliments. They are reliably simple and reliably delicious.
My favorite part is the simplicity. Once I made a double batch for a church bake sale and the tray sold out so fast I had to promise I would bring more the next week. The cups travel well and the bite-sized format makes them a natural hit at gatherings. I appreciate that the store-bought shortcut still produces a homemade feel with minimal effort and maximum gratitude from guests.
Store filled cups in a single layer in an airtight container in the refrigerator for up to three days. If you need to freeze, store baked shells separately in a freezer-safe container with parchment between layers and freeze up to three months. Thaw shells at room temperature, then fill and top. For best texture do not freeze assembled cups with the cherry topping because the fruit and gel can weep upon thawing. When reheating for a warm variation, gently warm shells for 5 to 7 minutes at 300 degrees Fahrenheit before filling, then allow to cool slightly.
If you need a dairy-free version substitute a dairy-free cream cheese alternative and a nondairy whipped topping; brands like Kite Hill or Tofutti work well. For a gluten-free option use gluten-free sugar cookie dough or make the from-scratch dough with a 1-to-1 gluten-free flour blend and add an extra tablespoon of liquid if it feels dry. To reduce sugar, use a sugar-free pie filling and a reduced-sugar cookie dough, being mindful that texture will vary. For a lighter filling, replace half the cream cheese with Greek yogurt strained overnight; the filling will be tangier and softer.
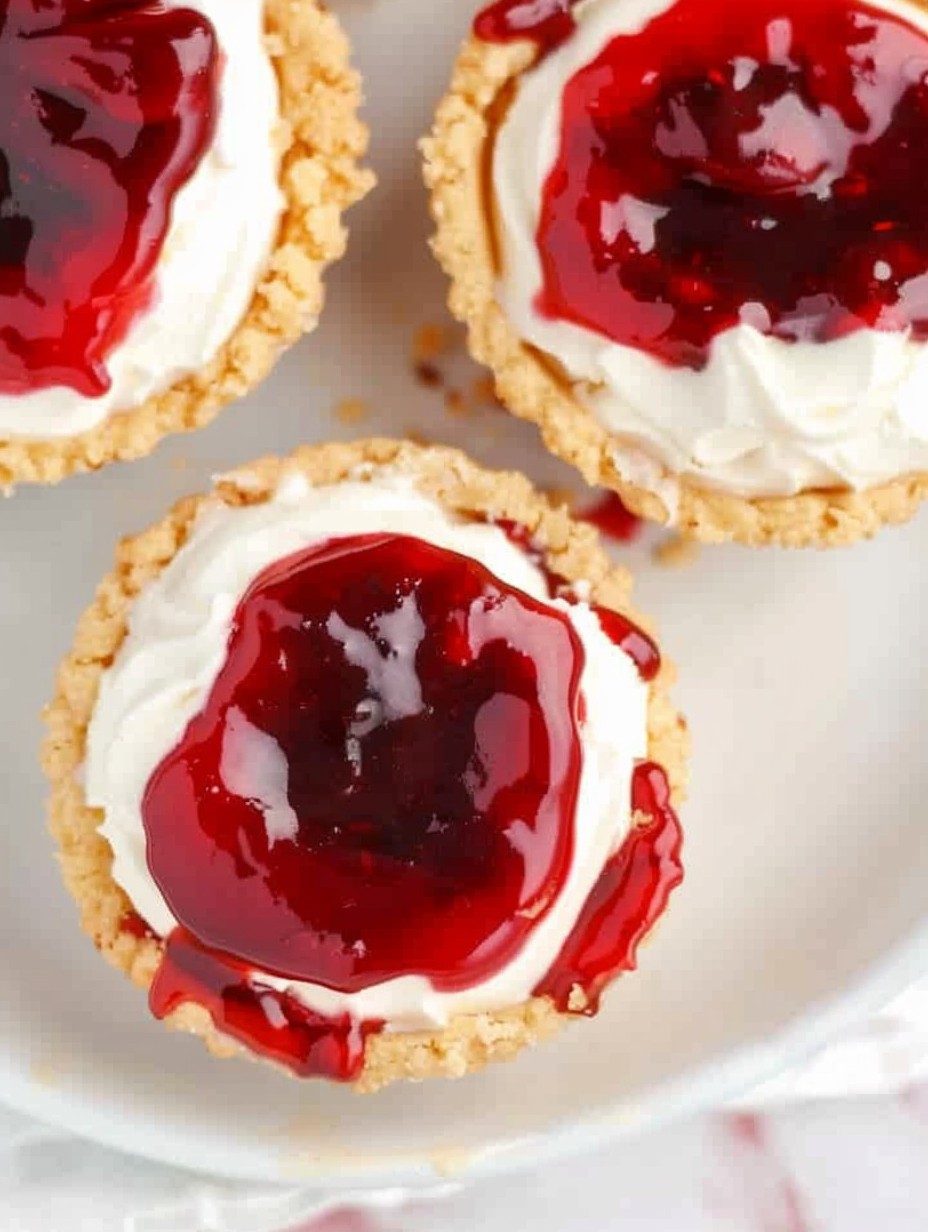
Present cups on a platter lined with parchment and garnish with mint leaves for color contrast. For a party, arrange assorted toppings in small bowls and let guests build their own: blueberry pie filling, lemon curd or fresh sliced strawberries are excellent alternatives. Pair with espresso or a dessert wine for an elevated finish. For a summer picnic serve straight from a cooler on ice to keep the filling firm and refreshing.
These cups are a playful adaptation of classic New York-style cheesecake flavors, segmented into a portable portion. Mini cheesecakes and tartlets have long been a part of Western dessert culture, prized for their individual presentation and portion control. The cherry topping echoes traditional American cherry pie, combining two beloved dessert motifs into one hand-held experience that feels both retro and modern.
Switch toppings to reflect the season: in summer use macerated berries, in autumn try spiced apple pie filling with a pinch of cinnamon, and at holiday time top with cranberry-orange compote for a festive twist. You can also stir 1 teaspoon lemon zest into the filling in spring to brighten the flavors. For a cold-weather crowd use warm spiced cherries spooned over chilled cups right before serving.
To meal-prep for an event prepare the shells and the filling a day ahead. Keep the shells in a sealed container at room temperature for one day or refrigerated up to two days. Store the filling covered in the refrigerator. On the day of serving, assemble and top the cups about 30 minutes before guests arrive to allow the filling to firm and flavors to meld. Use piping bags for a neat presentation and faster assembly.
These cherry cheesecake cups are delightfully adaptable and forgiving, which makes them one of my most requested quick desserts. They are simple enough for a weekday treat yet elegant enough for entertaining. Give them a try and make the recipe your own with seasonal toppings and personal flourishes.
Soften cream cheese to room temperature for 20 to 30 minutes to avoid lumps in the filling.
Chill the dough or muffin tin briefly if the cookie dough becomes too soft while shaping to maintain cup walls.
Pipe the filling for a clean, consistent presentation and faster assembly when making many cups.
This nourishing cherry cheesecake cups recipe is sure to be a staple in your kitchen. Enjoy every moist, high protein slice — it is perfect for breakfast or as a wholesome snack any time.
Yes, unfilled baked cookie cups can be stored in an airtight container at room temperature for up to two days or refrigerated for up to three days. Freeze shells separately for longer storage.
Thaw frozen shells at room temperature, then fill and top just before serving to prevent sogginess. Do not freeze assembled cups with fruit topping.
This Cherry Cheesecake Cups recipe makes perfectly juicy, tender, and flavorful steak every time! Serve with potatoes and a side salad for an unforgettable dinner in under 30 minutes.
Preheat oven to 350 degrees Fahrenheit and grease a 12-cup muffin tin. Portion store-bought dough into 1 to 2 tablespoon portions for each cup depending on desired thickness.
Press each dough portion into the muffin cup, pushing dough up the sides to create an even cup shape. Chill briefly if the dough softens during shaping.
Bake for 8 to 12 minutes until edges are lightly golden and centers set. Rotate the pan halfway if necessary for even baking. Allow to cool in the tin.
Beat softened cream cheese with vanilla and whipped topping until smooth and airy. Avoid overmixing to maintain a slightly firm filling consistency.
Spoon or pipe 1 to 2 tablespoons of filling into each cooled cookie shell, then top with about 1 tablespoon cherry pie filling. Garnish and chill at least 30 minutes before serving.
Cream butter and sugar until light, add egg and vanilla, then incorporate flour and baking powder. Form into a ball, wrap and refrigerate 30 minutes before shaping and baking as above.
Last Step: Please leave a rating and comment letting us know how you liked this recipe! This helps our business to thrive and continue providing free, high-quality recipes for you.
Leave a comment & rating below or tag
@yummique on social media!

Tender grilled zucchini wraps basil ricotta, bathed in marinara and mozzarella, baking into a bubbly, lighter Italian comfort dinner ready in 30 minutes.

Crisp-edged, tender-in-the-middle zucchini and yellow squash made in 15 minutes with pantry spices. A vibrant, veggie-forward side everyone devours.

Tender chicken meatballs simmered in rich marinara and blanketed with melty mozzarella, bringing all the flavors of chicken parm in cozy, bite-sized form.
Leave a comment & rating below or tag @yummique on social media!
Enjoyed this recipe? Share it with friends and family, and don't forget to leave a review!
This recipe looks amazing! Can't wait to try it.
Comments are stored locally in your browser. Server comments are displayed alongside your local comments.

Join to receive our email series which contains a round-up of some of our quick and easy family favorite recipes.
