
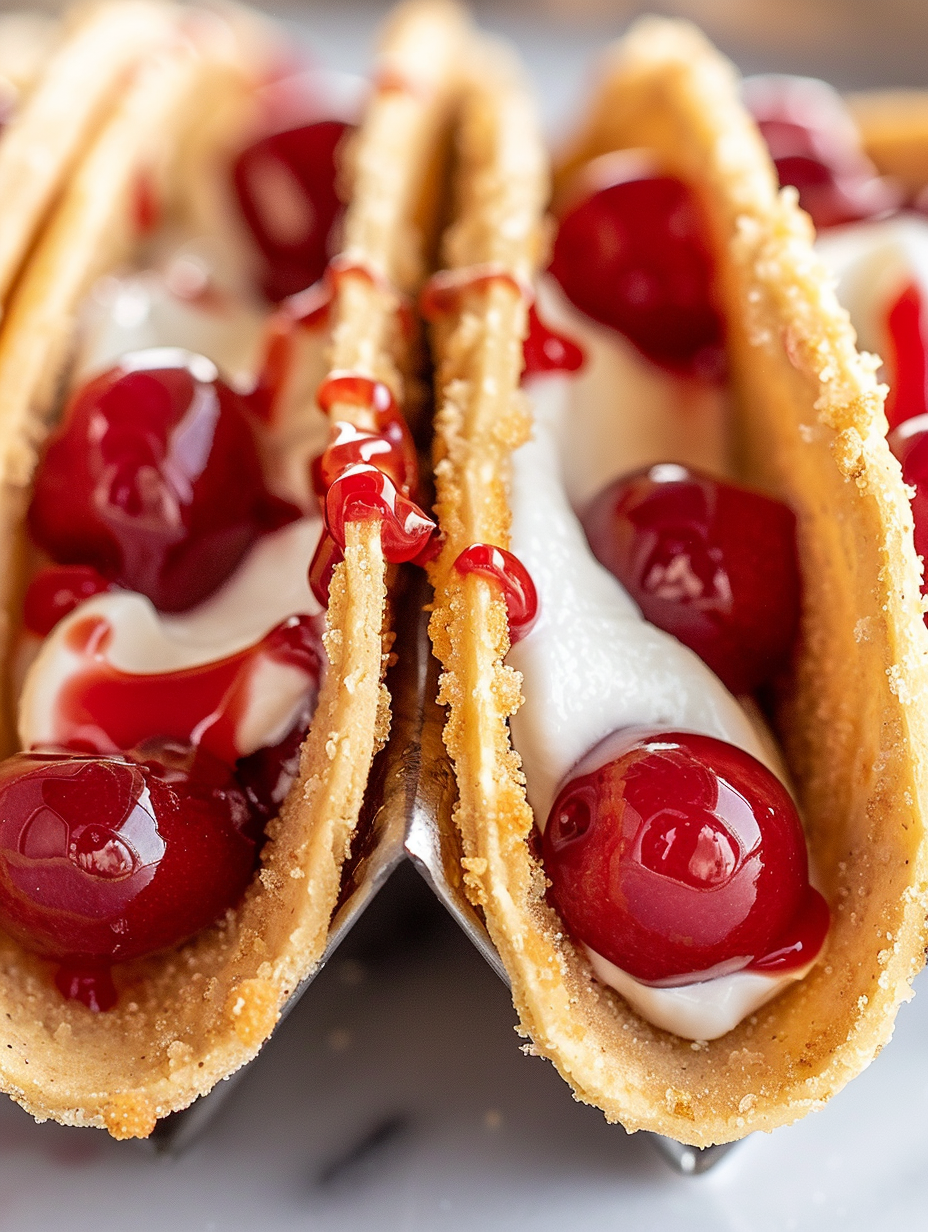
Cheesecake Tacos

Crunchy graham-coated tortilla shells filled with whipped cheesecake and crowned with cherry pie filling — an easy, crowd-pleasing dessert taco.
This dessert has been one of my most requested treats since I first made it for a summer potluck. Cheesecake Tacos combine the nostalgia of graham crackers and cherry pie with the playful shape of a taco, turning familiar flavors into a party-ready handheld. I discovered the idea while cleaning out my pantry and trying to use up a pack of street taco flour tortillas; transforming them into crisp shells coated in graham crumbs felt like a small kitchen miracle. The contrast of a crunchy, slightly sweet shell with pillowy, tangy cheesecake and glossy cherries creates a texture and flavor experience that guests always describe as "surprising and delightful."
I first served these at a family barbecue and watched people come back for thirds. The shells hold their shape well when baked in an inverted cupcake pan, and the filling is intentionally light — whipped cream folded into cream cheese keeps each bite airy, so you never feel overwhelmed by richness. The recipe is forgiving, quick to assemble, and easy to scale up for larger gatherings. If you love the idea of a playful dessert that looks special but is simple to make, these are the kind of sweet you will return to again and again.
Why You'll Love This Recipe
- Ready in under 30 minutes from start to finish when you use pre-made tortillas and canned pie filling, making it perfect for last-minute entertaining.
- Uses pantry staples like graham cracker crumbs and canned cherry pie filling, reducing shopping time and expense.
- Crunchy shells contrast with a light, whipped filling for a pleasing texture balance that appeals to adults and kids alike.
- Make-ahead friendly: shells can be baked and stored, filling can be chilled, and assembly takes minutes before serving.
- Portable and shareable — a fun, family-friendly dessert for potlucks, picnics, or date-night treats at home.
- Customizable: swap the cherry filling for other pie fillings or fresh fruit to suit seasons and preferences.
I have a vivid memory of my niece biting into her first cheesecake taco and stopping mid-chew to announce it was the "best taco ever." That kind of delighted silence is why I keep this recipe on hand. Over time I learned small tricks, like gently pricking the tortillas to avoid bubbles and cooling the shells fully for the cleanest presentation. These details make the difference between a good dessert and one guests will remember.
Ingredients
- Street taco flour tortillas (18): Choose thin 6-inch tortillas with a neutral flavor so the graham coating and filling shine. If you can only find larger tortillas, cut 4-inch rounds with a cookie cutter or glass for a similar size and crispness.
- Graham cracker crumbs (1 cup): Finely ground crumbs adhere best. Use store-bought crumbs or pulse whole graham crackers in a food processor until uniform. This adds the classic slightly sweet, toasty backbone to the shell.
- Granulated sugar (2 tablespoons): A small amount mixed with the crumbs gives subtle sweetness and helps the coating caramelize slightly in the oven.
- Butter, melted (1/3 cup): Unsalted butter melted and brushed on both sides creates a crisp, golden shell and helps the graham crumbs stick.
- Cream cheese, softened (8 ounces): Full-fat cream cheese gives the smoothest texture. Make sure it is at room temperature so it blends without lumps.
- Powdered sugar (1/3 cup): Adds sweetness without grit; it dissolves easily into the cream cheese for a silky finish.
- Vanilla extract (2 teaspoons): Use pure vanilla for the most authentic flavor lift; it brightens the cream cheese mixture.
- Whipped topping, thawed (8 ounces): Cool Whip or similar stabilizes the filling while keeping it light. Fold gently to maintain airiness.
- Cherry pie filling (21 ounces): Canned pie filling provides glossy cherries and syrup for a classic topping. Substitute with blueberry or strawberry pie filling if you prefer.
Instructions
Prepare the oven and crumbs: Preheat the oven to 400 degrees F. Combine 1 cup graham cracker crumbs and 2 tablespoons granulated sugar in a shallow bowl so you can press tortillas into the mixture easily. A shallow bowl lets you evenly coat each tortilla surface. Prep the tortillas: Gently stab each tortilla 6 to 7 times with a fork to prevent large air pockets when baking. Brush both sides lightly with the melted butter using a pastry brush. Press each side into the graham mixture until the entire surface is coated — do this gently so the coating adheres without flaking off. Shape and bake the shells: Flip an empty muffin or cupcake pan upside down. Fold each coated tortilla in half and nestle it between adjacent cups so it retains a taco shape during baking. Bake for 10 to 11 minutes or until the shells are golden brown and crisp. Watch the first batch closely; oven variances can change timing by a minute or two. Cool the shells: Allow the shells to cool completely in the inverted pan; this preserves shape and prevents filling from making the shell soggy. Cooling time is important — if the shells are warm, the filling will lose structure and slide out. Make the filling: In a large bowl, beat 8 ounces softened cream cheese, 1/3 cup powdered sugar, and 2 teaspoons vanilla extract with a hand mixer until smooth. Add 8 ounces thawed whipped topping and fold or beat on low until the mixture is uniform and airy. Chill for at least 30 minutes to firm up slightly for easier piping. Assemble: Transfer the chilled filling to a piping bag or a zip-top bag with a corner trimmed. Pipe a generous amount into each cooled shell and top with 3 to 4 cherries and some sauce from a 21-ounce can of cherry pie filling. Serve immediately for the best contrast of crisp shell and creamy filling.
You Must Know
- These hold best when shells are completely cooled; warm shells will steam and become soft.
- Leftovers can be stored assembled for a short time, but assembled tacos are best enjoyed within a few hours to preserve crunch.
- Make the filling ahead and chill for up to 48 hours; beat briefly before piping to restore texture.
- This recipe is high in dairy and gluten; use gluten-free tortillas and dairy-free cream cheese alternatives to adapt.
One of my favorite parts of serving this dish is watching people pick one up like a savory taco and then realize it is a dessert. The combination of textures and the bright pop from the cherry topping make it feel indulgent without being heavy. I especially enjoy making a half-batch for weekday treats and a full batch for holiday gatherings where it disappears fast.

Storage Tips
Store baked shells in an airtight container at room temperature for up to two days to keep them crisp. If you need longer storage, freeze cooled shells flat in a single layer separated by parchment for up to three months; thaw at room temperature before filling. The filled tacos should be eaten within four hours for optimum texture. If you must refrigerate assembled tacos, place them under a loose tent of plastic wrap and expect the shell to soften slightly after 12 to 24 hours. Re-crisping is not recommended once filled.
Ingredient Substitutions
Swap canned cherry pie filling for blueberry or strawberry pie filling for different flavors. For a lighter filling, replace half of the cream cheese with mascarpone or use 1 cup crème fraîche for a tangy profile. To make this gluten-free, use certified gluten-free flour tortillas and gluten-free graham crumbs. For a dairy-free version, try a stabilized whipped coconut cream and dairy-free cream cheese; texture will be slightly different but still enjoyable.
Serving Suggestions
Serve the tacos on a platter lined with parchment and garnish with fresh mint leaves or a light dusting of powdered sugar. They pair well with coffee, black tea, or a sparkling wine for a celebratory touch. For a kid-friendly dessert bar, offer small bowls of different pie fillings and let guests top their own. For a plated dessert, place two tacos on a dessert plate with a drizzle of warmed cherry sauce and a scoop of vanilla ice cream.
Cultural Background
While these do not come from a traditional culinary heritage, they are part of an American trend of playful mash-ups that reimagine classic flavors and forms. The idea combines elements from classic American desserts — graham cracker crust and canned pie filling — with the hand-held convenience of tacos. This kind of hybrid food reflects a broader tendency in home cooking to prioritize fun presentation and accessibility.
Seasonal Adaptations
During summer, swap canned filling for macerated fresh cherries or berries tossed with a touch of sugar and lemon. For fall and winter, use apple pie filling with a sprinkle of cinnamon on the graham crumbs, or top with caramel sauce and toasted pecans. Holiday versions can feature cranberry compote and orange zest for a festive twist.
Meal Prep Tips
To streamline assembly for a party, bake shells a day ahead and store them in an airtight container. Make the filling in the morning and refrigerate; transfer to a piping bag just before guests arrive. Pre-portion cherries into small bowls so guests can top their own. Use a piping technique that leaves a small well in the filling for the cherry sauce to prevent sogginess around the edges.
These Cheesecake Tacos are a joyful, accessible dessert that rewards small attention to detail. Share them, adapt them, and most of all, enjoy the smiles they inspire at your table.
Pro Tips
Make sure the cream cheese is fully softened at room temperature for a lump-free filling.
Prick tortillas with a fork before baking to avoid large air pockets.
Cool shells completely in the inverted pan to preserve shape and crispness.
Use a piping bag to fill shells quickly and neatly; a zip-top bag with a corner cut works too.
If using fresh fruit, macerate with a teaspoon of sugar and a squeeze of lemon to release juices and enhance flavor.
This nourishing cheesecake tacos recipe is sure to be a staple in your kitchen. Enjoy every moist, high protein slice — it is perfect for breakfast or as a wholesome snack any time.
FAQs about Recipes
How long should I bake the shells?
Bake until golden brown, usually 10 to 11 minutes, and allow shells to cool completely in the inverted pan before filling to prevent sogginess.
Can I use larger tortillas?
Yes. Use 4-inch rounds cut from larger tortillas and follow the same coating and baking steps.
Tags
Cheesecake Tacos
This Cheesecake Tacos recipe makes perfectly juicy, tender, and flavorful steak every time! Serve with potatoes and a side salad for an unforgettable dinner in under 30 minutes.
Ingredients
For the Taco Shells
For the Filling
Instructions
Preheat oven and mix crumbs
Preheat the oven to 400 degrees F. Stir together graham cracker crumbs and granulated sugar in a shallow bowl so you can press tortillas into the mixture easily.
Prep tortillas for coating
Gently stab each tortilla 6 to 7 times with a fork to prevent air bubbles. Brush both sides with melted butter using a pastry brush, then press into the graham mixture to coat both sides evenly.
Shape and bake shells
Flip a cupcake pan upside down, fold each tortilla in half and tuck it between adjacent cups to maintain shape. Bake for 10 to 11 minutes until golden brown and crisp. Watch closely to prevent over-browning.
Cool shells completely
Let the shells cool in the inverted pan until fully cooled. Cooling preserves the crisp structure for filling and serving.
Make the filling
Beat softened cream cheese, powdered sugar and vanilla until smooth. Add thawed whipped topping and beat on low until smooth and fluffy. Chill at least 30 minutes for easier piping.
Fill and top
Transfer chilled filling to a piping bag and pipe into cooled shells. Top each with 3 to 4 cherries and some sauce from the can of pie filling. Serve immediately.
Last Step: Please leave a rating and comment letting us know how you liked this recipe! This helps our business to thrive and continue providing free, high-quality recipes for you.
Nutrition
Did You Make This?
Leave a comment & rating below or tag
@yummique on social media!
Categories:
You might also like...

Cheesy Zucchini Rollatini Bake
Tender grilled zucchini wraps basil ricotta, bathed in marinara and mozzarella, baking into a bubbly, lighter Italian comfort dinner ready in 30 minutes.

Air Fryer Zucchini and Squash
Crisp-edged, tender-in-the-middle zucchini and yellow squash made in 15 minutes with pantry spices. A vibrant, veggie-forward side everyone devours.

Chicken Meatball Parmesan
Tender chicken meatballs simmered in rich marinara and blanketed with melty mozzarella, bringing all the flavors of chicken parm in cozy, bite-sized form.
Did You Make This?
Leave a comment & rating below or tag @yummique on social media!
Rate This Recipe
Share This Recipe
Enjoyed this recipe? Share it with friends and family, and don't forget to leave a review!
Comments (1)
This recipe looks amazing! Can't wait to try it.
Comments are stored locally in your browser. Server comments are displayed alongside your local comments.

Hi, I'm Amira!
What's Popular

30-Minute Meals!
Join to receive our email series which contains a round-up of some of our quick and easy family favorite recipes.