
>>

Crispy, cheesy pickle cups made in the air fryer—ready in minutes and perfect for snacking, parties, or game day.
This recipe for Air Fryer Cheddar Ranch Pickle Chips is one of those discoveries that feels both inevitable and delightfully surprising. I first whipped these up on a slow Sunday when I had a jar of dill pickle chips and a craving for something salty and crunchy without deep frying. The result was a plate of golden, bubbling cheese cups hugging tangy pickle slices that vanished faster than I expected. The tang of the dill, the savory punch of ranch seasoning, and the warm, stretchy cheddar create a snack that hits salty, tangy, and cheesy notes all at once.
Why does this snack matter to me? Because it is ridiculously simple yet sophisticated enough for guests. I love recipes that transform a few pantry staples into something celebratory. These pickle chips are quick to prep, cook in minutes in the air fryer, and deliver satisfying texture contrasts: a crisp, blistered cheese edge, melty interior, and a cool, briny pickle center. They have become my go-to appetizer for last-minute gatherings, and my kids now ask for them during movie nights.
I remember the first time I served these at a backyard picnic; neighbors hovered, took one bite, and immediately asked for the recipe. The recipe is forgiving: if your pickle chips are slightly larger or smaller, the assembly still works. Over time I've learned little tweaks—like patting pickles very dry and using a light spray of cooking oil in the muffin tin—to ensure the cheese crisps evenly. These small adjustments consistently earn compliments every time I make them.

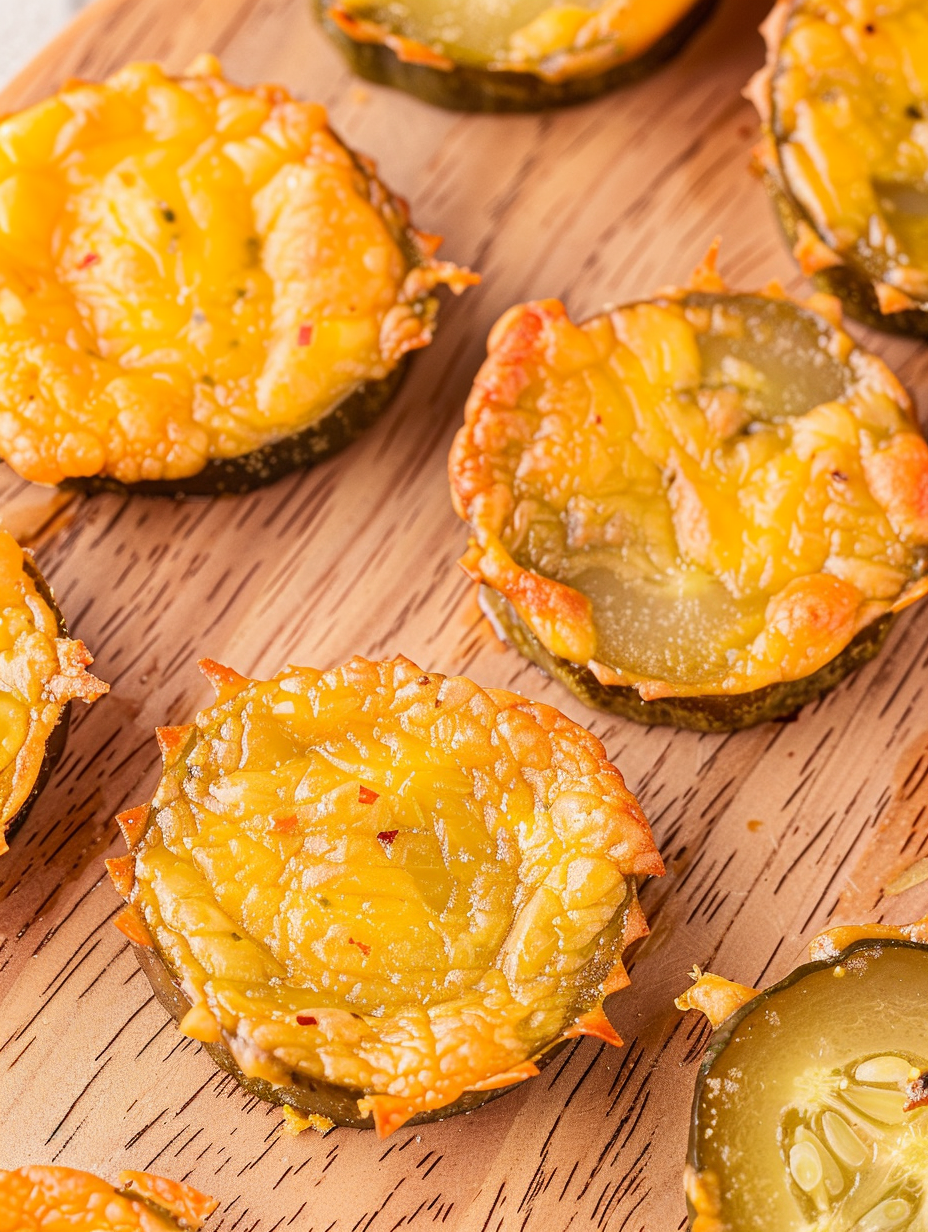
My favorite part is the crunchy, lacy cheese rim that forms when the cheese escapes the muffin cup slightly and browns against the hot air. Family members often fight over the crispiest pieces. Serving these immediately makes them feel indulgent and party-ready, but they also fit casual weeknight snacking when you need something quick and satisfying. Over time I learned the importance of dried pickles and preheating the air fryer for consistent results.
Store leftovers in a shallow, airtight container in the refrigerator for up to three days. Lay a single layer or use parchment to prevent sticking. To reheat, place them in the air fryer at 350°F for 2 to 3 minutes or until the cheese regains crispness. Avoid microwaving if possible, as it will make the cheese rubbery. For longer storage, freeze fully cooled assembled cups on a sheet pan, then transfer to a freezer-safe bag for up to two months. Reheat from frozen at 350°F for 4 to 6 minutes, checking frequently.
Swap Colby Jack for mild cheddar or a Monterey Jack blend if you prefer sharper or creamier flavors. For a lower-sodium option, choose reduced-sodium pickles and a homemade low-sodium ranch mix made from dried herbs, garlic powder, onion powder, and buttermilk powder substitute. To make dairy-free versions, use a plant-based melting cheese and a dairy-free ranch seasoning. Keep proportions the same; just watch melting behavior because plant cheeses sometimes crisp faster or slower depending on fat content.
Serve these as an appetizer on a large platter garnished with minced chives or thinly sliced jalapeño for a spicy kick. Pair with a simple dipping sauce such as sour cream mixed with chive and a pinch of ranch mix, or a smoky aioli. They work well alongside sliders, charcuterie boards, or a bowl of chilled deviled eggs for a party spread. For a casual snack, plate with extra pickle chips and a small bowl of extra ranch for dipping.
In summer, serve alongside light salads and grilled meats for balanced flavors—think corn on the cob and cold potato salad. During colder months, add a dash of smoked paprika to the ranch mix for warmth and pair with hearty soups. Around game day season, double the batch and keep them warm in a low oven until guests arrive. For holiday gatherings, present them on small skewers with extra herbs for a festive touch.
Assemble the cups in muffin tins and cover tightly with plastic wrap for up to 24 hours in the fridge, then air fry just before serving to maintain crisp edges. If prepping for a party, make two pans and keep one assembled and covered in the fridge as a backup. Label freezer bags with date and cook-from-frozen instructions. Use standard muffin tins to keep portions uniform and to speed up assembly when making larger batches.
Readers have told me these were a hit at tailgates and book clubs. One friend adapted the idea to use pepperoncini slices instead of pickles for a tangy, slightly sweet version that delighted her family. Another reader doubled the ranch spice and served them alongside baby back ribs for a crunchy contrast. The versatility keeps coming up in messages: people love how the recipe is quick, forgiving, and always gets compliments.
Every time I make these, someone inevitably asks for the recipe, and I love watching new cooks tweak the mix to suit their taste. Share them with friends, experiment with cheese blends, and enjoy the simplicity of a snack that feels like a treat.
Happy cooking and crunching—these cheddar ranch pickle chips are proof that small, thoughtful tweaks turn humble ingredients into something memorable.
Pat the pickle chips very dry to prevent soggy cups and help the cheese adhere.
Preheat the air fryer to 350°F for even melting and browning.
Use shredded cheese for more even coverage and lacy edges when crisped.
Lightly spray the muffin tin to help the cheese release after cooking.
Check at 5 minutes; air fryers vary and cheese can go from golden to burnt quickly.
This nourishing air fryer cheddar ranch pickle chips recipe is sure to be a staple in your kitchen. Enjoy every moist, high protein slice — it is perfect for breakfast or as a wholesome snack any time.
Yes. Assemble and refrigerate for up to 24 hours; air fry when ready, adding a minute or two if chilled.
Freeze on a tray first, then transfer to a freezer bag for up to 2 months. Cook from frozen at 350°F for 4 to 6 minutes.
This Air Fryer Cheddar Ranch Pickle Chips recipe makes perfectly juicy, tender, and flavorful steak every time! Serve with potatoes and a side salad for an unforgettable dinner in under 30 minutes.
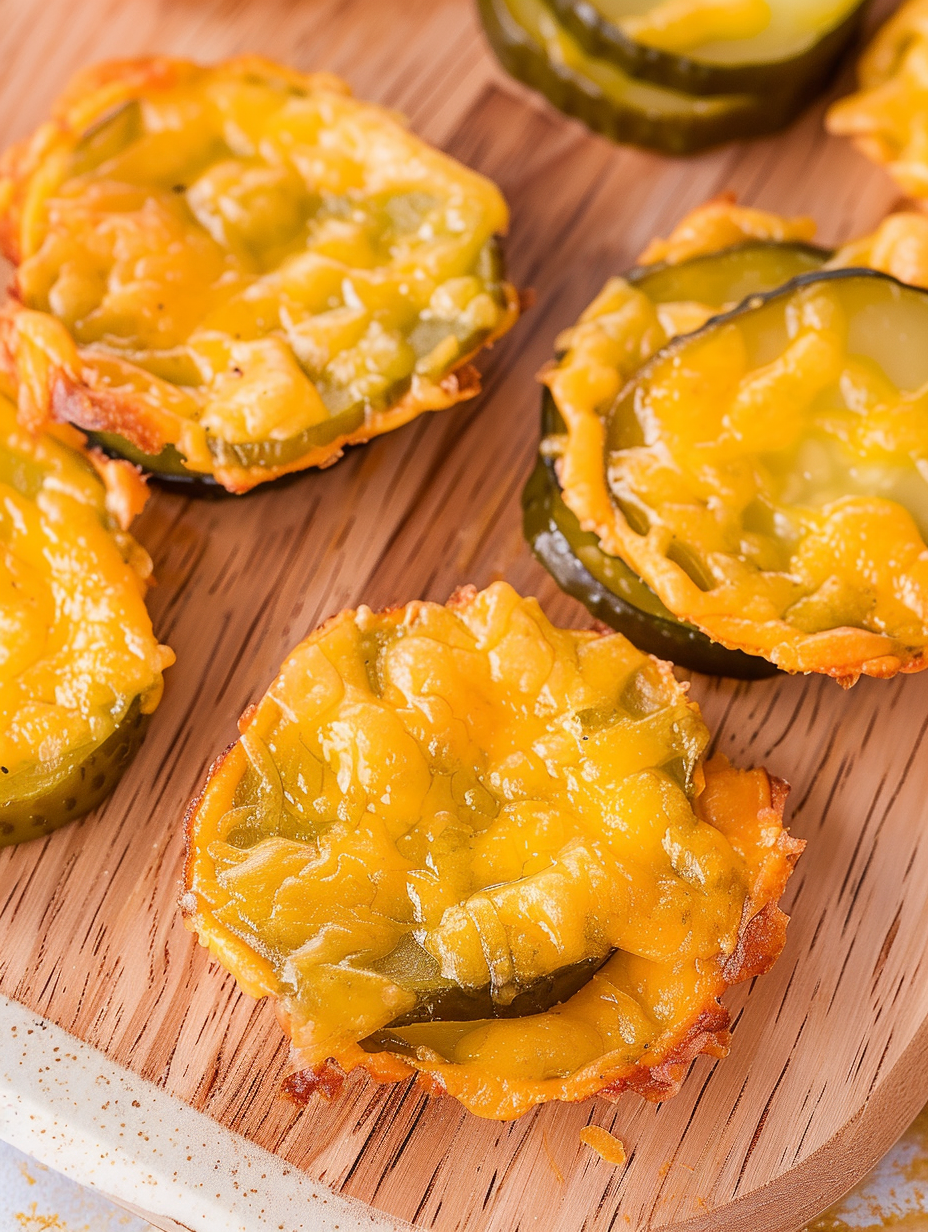
Lay pickle chips on paper towels and gently pat them dry to remove surface moisture. Thorough drying helps cheese adhere and prevents sogginess.
Cut Colby Jack into small squares or shred. Lightly spray a muffin tin and add a small pinch of cheese to the bottom of each cavity to serve as a base.
Place one pickle chip over the base layer of cheese in each cup. Lightly dust each with dry ranch seasoning, then top with another small layer of cheese.
Preheat the air fryer to 350°F for 3 to 5 minutes to ensure a stable cooking environment for even melting.
Air fry at 350°F for 5 to 7 minutes, checking at 5 minutes. Look for fully melted cheese and golden, lacy edges that indicate crispness.
Remove tin and allow cups to cool 1 to 2 minutes before releasing. Serve warm for best texture and flavor.
Last Step: Please leave a rating and comment letting us know how you liked this recipe! This helps our business to thrive and continue providing free, high-quality recipes for you.
Leave a comment & rating below or tag
@yummique on social media!

Tender grilled zucchini wraps basil ricotta, bathed in marinara and mozzarella, baking into a bubbly, lighter Italian comfort dinner ready in 30 minutes.

Crisp-edged, tender-in-the-middle zucchini and yellow squash made in 15 minutes with pantry spices. A vibrant, veggie-forward side everyone devours.

Tender chicken meatballs simmered in rich marinara and blanketed with melty mozzarella, bringing all the flavors of chicken parm in cozy, bite-sized form.
Leave a comment & rating below or tag @yummique on social media!
Enjoyed this recipe? Share it with friends and family, and don't forget to leave a review!
This recipe looks amazing! Can't wait to try it.
Comments are stored locally in your browser. Server comments are displayed alongside your local comments.

Join to receive our email series which contains a round-up of some of our quick and easy family favorite recipes.
